
Dreamy Ice Cream Cake With Cookie Crunch Recipe for Sweet Smiles
Crafting a delectable ice cream cake with cookie crunch brings pure summer excitement to your dessert table.
Sweet layers of creamy goodness promise an unforgettable experience for anyone who loves indulgent treats.
Crisp cookie pieces add a delightful textural contrast that elevates each delicious bite.
Minimal ingredients and simple steps make this recipe accessible for home bakers of all skill levels.
Cool and refreshing, this dessert feels like a celebration in every slice.
Rich flavors blend seamlessly, creating a memorable experience that will have everyone asking for seconds.
Jump into this delightful adventure and surprise your loved ones with a homemade masterpiece they won’t forget.
Ice Cream Cake with Cookie Crunch: The Ultimate Dessert
Ingredients for a Decadent Ice Cream Cake with Cookie Crunch
Crust Ingredients:Ice Cream Layers:Topping and Sauce Ingredients:How to Assemble and Freeze the Perfect Ice Cream Cake
Step 1: Create Cookie Base
Crush chocolate sandwich cookies into fine crumbs. Melt butter and mix thoroughly with cookie crumbs.
Press the mixture firmly into the bottom of a springform pan, creating an even layer. Place the pan in the freezer for 10 minutes to set the base.
Step 2: Layer Chocolate Ice Cream
Remove pan from freezer and spread softened chocolate ice cream evenly over the cookie crust. Use a spatula to smooth the surface.
Return pan to freezer for 30 minutes to allow the layer to firm up.
Step 3: Add Fudge Drizzle
Take the pan out of the freezer and generously drizzle warm hot fudge sauce over the chocolate ice cream layer.
Ensure an even distribution of the sauce. Place back in the freezer for 15 minutes to allow the fudge to slightly set.
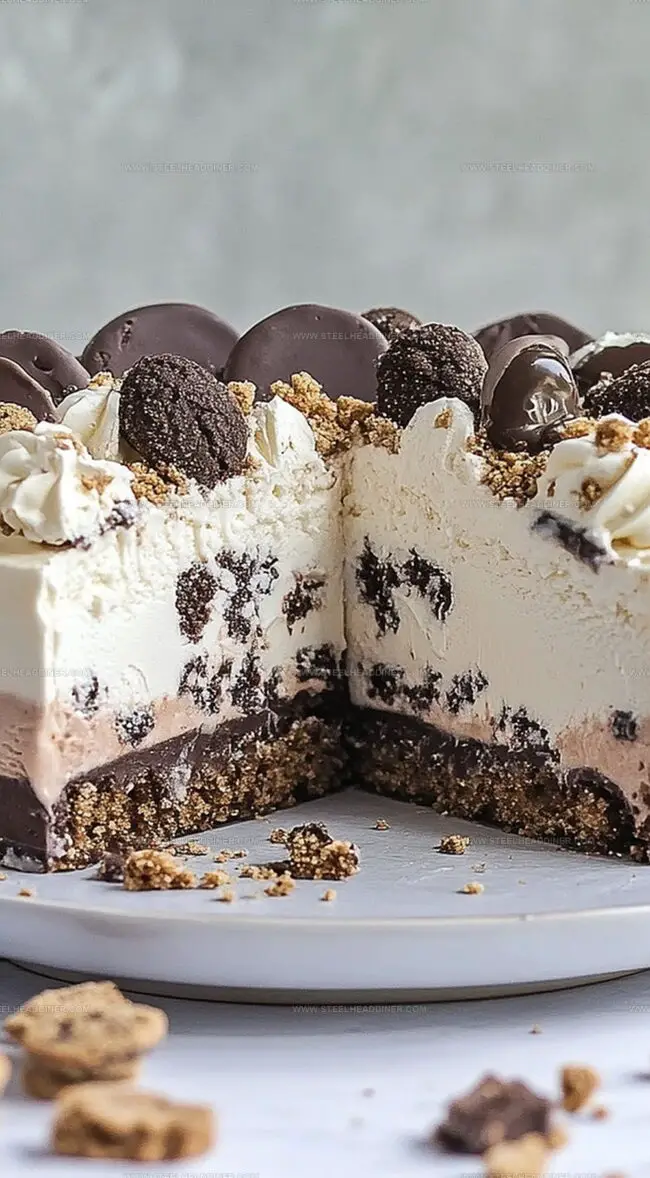
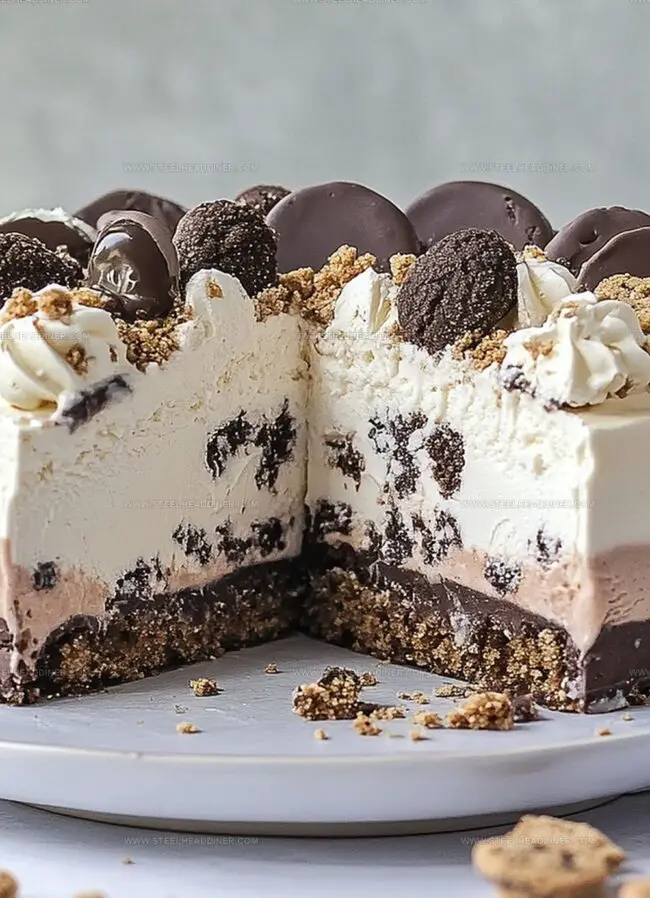
Step 4: Top With Vanilla Layer
Spread softened vanilla ice cream over the fudge-drizzled chocolate layer. Use a clean spatula to create a smooth, even surface.
Carefully return the pan to the freezer and let it set for at least 2 hours.
Step 5: Decorate And Serve
Remove the cake from the freezer just before serving.
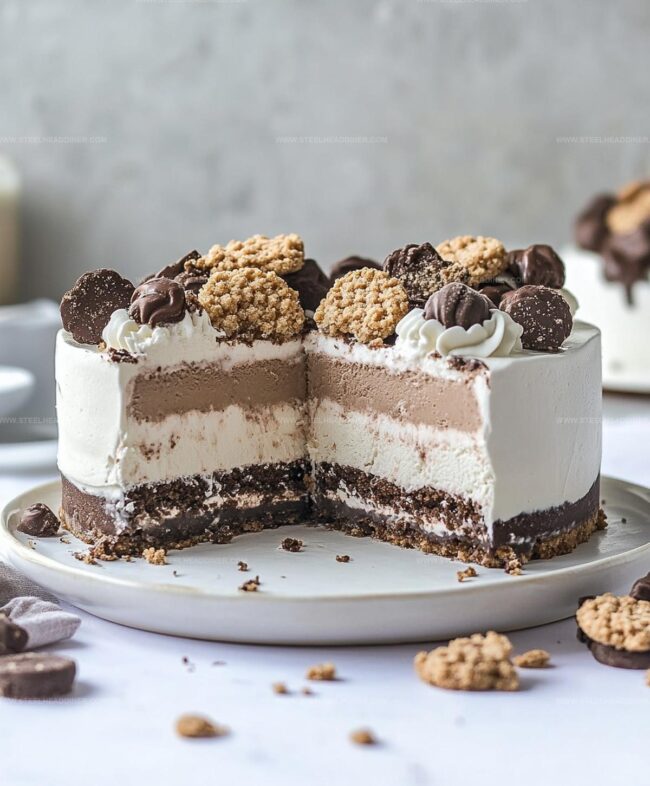
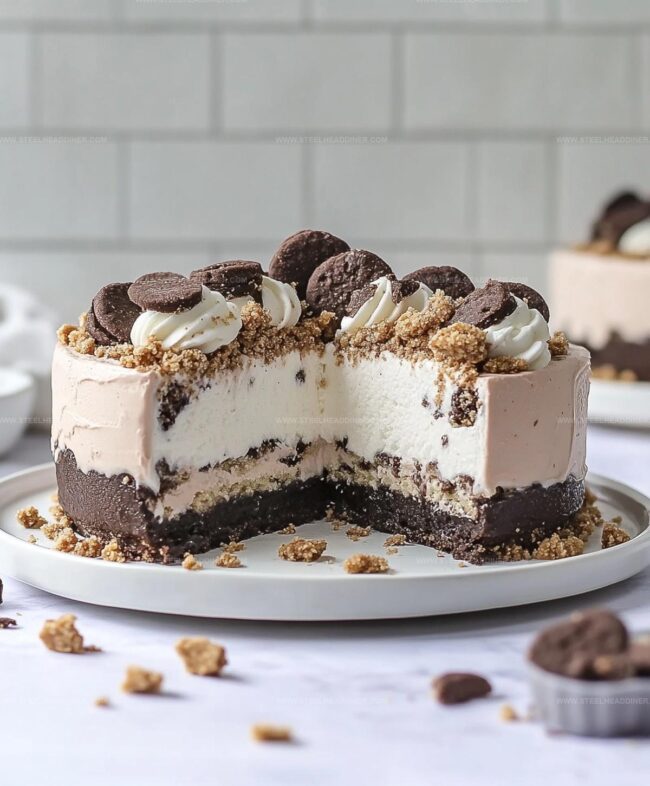
Top with fluffy whipped cream. Sprinkle additional crushed cookie crumbs over the whipped cream for extra crunch.
Carefully release the springform pan and slice into servings.
Tips to Balance Texture and Flavor in Your Ice Cream Cake
Creative Variations to Make Your Cake Unique and Fun
Serving Suggestions to Wow Friends and Family
Best Storage Techniques to Keep Your Ice Cream Cake Perfect
FAQs
Yes, you can easily swap the cookies. Graham crackers, Oreos, or any crisp cookie work great for creating a delicious crunchy base.
Keep the ice cream slightly softened but not fully melted, and work quickly. Always return the cake to the freezer between layers to maintain firmness.
Run your knife under hot water for a few seconds before each slice. This helps create clean, smooth cuts through the frozen layers.
Absolutely! You can prepare the entire cake up to 3-4 days before serving. Just keep it tightly covered in the freezer until you’re ready to enjoy.
Print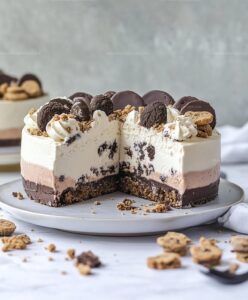
Irresistible Ice Cream Cake With Cookie Crunch Recipe
- Total Time: 3 hours 15 minutes
- Yield: 12 1x
Description
Irresistible homemade ice cream cake with cookie crunch celebrates summer’s sweetest pleasures. Layers of creamy vanilla, chocolate cookie crumbles, and silky frosting create a dessert you’ll crave again and again.
Ingredients
Main Ingredients (Ice Cream):
- 1.5 quarts vanilla ice cream (softened)
- 1.5 quarts chocolate ice cream (softened)
Crust Ingredients:
- 1 package chocolate sandwich cookies (crushed)
- 1/4 cup (4 tablespoons) melted butter
Topping Ingredients:
- 1 cup hot fudge sauce
Instructions
- Crush cookies into fine crumbs and blend thoroughly with melted butter, then firmly press the mixture into the bottom of a springform pan, creating a compact base. Chill in the freezer for 10 minutes to set.
- Allow chocolate ice cream to soften slightly at room temperature, then carefully spread an even layer over the chilled cookie crust, ensuring complete coverage. Return to the freezer for 30 minutes to solidify.
- Warm the hot fudge sauce until it reaches a smooth, pourable consistency, then gently drizzle it across the chocolate ice cream layer in an artistic pattern. Freeze for an additional 15 minutes to allow the sauce to set.
- Remove vanilla ice cream from the freezer and let it soften for a few minutes. Spread a smooth, thick layer over the fudge-covered chocolate ice cream, making sure to create an even surface.
- Place the cake in the freezer for a minimum of 2 hours to ensure complete freezing and structural integrity of all layers.
- Before serving, generously top the cake with whipped cream, creating decorative swirls or peaks. Sprinkle remaining cookie crumbs over the whipped topping for added texture and visual appeal.
Notes
- Ensure cookie crumbs are finely crushed for a smooth, compact crust that holds together perfectly.
- Use room temperature ice cream for easier spreading and preventing cracks in the layers.
- Let each ice cream layer freeze completely to create distinct, clean-looking sections in the cake.
- Drizzle hot fudge sauce sparingly to prevent melting and maintain the cake’s structural integrity.
- Prep Time: 20 minutes
- Cook Time: 2 hours 55 minutes
- Category: Desserts
- Method: Freezing
- Cuisine: American
Nutrition
- Serving Size: 12
- Calories: 434 kcal
- Sugar: 36 g
- Sodium: 160 mg
- Fat: 23 g
- Saturated Fat: 14 g
- Unsaturated Fat: 7 g
- Trans Fat: 0.5 g
- Carbohydrates: 50 g
- Fiber: 2 g
- Protein: 5 g
- Cholesterol: 45 mg
Jack Monroe
Founder & Recipe Innovator
Expertise
Pacific Northwest cuisine, Single-serving recipe development, Sustainable sourcing and cooking, Modern comfort food
Education
Brightwater
Associate of Applied Science in Culinary Arts
Focus: Sustainable cooking, seasonal ingredients, and food systems education
Jack grew up with a fishing rod in one hand and a cast-iron skillet in the other. After graduating from Brightwater: A Center for the Study of Food, he set out to prove that cooking for one could still taste like a feast.
Jack believes that food should feel real: fresh, fearless, and a little wild, just like the rivers he grew up around. For Jack, every single dish is a small adventure, and the best ones are the ones you can cook with heart, not hassle.