
The Ultimate Chocolate Chip Butter Tart Pie Recipe You’ll Adore
Butter tarts with chocolate chips dance on the edge of Canadian dessert perfection, promising a sweet symphony of flavors.
This classic treat blends traditional charm with a delightful chocolatey twist.
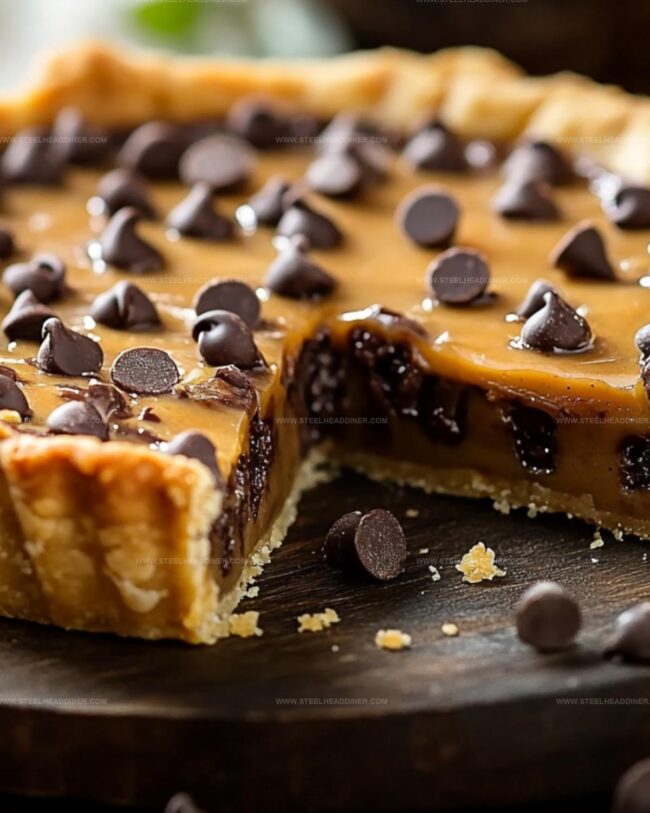
Silky smooth filling meets a crisp, flaky crust that crumbles perfectly with each bite.
Generations of home bakers have cherished this beloved recipe, passing down its delectable secrets.
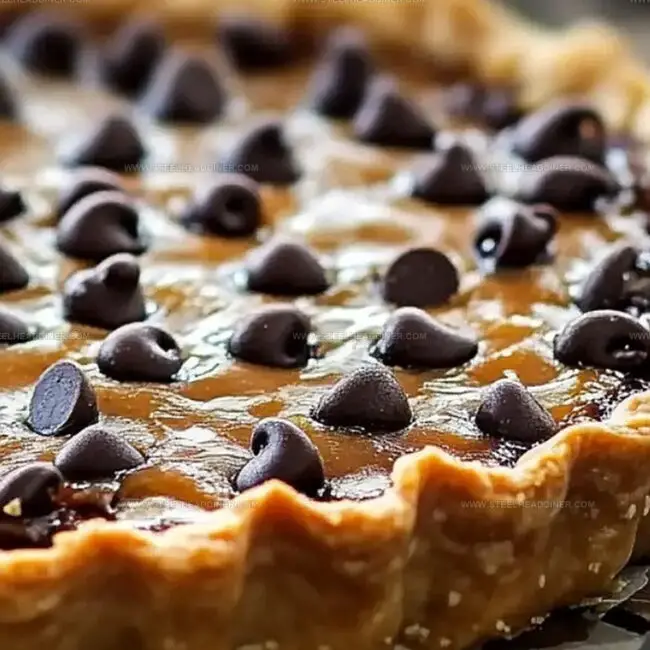
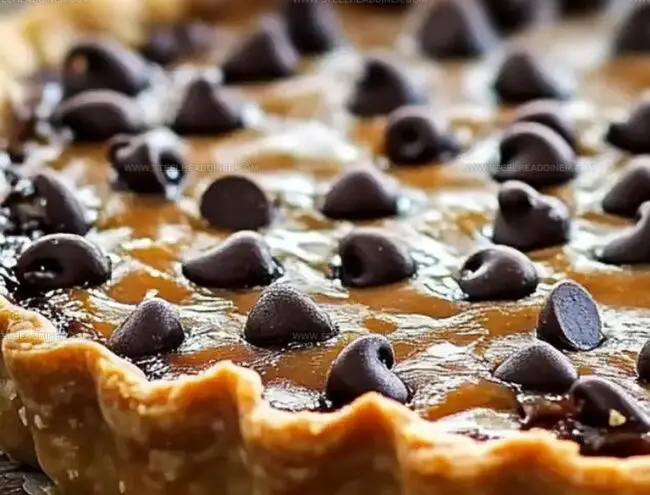
The combination of gooey chocolate and rich, caramelized filling creates an irresistible dessert that beckons from the table.
Warm from the oven or enjoyed at room temperature, these tarts will quickly become your new favorite indulgence.
Prepare to fall in love with every single decadent morsel.
Chocolate Chip Butter Tart Pie That’s Simply Delicious
Ingredients for Chocolate Chip Butter Tart Pie
Pie Crust Ingredients:Filling Ingredients:Flavor Add-Ins:How to Bake Chocolate Chip Butter Tart Pie
Step 1: Create Buttery Pie Dough
Mix flour, sugar, and salt in a large mixing bowl. Use a pastry cutter or your fingers to blend butter into the dry ingredients until the mixture looks like coarse breadcrumbs.
Slowly add ice water, stirring gently until the dough just comes together. Split the dough into two round discs, wrap in plastic, and chill in the refrigerator for half an hour.
Step 2: Prepare the Baking Surface
Heat the oven to 350°F. Dust a clean countertop with flour and roll out one dough disc to fit a 9-inch pie plate.
Carefully transfer the dough to the plate, pressing it into the corners and trimming excess edges.
Step 3: Whip Up the Decadent Filling
In a separate bowl, combine:Whisk in beaten eggs and vanilla extract until the mixture becomes smooth.
Gently fold in chocolate chips and chopped nuts if desired.
Step 4: Assemble the Pie
Pour the filling evenly into the prepared pie crust, ensuring it spreads to all edges.
Step 5: Bake to Golden Perfection
Slide the pie into the preheated oven and bake for 40-45 minutes. The filling should set and the crust turn a beautiful golden brown.
If the edges start browning too quickly, shield them with aluminum foil.
Step 6: Cool and Indulge
Let the pie cool completely on a wire rack.
Slice and serve as is, or top with a generous scoop of vanilla ice cream or a dollop of whipped cream for extra deliciousness.
Tips for Chocolate Chip Butter Tart Pie
Variations on Chocolate Chip Butter Tart Pie
What Goes Well with Chocolate Chip Butter Tart Pie
Storage Advice for Chocolate Chip Butter Tart Pie
FAQs
The filling combines melted butter, brown sugar, corn syrup, eggs, and vanilla extract, which creates a rich, sweet base that’s enhanced by chocolate chips and optional nuts.
Yes, you can prepare the pie crust dough in advance and refrigerate it for up to 30 minutes or freeze it for later use, making it convenient for advance preparation.
The pie is done when the filling is set and the crust turns golden brown, which typically takes 40-45 minutes in a 350F (175C) oven.
Absolutely! This chocolate chip butter tart pie works great for dessert, potlucks, family gatherings, or as a special weekend treat that everyone will enjoy.
Print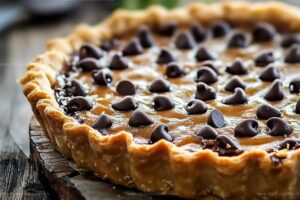
Chocolate Chip Butter Tart Pie Recipe
- Total Time: 1 hour 30 minutes
- Yield: 8 1x
Description
Sweet Canadian magic shines in this chocolate chip butter tart pie, blending nostalgic prairie flavors with irresistible chocolate charm. Maple-kissed filling nestled in flaky pastry promises delightful moments you’ll savor to the last delectable crumb.
Ingredients
Main Ingredients:
- 1 cup unsalted butter, cold and cubed
- 2 1/2 cups all-purpose flour
- 1 cup light brown sugar, packed
- 1 cup semi-sweet chocolate chips
- 2 large eggs, lightly beaten
Supporting Ingredients:
- 1/2 cup corn syrup
- 1/4 cup granulated sugar
- 1/2 cup chopped pecans or walnuts (optional)
Seasoning and Flavor Enhancers:
- 1/2 teaspoon salt
- 1/4 teaspoon salt
- 1 teaspoon pure vanilla extract
- 6–8 tablespoons ice water
Instructions
- Create a delicate pastry foundation by combining flour, sugar, and salt in a spacious mixing vessel.
- Incorporate cold butter into the dry ingredients using a pastry blender, working until the mixture resembles sandy granules.
- Introduce ice water incrementally, gently blending until the dough coheres without becoming overworked.
- Separate the dough into two symmetrical discs, encase in plastic wrap, and chill for a minimum of 30 minutes to enhance texture.
- Heat the oven to 350°F, preparing for a golden-brown transformation.
- Dust a work surface with flour and roll out one dough disc to perfectly fit a 9-inch pie plate, carefully transferring and molding it into the dish.
- Craft the decadent filling by whisking melted butter, brown sugar, corn syrup, and salt until harmoniously blended.
- Introduce beaten eggs and vanilla extract, stirring until the mixture achieves a silky consistency.
- Gently fold chocolate chips and optional nuts into the luscious filling.
- Distribute the filling evenly across the prepared crust, ensuring a uniform layer.
- Bake for 40-45 minutes, monitoring until the filling sets and the crust turns a rich golden hue.
- Shield the crust edges with aluminum foil if browning occurs too rapidly.
- Allow the pie to cool completely on a wire rack, enabling the filling to stabilize.
- Serve elegantly, optionally adorned with a cloud of whipped cream or a scoop of vanilla ice cream for an indulgent finale.
Notes
- Chill the pie dough thoroughly to prevent shrinkage and ensure a flaky, tender crust that melts in your mouth.
- Use cold butter and ice water when making the pastry to create those delightful, light layers that make pie crust irresistible.
- Avoid overworking the dough, as this can develop gluten and result in a tough, chewy crust instead of a delicate, crumbly texture.
- For a gluten-free version, substitute regular flour with a high-quality gluten-free flour blend and add a teaspoon of xanthan gum to help bind the crust.
- Create a nut-free alternative by omitting the nuts or replacing them with toasted coconut flakes for added crunch and flavor.
- Prep Time: 45 minutes
- Cook Time: 45 minutes
- Category: Desserts
- Method: Baking
- Cuisine: Canadian
Nutrition
- Serving Size: 8
- Calories: 445 kcal
- Sugar: 36 g
- Sodium: 140 mg
- Fat: 26 g
- Saturated Fat: 12 g
- Unsaturated Fat: 12 g
- Trans Fat: 0.5 g
- Carbohydrates: 53 g
- Fiber: 2 g
- Protein: 4 g
- Cholesterol: 60 mg
Maya Thompson
Culinary Content Creator & Nutrition Enthusiast
Expertise
Healthy single-serving recipes, Meal prepping for individuals, Integrating nutrition into everyday cooking, Vegetarian and plant-based cuisine
Education
The Chef’s Academy at Harrison College
Associate of Applied Science in Culinary Arts
Focus: Nutrition, meal planning, and culinary techniques for healthy living.
Maya found her passion in the kitchen by mixing good food with good energy. After earning her culinary degree at The Chef’s Academy at Harrison College, she made it her mission to keep cooking simple, wholesome, and packed with flavor.
At Steelhead Diner, Maya shares easy, healthy recipes built for real life. For Maya, great food seems like a celebration of everyday moments, made better one fresh bite at a time.