The Best Classic Peanut Butter Blossoms Recipe Ever Made
Soft, chewy peanut butter blossoms dance with irresistible charm on cookie platters everywhere.
Memories of childhood kitchens flood back with each sweet bite.
Delicate crackles mark the surface of these beloved treats.
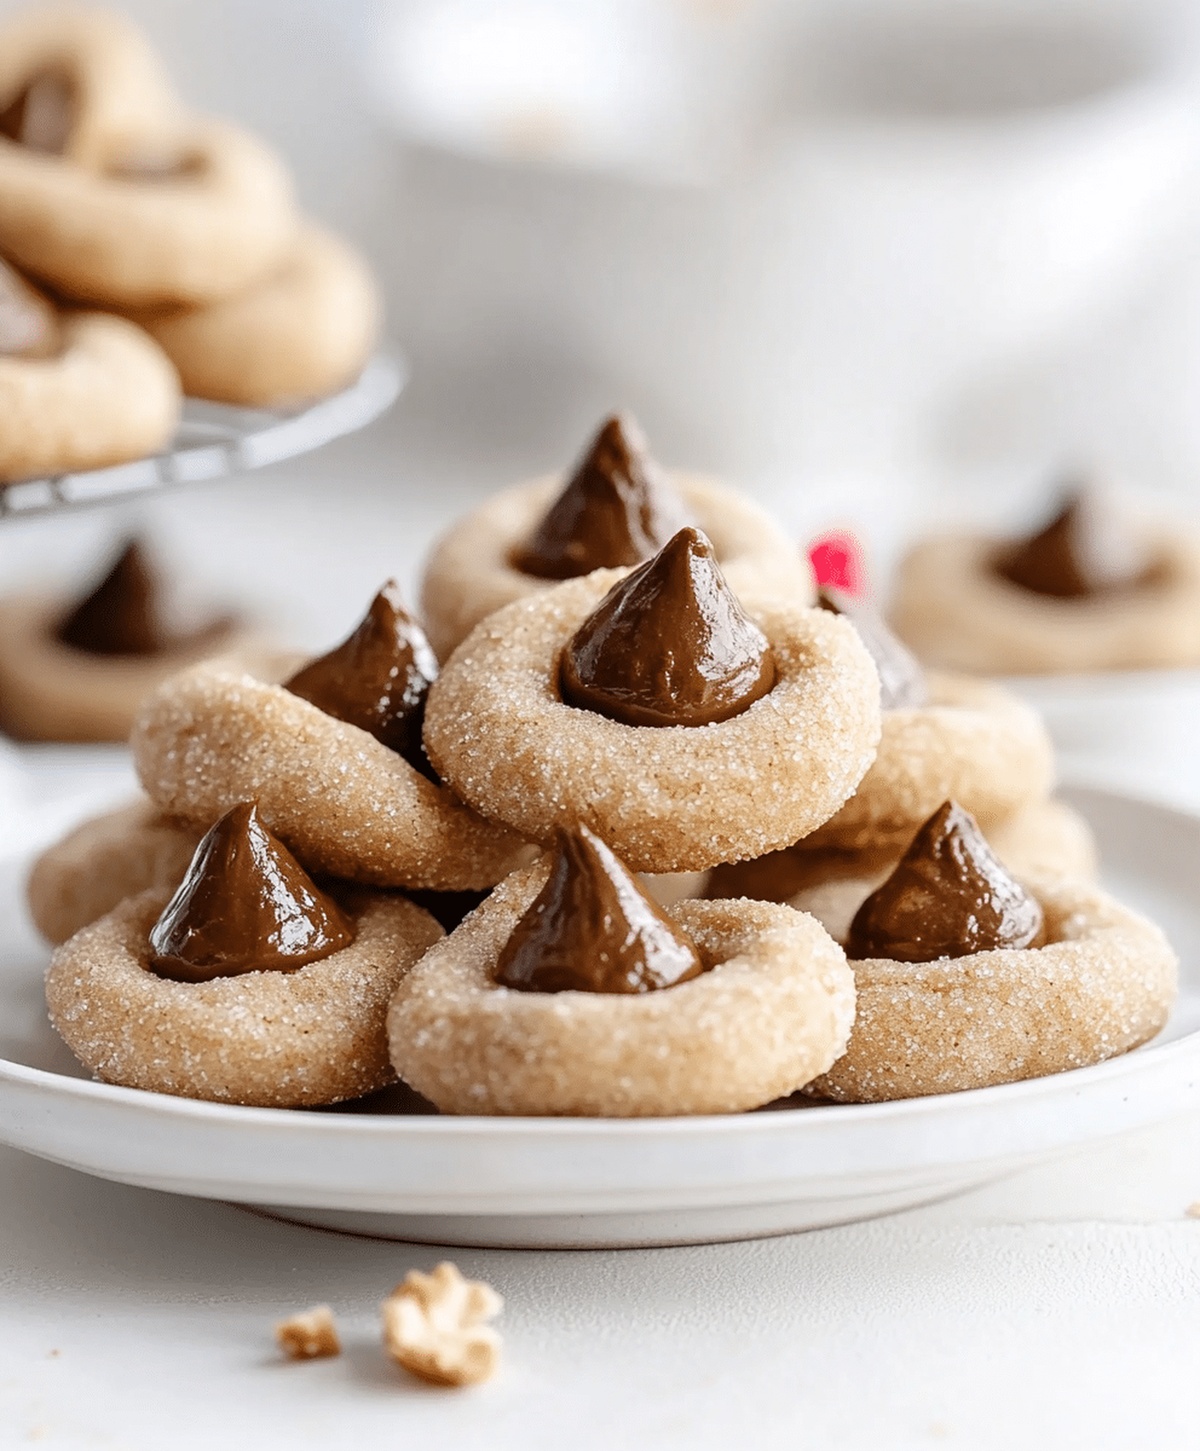
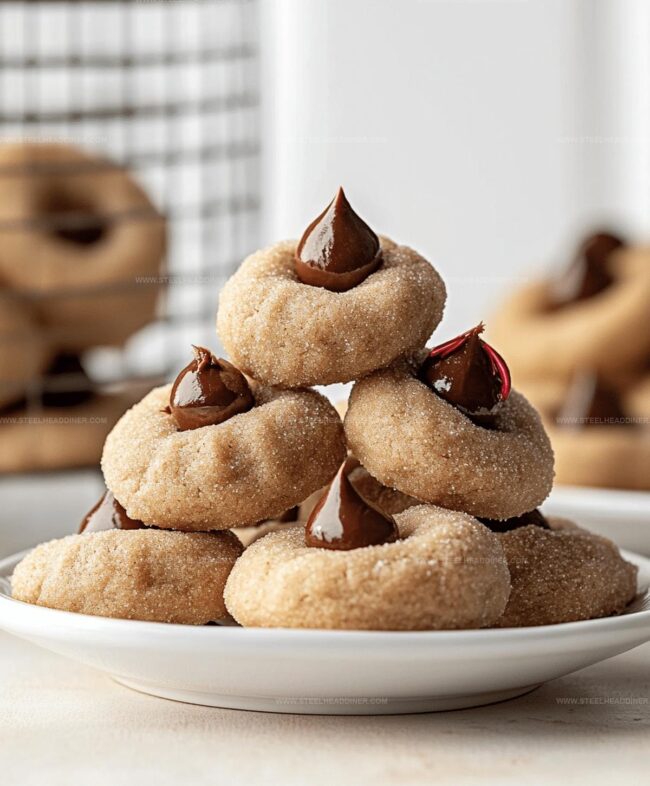
Chocolate kisses nestle perfectly atop pillowy peanut butter bases.
Bakers love how simple ingredients create such magical results.
Subtle hints of nostalgia make these cookies more than just a dessert.
You’ll want to share every last morsel with people who make your world brighter.
Classic Peanut Butter Blossoms: Cookie Jar Staple

Shopping List for Classic Peanut Butter Blossoms
For the Base:For the Wet Ingredients:For the Binding and Flavor Enhancers:How to Prepare Classic Peanut Butter Blossoms
Step 1: Prepare Baking Station
Preheat the oven to 375°F. Cover a baking sheet with parchment paper to prevent sticking and ensure easy cookie removal.
Step 2: Mix Dry Ingredients
Grab a medium bowl and whisk together:Make sure the dry ingredients are well combined with no lumps.
Step 3: Create Creamy Base
In a large mixing bowl, blend until smooth and fluffy:Use an electric mixer to achieve a light and airy texture.
Step 4: Add Wet Ingredients
Incorporate into the creamy mixture:Mix until everything is thoroughly combined and looks uniform.
Step 5: Combine Wet and Dry Mixtures
Slowly add the dry ingredient mixture to the wet ingredients.
Stir gently until a soft dough forms. Avoid overmixing to keep cookies tender.
Step 6: Shape Cookie Balls
Roll the dough into small balls, each about the size of a walnut. Coat each ball completely in granulated sugar for a sparkling exterior.
Step 7: Bake Cookies
Place sugar-coated dough balls on the prepared baking sheet. Bake for 8-10 minutes until edges turn a light golden brown.
Step 8: Add Chocolate Kisses
Immediately after removing from the oven, gently press a Hershey’s Kiss into the center of each warm cookie. The heat will help the chocolate stick.
Step 9: Cool and Serve
Allow cookies to rest on the baking sheet for a few minutes. Transfer to a wire cooling rack to cool completely.
Enjoy these classic treats with a glass of cold milk!
Classic Peanut Butter Blossoms Baking Tips

Peanut Butter Blossoms – Ways to Make It Unique
Serving Classic Peanut Butter Blossoms at Parties
Peanut Butter Blossoms: Storing for Later
FAQs
The chocolate Kiss melts slightly from the warm cookie’s heat, creating a perfect surface attachment and helping it stick smoothly to the cookie.
Yes, you can use creamy or crunchy peanut butter, but avoid natural or separated peanut butter as they might change the cookie’s texture and consistency.
Roll the dough into uniform 1-inch balls and roll them in granulated sugar before baking to maintain a consistent, round appearance.
Print
Classic Peanut Butter Blossoms Recipe
- Total Time: 30 minutes
- Yield: 24 1x
Description
Homemade classic peanut butter blossoms combine nutty cookies with chocolate kiss centers. Sweet comfort emerges from simple ingredients, promising delightful moments you’ll savor with each tender, chocolatey bite.
Ingredients
- 1/2 cup unsalted butter, softened
- 1/2 cup creamy peanut butter
- 1/2 cup granulated sugar
- 1/2 cup brown sugar, packed
- 1 large egg
- 1 tsp vanilla extract
- 2 tbsp milk
- 1 3/4 cups all-purpose flour
- 1 tsp baking soda
- 1/2 tsp salt
- 1/4 cup granulated sugar
- 36 Hershey’s Kisses, unwrapped
Instructions
- Prepare the oven at 375F (190C) and arrange parchment paper on a baking sheet for optimal cookie performance.
- Combine flour, baking soda, and salt in a medium mixing bowl, whisking thoroughly to ensure even distribution of dry ingredients.
- In a separate large bowl, blend butter, peanut butter, granulated sugar, and brown sugar until achieving a light, airy texture with smooth consistency.
- Incorporate egg, vanilla extract, and milk into the sugar mixture, stirring until completely integrated and uniform.
- Gradually fold dry ingredients into the wet mixture, stirring carefully until a cohesive dough forms without overmixing.
- Shape the dough into compact 1-inch spheres, gently rolling each ball through granulated sugar for a delicate sweet coating.
- Strategically position sugar-coated dough balls on the prepared baking sheet, allowing sufficient spacing between cookies.
- Bake for 8-10 minutes, monitoring until cookies develop a delicate golden hue around the edges.
- Working swiftly, press a Hershey’s Kiss into the center of each warm cookie, creating an iconic indentation.
- Allow cookies to rest on the baking sheet for 2-3 minutes to stabilize, then transfer to a wire cooling rack for complete cooling.
Notes
- Ensure butter and peanut butter are at room temperature for smoother, more evenly mixed dough that creates perfectly textured cookies.
- Chill the dough for 30 minutes before rolling if the mixture feels too soft, which helps prevent spreading and maintains the cookie’s shape during baking.
- For gluten-free version, substitute all-purpose flour with a 1:1 gluten-free baking blend, keeping the same measurements and baking time.
- To make vegan, replace butter with plant-based alternative, use egg substitute like flax egg, and select dairy-free chocolate kiss or chocolate drop for topping.
- Prep Time: 20 minutes
- Cook Time: 10 minutes
- Category: Desserts, Snacks
- Method: Baking
- Cuisine: American
Nutrition
- Serving Size: 24
- Calories: 190 kcal
- Sugar: 12 g
- Sodium: 110 mg
- Fat: 9 g
- Saturated Fat: 3 g
- Unsaturated Fat: 5 g
- Trans Fat: 0.1 g
- Carbohydrates: 23 g
- Fiber: 1 g
- Protein: 4 g
- Cholesterol: 20 mg
Jack Monroe
Founder & Recipe Innovator
Expertise
Pacific Northwest cuisine, Single-serving recipe development, Sustainable sourcing and cooking, Modern comfort food
Education
Brightwater
Associate of Applied Science in Culinary Arts
Focus: Sustainable cooking, seasonal ingredients, and food systems education
Jack grew up with a fishing rod in one hand and a cast-iron skillet in the other. After graduating from Brightwater: A Center for the Study of Food, he set out to prove that cooking for one could still taste like a feast.
Jack believes that food should feel real: fresh, fearless, and a little wild, just like the rivers he grew up around. For Jack, every single dish is a small adventure, and the best ones are the ones you can cook with heart, not hassle.