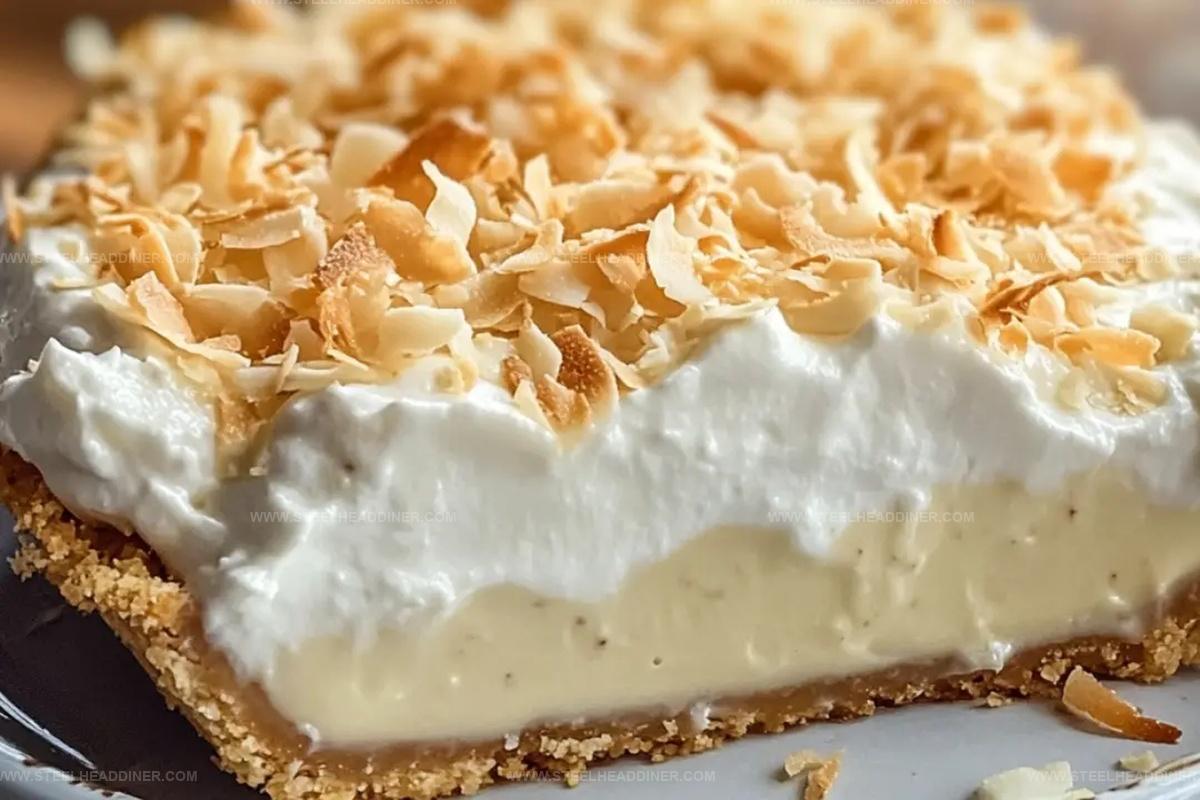
The Dreamiest No Bake Coconut Cream Pie Recipe for Summer
Cool summer days call for a delightful no bake coconut cream pie that melts in your mouth with creamy goodness.
Tropical flavors dance through each silky smooth slice of this luscious dessert.
Creamy coconut and sweet graham cracker crust combine in a heavenly match made in dessert paradise.
The recipe requires minimal effort and delivers maximum satisfaction for anyone seeking a refreshing treat.
Each bite offers a delicate balance of coconut richness and smooth texture that transports you to a beachy paradise.
Chilled and set to perfection, this pie promises to be the star of any gathering.
Prepare to indulge in a dessert that celebrates simplicity and pure deliciousness.
What Makes No Bake Coconut Cream Pie Special
Ingredients For No Bake Coconut Cream Pie
Core Ingredients:Crust:Garnish:Clear Steps For No Bake Coconut Cream Pie
Step 1: Whip Up the Creamy Base
In a spacious mixing bowl, combine the coconut cream pudding mix with milk. Whisk vigorously until the mixture transforms into a silky, smooth texture with no lumps.
Step 2: Fold in Fluffy Clouds
Gently incorporate the whipped topping into the pudding, folding carefully to maintain the light, airy consistency. Mix until the topping blends completely with the pudding.
Step 3: Sprinkle Tropical Goodness
Mix in the sweetened shredded coconut, stirring evenly to distribute the tropical flakes throughout the creamy mixture.
Step 4: Create the Pie Foundation
Pour the coconut pudding filling into the graham cracker crust, spreading it edge to edge.
Ensure an even, smooth surface that completely covers the crust.
Step 5: Chill and Set
Cover the pie with plastic wrap and refrigerate for a minimum of 4 hours or overnight.
This allows the filling to firm up and develop a rich, creamy texture.
Step 6: Transform Coconut Flakes
Heat a dry skillet over medium-low flame.
Add the remaining coconut flakes and stir constantly. Watch carefully as the coconut turns golden brown and releases a nutty aroma.
Immediately transfer to a separate plate to stop the toasting process.
Step 7: Final Flourish
Once the pie has set, generously spread the remaining whipped topping across the surface.
Sprinkle the toasted coconut flakes on top for a delightful crunch and extra flavor.
Step 8: Serve and Enjoy
Slice the pie into elegant wedges and serve chilled.
Indulge in the creamy, tropical paradise you’ve created!
Helpful Tips For Coconut Cream Pie
Creative Twists For No Bake Coconut Cream Pie
Foods That Pair Well With Coconut Cream Pie
Proper Storage For No Bake Coconut Cream Pie
FAQs
Yes, you can substitute the graham cracker crust with a vanilla wafer or shortbread crust for a different flavor profile.
Coconut cream pudding mix has a more intense coconut flavor compared to vanilla or regular pudding mixes, which gives this pie its distinctive taste.
The no-bake coconut cream pie will stay fresh for 3-4 days when stored in the refrigerator with plastic wrap covering it.
You can substitute dairy milk with coconut milk and use a dairy-free whipped topping to create a dairy-free version of this recipe.
Print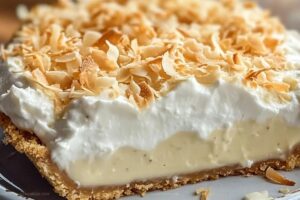
No Bake Coconut Cream Pie Recipe
- Total Time: 15 minutes
- Yield: 8 1x
Description
Creamy No Bake Coconut Cream Pie delivers tropical paradise on a plate, blending luscious coconut flavors with silky smooth texture. Cool summer desserts never tasted so luxurious, beckoning hungry guests to savor each blissful tropical-inspired bite.
Ingredients
Filling Ingredients:
- 2 (96 grams / 3.4 ounces) packages instant coconut cream pudding mix
- 2 cups (480 milliliters) whole milk
- 8 ounces (226 grams) thawed whipped topping, divided use
Coconut Ingredients:
- 1 cup (80 grams) sweetened shredded coconut, divided use
Crust Ingredients:
- 1 (9-inch / 23-centimeter) graham cracker crust
Instructions
- Create a smooth coconut cream pudding mixture by whisking pudding mix with milk until completely blended and free of lumps.
- Gently incorporate whipped topping into the pudding, folding carefully to maintain a light, airy texture.
- Mix in sweetened shredded coconut, distributing evenly throughout the creamy filling.
- Transfer the entire coconut pudding mixture into the prepared graham cracker crust, ensuring complete and even coverage.
- Refrigerate the pie for a minimum of 4 hours or ideally overnight, allowing the filling to set firmly and develop rich flavors.
- Meanwhile, prepare toasted coconut by heating in a dry skillet over medium-low temperature, stirring continuously until golden brown and fragrant.
- Remove toasted coconut immediately to prevent burning, transferring to a separate plate to cool and stop the cooking process.
- Once pie is completely chilled and set, generously spread remaining whipped topping across the surface.
- Sprinkle the freshly toasted coconut over the whipped topping as a decorative and flavorful garnish.
- Slice and serve the chilled pie, enjoying the creamy, tropical dessert.
Notes
- Enhance flavor by using full-fat coconut milk instead of regular milk for a richer, more intense coconut taste.
- Prevent soggy crust by letting the graham cracker base cool completely before adding the filling, ensuring a crisp texture.
- Customize dietary needs by using dairy-free whipped topping and gluten-free graham crackers for a vegan and gluten-sensitive version.
- Control coconut toasting by watching carefully and stirring frequently to achieve a golden-brown color without burning, which can turn bitter.
- Prep Time: 15 minutes
- Cook Time: 0 minutes
- Category: Desserts
- Method: Refrigerating
- Cuisine: American
Nutrition
- Serving Size: 8
- Calories: 265 kcal
- Sugar: 21 g
- Sodium: 190 mg
- Fat: 14 g
- Saturated Fat: 11 g
- Unsaturated Fat: 2 g
- Trans Fat: 0.1 g
- Carbohydrates: 29 g
- Fiber: 1 g
- Protein: 3 g
- Cholesterol: 15 mg
Maya Thompson
Culinary Content Creator & Nutrition Enthusiast
Expertise
Healthy single-serving recipes, Meal prepping for individuals, Integrating nutrition into everyday cooking, Vegetarian and plant-based cuisine
Education
The Chef’s Academy at Harrison College
Associate of Applied Science in Culinary Arts
Focus: Nutrition, meal planning, and culinary techniques for healthy living.
Maya found her passion in the kitchen by mixing good food with good energy. After earning her culinary degree at The Chef’s Academy at Harrison College, she made it her mission to keep cooking simple, wholesome, and packed with flavor.
At Steelhead Diner, Maya shares easy, healthy recipes built for real life. For Maya, great food seems like a celebration of everyday moments, made better one fresh bite at a time.