
Easy No-Bake Cheesecake Recipe: Silky Smooth & Hassle-Free
Crafting a delectable no-bake cheesecake requires minimal effort and maximum deliciousness.
Summer heat makes traditional baking feel like a chore, so this cool dessert comes to the rescue.
Creamy textures and sweet flavors combine without ever touching an oven.
Minimal ingredients create maximum satisfaction for anyone wanting a quick dessert solution.
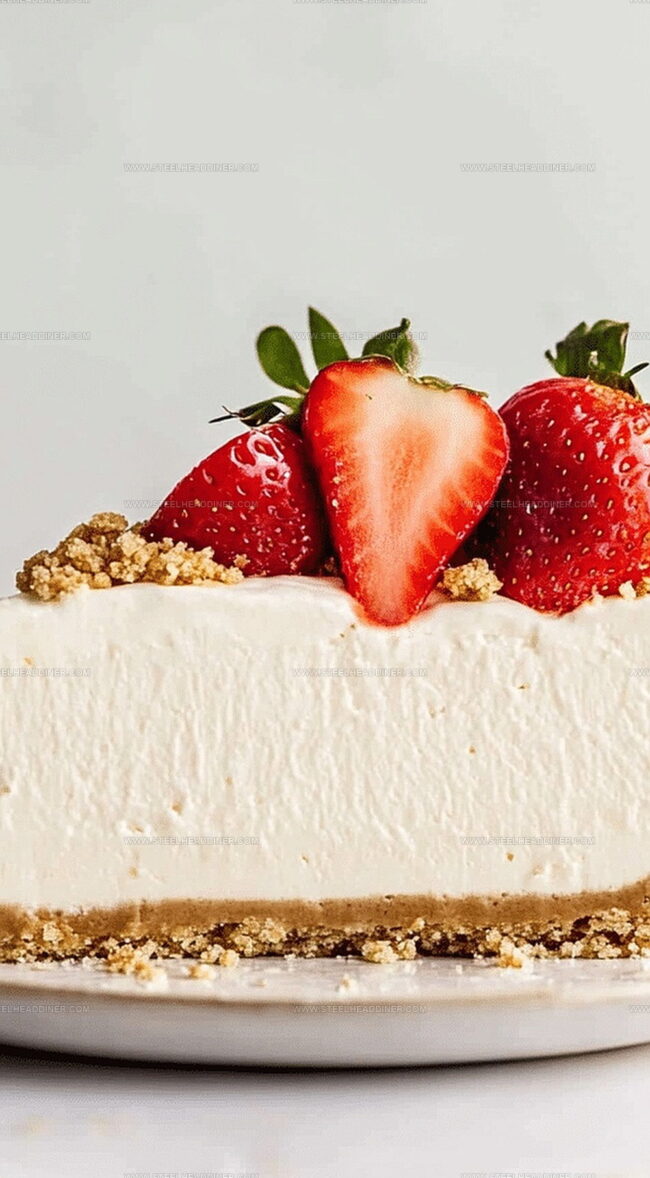
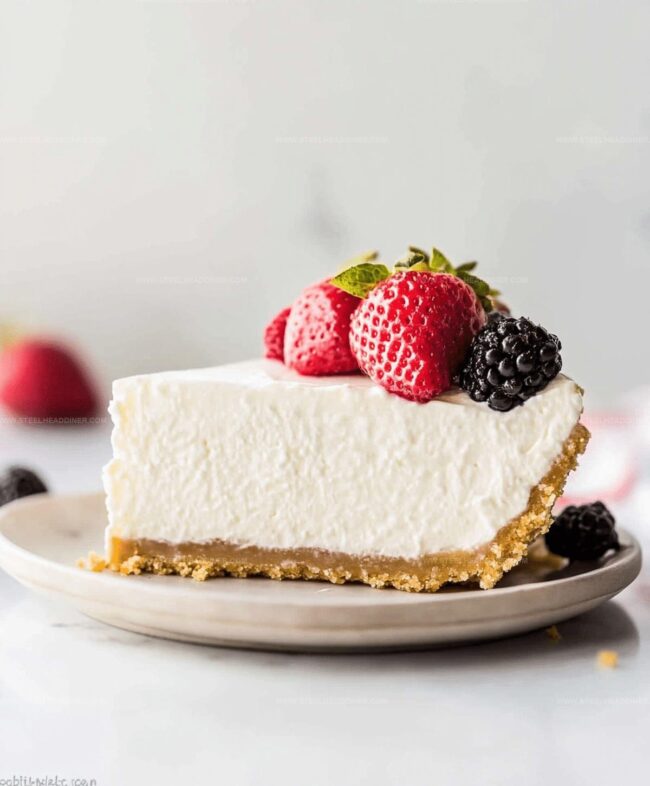
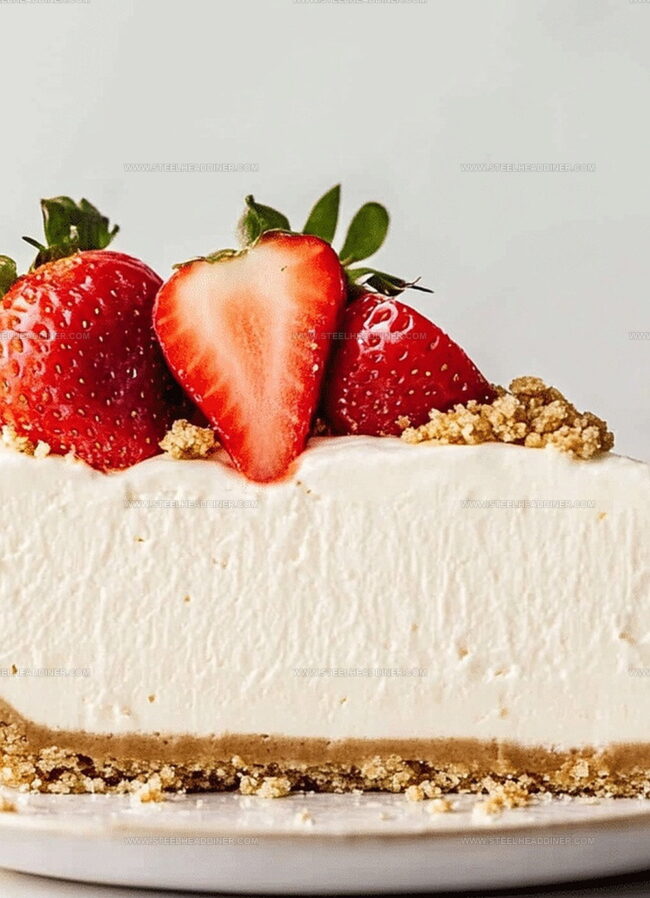
Graham cracker crusts provide a perfect crispy base for the silky smooth filling.
Chilling works its magic, transforming simple ingredients into a restaurant-worthy treat.
We promise this recipe will become your new go-to dessert that impresses everyone at the table.
No-Bake Cheesecake for Quick Cravings
What You Need for No-Bake Cheesecake
For the Crust:For the Filling:For the Optional Garnish:Stepwise No-Bake Cheesecake Instructions
Step 1: Create the Crumbly Crust Foundation
Grab your graham crackers and crush them into fine, sandy crumbs. Pour melted butter over the crumbs and mix until they stick together perfectly.
Press this magical mixture firmly into the bottom of a springform pan, creating a solid and delicious base for your cheesecake. Use the back of a spoon or your fingers to pack it down evenly and create a smooth surface.
Step 2: Whip Up the Creamy Cheese Mixture
Take your softened cream cheese and toss it into a large mixing bowl. Add powdered sugar and a splash of vanilla extract.
Using an electric mixer, beat these ingredients together until they transform into a silky, smooth blend that looks absolutely dreamy. Make sure to scrape down the sides of the bowl to incorporate every last bit of creamy goodness.
Step 3: Fold in Clouds of Whipped Cream
In a separate bowl, pour heavy cream and whip it until it forms beautiful, stiff peaks that stand up tall and proud. Gently fold this fluffy whipped cream into the cream cheese mixture.
Use a spatula and a light touch to keep all that wonderful airiness intact. The goal is to create a light, cloud-like filling that will melt in your mouth.
Step 4: Spread the Heavenly Filling
Pour the luscious cream cheese mixture over your prepared crust. Smooth the top with a spatula, making sure it’s level and looks absolutely irresistible.
Take your time to create a perfectly even surface that will make your cheesecake look as good as it tastes.
Step 5: Chill and Set to Perfection
Carefully place your cheesecake in the refrigerator and let it rest for at least 4 hours, or preferably overnight.
This chilling time allows the cheesecake to set and develop its incredible texture and flavor. When you’re ready to serve, remove from the springform pan, slice, and watch everyone’s eyes light up with pure dessert excitement!
Pro Touches for No-Bake Cheesecake
No-Bake Cheesecake: Switch Things Up
Serving No-Bake Cheesecake in Style
Storing No-Bake Cheesecake Easily
FAQs
Use full-fat, room temperature Philadelphia cream cheese for the smoothest and richest texture. Low-fat or non-fat versions can make the cheesecake less creamy.
Absolutely! You can substitute graham crackers with digestive biscuits, oreo cookies, or vanilla wafers. Just ensure you use the same butter-to-crumb ratio for the perfect crust consistency.
Make sure to whip the heavy cream until stiff peaks form and fold it gently into the cream cheese mixture. Also, allow the cheesecake to set completely in the refrigerator for at least 4 hours to achieve the right firmness.
Print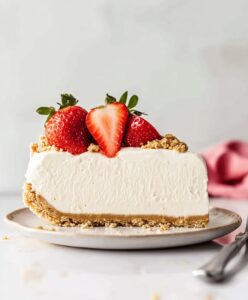
No-Bake Cheesecake Recipe
- Total Time: 20 minutes
- Yield: 8 1x
Description
Classic no-bake cheesecake promises creamy indulgence without oven heat. Graham cracker crust and silky cream cheese filling combine for an effortless dessert you’ll savor with pure delight.
Ingredients
- 16 oz cream cheese (softened)
- 1 cup heavy whipping cream
- 1 cup powdered sugar
- 2 cups graham cracker crumbs
- 1/2 cup (120 ml) melted butter
- 1 tsp vanilla extract
Instructions
- Combine crushed graham crackers with melted butter, ensuring a uniform texture. Press the mixture firmly into the bottom of a springform pan, creating a compact and even base.
- In a separate mixing bowl, whip cream cheese until velvety and free of lumps. Gradually incorporate powdered sugar and vanilla extract, blending until the mixture becomes silky and well-integrated.
- Whip heavy cream to stiff, glossy peaks, using a clean whisk or electric mixer. Carefully fold the whipped cream into the cream cheese blend, maintaining the airy volume and creating a light, creamy consistency.
- Gently transfer the luxurious filling onto the prepared graham cracker crust, using a spatula to distribute evenly and smooth the surface.
- Chill the assembled cheesecake in the refrigerator for a minimum of 4 hours, allowing it to set completely and develop a rich, creamy texture. For optimal results, let it rest overnight before serving.
- When ready to serve, carefully release the springform pan sides and slice the cheesecake into elegant portions. Garnish with fresh berries or a light dusting of powdered sugar if desired.
Notes
- Select graham crackers with a golden-brown texture for maximum crunch and flavor depth in the crust.
- Use room temperature cream cheese to ensure a silky smooth filling without lumps, which can disrupt the creamy texture.
- Fold whipped cream gently into the cream cheese mixture to maintain its airy volume and prevent deflating the mixture.
- Try alternative crusts like chocolate cookie crumbs or crushed nuts for a unique twist on the classic recipe.
- Prep Time: 20 minutes
- Cook Time: 0 minutes
- Category: Desserts
- Method: None
- Cuisine: American
Nutrition
- Serving Size: 8
- Calories: 437
- Sugar: 28 g
- Sodium: 220 mg
- Fat: 37 g
- Saturated Fat: 21 g
- Unsaturated Fat: 13 g
- Trans Fat: 1 g
- Carbohydrates: 23 g
- Fiber: 1 g
- Protein: 5 g
- Cholesterol: 80 mg
Jack Monroe
Founder & Recipe Innovator
Expertise
Pacific Northwest cuisine, Single-serving recipe development, Sustainable sourcing and cooking, Modern comfort food
Education
Brightwater
Associate of Applied Science in Culinary Arts
Focus: Sustainable cooking, seasonal ingredients, and food systems education
Jack grew up with a fishing rod in one hand and a cast-iron skillet in the other. After graduating from Brightwater: A Center for the Study of Food, he set out to prove that cooking for one could still taste like a feast.
Jack believes that food should feel real: fresh, fearless, and a little wild, just like the rivers he grew up around. For Jack, every single dish is a small adventure, and the best ones are the ones you can cook with heart, not hassle.