
The Best No-Bake Chocolate Peanut Butter Bars Recipe Ever
Crafting homemade no-bake chocolate peanut butter bars offers a delightful twist on classic dessert indulgence.
Creamy peanut butter mingles with rich chocolate in this simple, decadent treat.
Sweet cravings meet their match with minimal kitchen effort.
Quick assembly means you can satisfy your dessert desires in minutes.
Minimal ingredients create maximum flavor for chocolate and peanut butter enthusiasts.
Chilling transforms these bars into a smooth, irresistible snack perfect for any moment.
Dive into this effortless recipe that promises pure, unapologetic deliciousness.
No-Bake Chocolate Peanut Butter Bars Is a Treat
Everything Needed for No-Bake Chocolate Peanut Butter Bars
For the Base:For the Topping:For the Preparation:How to Make No-Bake Chocolate Peanut Butter Bars
Step 1: Whip Together Creamy Base
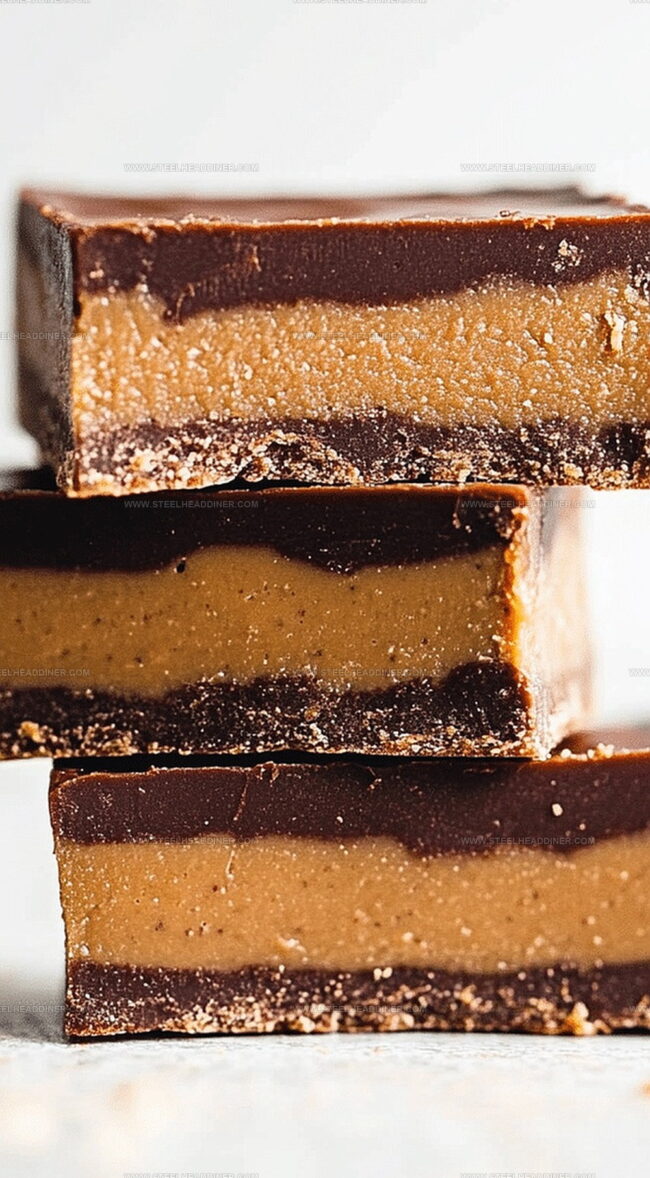
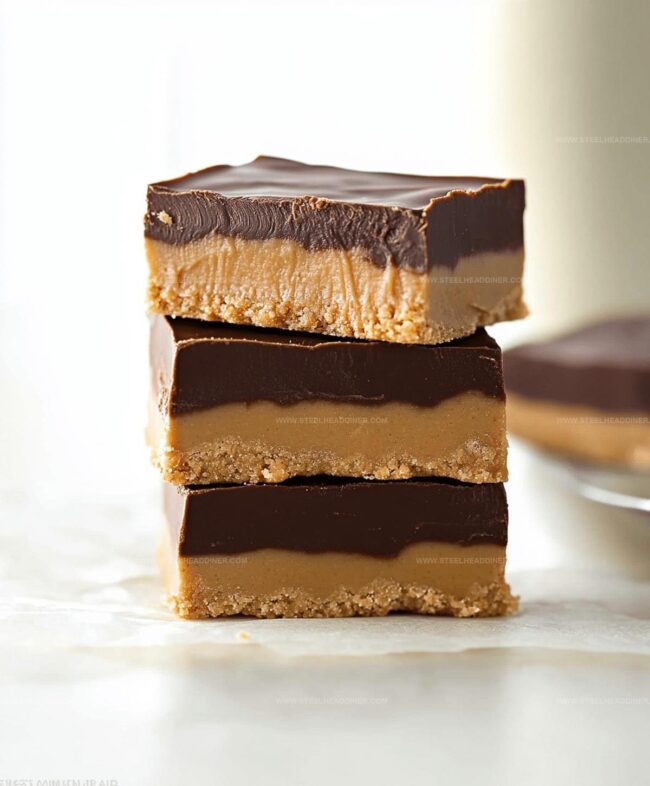
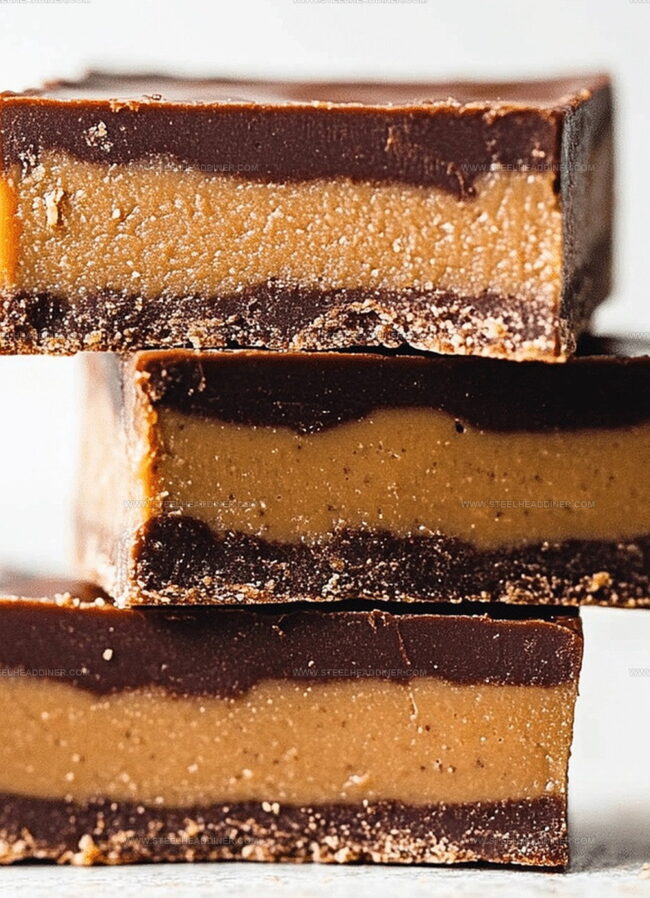
In a spacious mixing bowl, combine smooth peanut butter, melted butter, powdered sugar, and crushed graham crackers. Stir thoroughly until the mixture becomes uniform and well-blended, creating a delectable foundation for your no-bake treat.
Step 2: Create Smooth Foundation
Grab an 8×8-inch pan and line it with parchment paper. Gently press the peanut butter mixture into the pan, ensuring an even and compact layer that will serve as the delicious base of your bars.
Step 3: Craft Chocolate Topping
Set up a microwave-safe bowl and melt chocolate chips with peanut butter. Heat in short 30-second bursts, stirring between each interval until the mixture transforms into a silky, glossy chocolate layer.
Step 4: Layer Chocolate Decadence
Pour the molten chocolate mixture over the peanut butter base. Use a spatula to spread the chocolate evenly, creating a smooth and tempting surface that will make mouths water.
Step 5: Chill and Set
Transfer the pan to the refrigerator and let it rest for at least 2 hours. This cooling period allows the bars to firm up and develop a perfect, slice-able consistency.
Step 6: Slice and Enjoy
Remove the pan from the refrigerator and lift the bars out using the parchment paper. Slice into squares and serve these heavenly no-bake chocolate peanut butter bars to eager friends and family.
Tips for Perfect No-Bake Chocolate Peanut Butter Bars
Try a New Twist on No-Bake Chocolate Peanut Butter Bars
Plating No-Bake Chocolate Peanut Butter Bars for Parties
No-Bake Chocolate Peanut Butter Bars: Keep Them Fresh
FAQs
Yes, you can substitute almond butter or cashew butter for peanut butter. Each will slightly change the flavor, but the recipe will still work well.
Always line the pan with parchment paper or aluminum foil, leaving some overhang to easily lift out the bars after chilling.
Use gluten-free graham cracker crumbs or substitute with gluten-free cookie crumbs to make this recipe celiac-friendly.
Absolutely! These bars can be prepared up to 5 days in advance and stored in the refrigerator, making them perfect for meal prep or party planning.
Print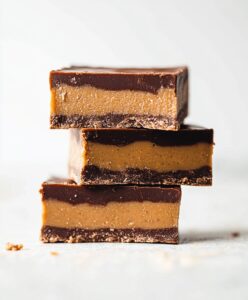
No-Bake Chocolate Peanut Butter Bars Recipe
- Total Time: 15 minutes
- Yield: 12 1x
Description
Indulgent no-bake chocolate peanut butter bars combine creamy peanut butter with rich chocolate for a quick dessert. Chocolate lovers will savor this simple, irresistible treat that requires minimal ingredients and zero oven time.
Ingredients
- 1 cup peanut butter
- 1/2 cup (113 g) butter, melted
- 1 3/4 cups (220 g) powdered sugar
- 1 cup graham cracker crumbs
- 1 1/4 cups (213 g) semi-sweet chocolate chips
- 1/4 cup (60 g) peanut butter (for topping)
Instructions
- Combine peanut butter, melted butter, powdered sugar, and graham cracker crumbs in a large mixing bowl, stirring until the mixture forms a cohesive, smooth consistency.
- Transfer the mixture into a parchment-lined 8×8-inch pan, using a spatula or your hands to create an even, compact layer across the bottom.
- In a microwave-safe bowl, melt chocolate chips and additional peanut butter, heating in 30-second intervals and stirring between each interval until the mixture becomes completely smooth and glossy.
- Carefully pour the warm chocolate mixture over the peanut butter base, using a spatula to distribute it evenly and create a uniform top layer.
- Place the pan in the refrigerator and allow the bars to chill for approximately 2 hours, or until the chocolate layer has fully set and becomes firm to the touch.
- Remove the pan from the refrigerator and lift the parchment paper to transfer the entire block onto a cutting surface.
- Using a sharp knife, slice the chilled block into individual bars of desired size, creating clean, precise cuts.
- Serve the bars immediately or store in an airtight container in the refrigerator for up to one week.
Notes
- Swap graham crackers with gluten-free alternatives like almond flour or oat flour for a celiac-friendly version.
- Reduce powdered sugar or use a sugar substitute like stevia for a lower-sugar treat that’s still deliciously sweet.
- Elevate the chocolate layer by using dark chocolate chips for a richer, more intense flavor profile that balances the creamy peanut butter.
- Sprinkle sea salt or chopped nuts on top before chilling to add a crunchy texture and enhance the overall taste experience.
- Prep Time: 15 minutes
- Cook Time: 0 minutes
- Category: Snacks, Desserts
- Method: Chilling
- Cuisine: American
Nutrition
- Serving Size: 12
- Calories: 297 kcal
- Sugar: 18 g
- Sodium: 110 mg
- Fat: 23 g
- Saturated Fat: 6 g
- Unsaturated Fat: 14 g
- Trans Fat: 0.1 g
- Carbohydrates: 22 g
- Fiber: 2 g
- Protein: 7 g
- Cholesterol: 15 mg
Jack Monroe
Founder & Recipe Innovator
Expertise
Pacific Northwest cuisine, Single-serving recipe development, Sustainable sourcing and cooking, Modern comfort food
Education
Brightwater
Associate of Applied Science in Culinary Arts
Focus: Sustainable cooking, seasonal ingredients, and food systems education
Jack grew up with a fishing rod in one hand and a cast-iron skillet in the other. After graduating from Brightwater: A Center for the Study of Food, he set out to prove that cooking for one could still taste like a feast.
Jack believes that food should feel real: fresh, fearless, and a little wild, just like the rivers he grew up around. For Jack, every single dish is a small adventure, and the best ones are the ones you can cook with heart, not hassle.