
The Dreamiest Mini Cheesecakes Recipe for Sweet Moments
Baking mini cheesecakes always sparks joy in my kitchen, bringing delightful miniature desserts that steal everyone’s heart.
Creamy textures and delicate crusts create pure magic on dessert plates.
Small portions mean you can enjoy multiple flavor combinations without guilt.
Compact and adorable, these little treats work perfectly for dinner parties or casual gatherings.
Individual servings eliminate messy cutting and ensure each guest receives a picture-perfect dessert.
Simple ingredients and straightforward techniques make these mini cheesecakes accessible for bakers of all skill levels.
Whip up these charming sweets and watch smiles bloom around the table.
Mini Cheesecakes That Impress
Ingredients for Mini Cheesecakes
Crust Ingredients:Cheesecake Filling Ingredients:Topping Ingredients:Step-by-Step Guide to Mini Cheesecakes
Step 1: Prepare Baking Equipment
Warm up the oven to 325°F. Grab a muffin tin and line each cavity with paper cupcake liners.
This will help your mini cheesecakes come out perfectly and prevent sticking.
Step 2: Create Crumbly Crust
Mix together:Press about one tablespoon of this mixture into the bottom of each liner.
Use your fingers or the back of a spoon to create a compact, even base for your cheesecakes.
Step 3: Whip Creamy Cheesecake Filling
In a mixing bowl, blend cream cheese and sugar until silky smooth.
Add eggs one at a time, stirring thoroughly after each addition. Pour in vanilla extract and mix until the filling is completely uniform and free of lumps.
Step 4: Fill and Bake
Carefully pour the cheesecake mixture over the graham cracker crust in each liner. Fill almost to the top, leaving a tiny bit of space.
Slide the muffin tin into the preheated oven and bake for 15-18 minutes. The centers should look set but still have a slight wobble.
Step 5: Cool and Chill
Remove cheesecakes from the oven and let them cool completely at room temperature. Once cooled, transfer to the refrigerator and chill for at least one hour to help them firm up.
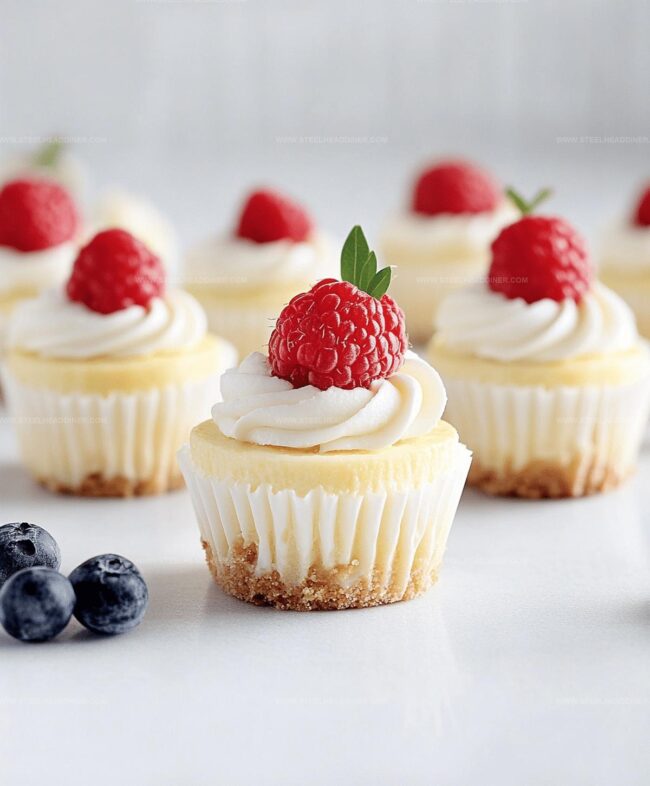
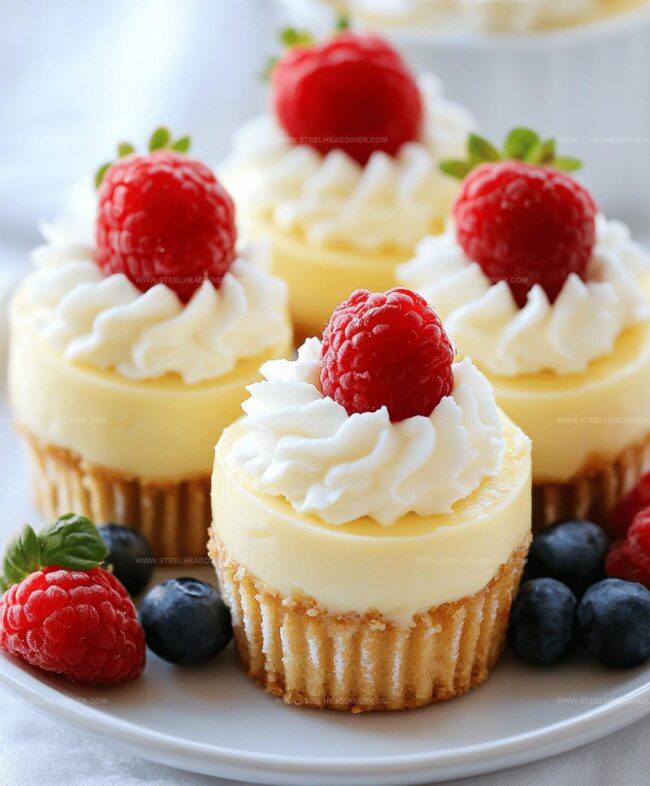
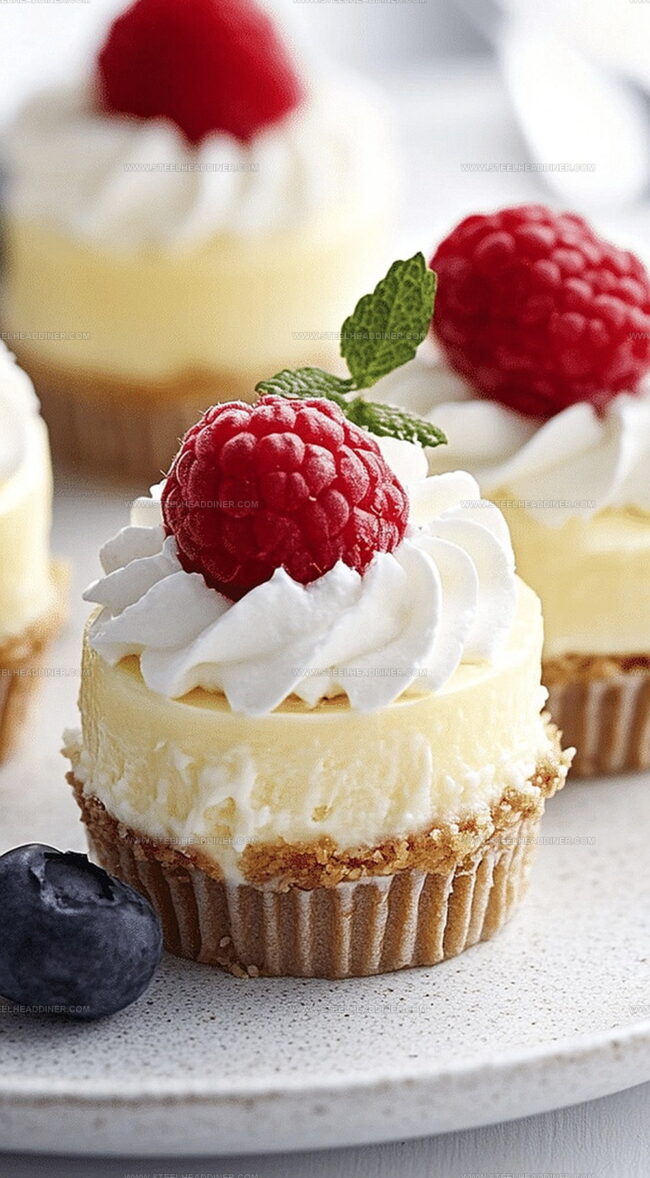
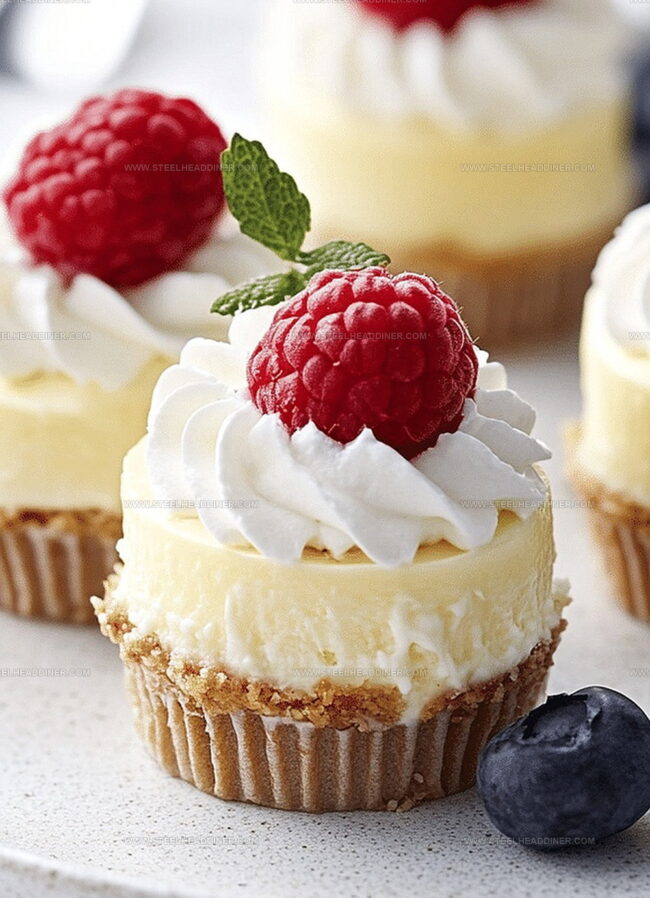
Step 6: Garnish and Serve
Top your mini cheesecakes with fresh berries, chocolate sauce, caramel, whipped cream, or any other delightful garnish you prefer. Serve chilled and enjoy!
Tips to Elevate Mini Cheesecake Flavors
Flavor Twists to Try with Mini Cheesecakes
Best Pairings for Mini Cheesecakes
How to Store Mini Cheesecakes Safely
FAQs
Yes, you can substitute graham crackers with vanilla wafers, digestive biscuits, or Oreo cookies for a unique base flavor.
Avoid overmixing the batter, bake at the correct temperature, and let them cool gradually to prevent cracks on the surface.
Absolutely! You can prepare these mini cheesecakes up to 3 days in advance and store them in the refrigerator until ready to serve.
Yes, these mini cheesecakes freeze well. Wrap them individually in plastic wrap and store in a freezer-safe container for up to 2 months.
Print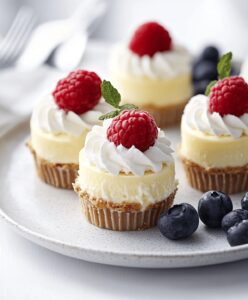
Perfect Mini Cheesecakes Recipe
- Total Time: 33 minutes
- Yield: 12 1x
Description
Irresistible mini cheesecakes bring New York-style dessert magic to your table. Creamy, tangy bites deliver pure indulgence for sweet enthusiasts seeking simple yet elegant dessert perfection.
Ingredients
Main Ingredients:
- 16 ounces (454 grams) cream cheese, softened
- 2 large eggs
- 1/2 cup (100 grams) sugar
Crust Ingredients:
- 1 cup (120 grams) graham cracker crumbs
- 1/4 cup (57 grams) unsalted butter, melted
- 3 tablespoons (38 grams) sugar
Finishing Ingredients:
- 1 teaspoon vanilla extract
- Optional toppings: fresh fruit, chocolate shavings, or caramel sauce
Instructions
- Prepare the oven at 325F (163C) and arrange paper liners inside a muffin tin.
- Blend graham cracker crumbs with sugar and melted butter, then firmly press approximately one tablespoon of the mixture into each liner to create a compact base.
- Using an electric mixer, whip cream cheese and sugar until achieving a silky consistency, then gently incorporate eggs individually, ensuring thorough mixing after each addition. Fold in vanilla extract for enhanced flavor.
- Carefully distribute the cheesecake mixture over the prepared crusts, filling each liner almost to its brim.
- Bake for 15-18 minutes, watching for a set center that maintains a slight jiggle. Allow complete cooling at room temperature.
- Refrigerate the mini cheesecakes for a minimum of one hour to ensure proper setting and optimal texture.
- Before serving, personalize with preferred toppings such as fresh berries, chocolate drizzle, or caramel sauce to elevate the dessert’s visual appeal and taste profile.
Notes
- Swap graham crackers with gluten-free cookies for a celiac-friendly version that maintains the same delicious crumbly texture.
- Ensure cream cheese is room temperature to prevent lumps and create a silky smooth filling that blends perfectly.
- Test doneness by gently shaking the pan – centers should have a slight wobble but not be liquid, indicating perfectly baked mini cheesecakes.
- Use a piping bag or zip-lock bag with corner snipped for precise and mess-free filling of muffin liners, creating uniform and professional-looking desserts.
- Prep Time: 15 minutes
- Cook Time: 18 minutes
- Category: Desserts
- Method: Baking
- Cuisine: American
Nutrition
- Serving Size: 12
- Calories: 262 kcal
- Sugar: 12 g
- Sodium: 121 mg
- Fat: 20 g
- Saturated Fat: 12 g
- Unsaturated Fat: 7 g
- Trans Fat: 0.3 g
- Carbohydrates: 15 g
- Fiber: 0.5 g
- Protein: 5 g
- Cholesterol: 70 mg
Jack Monroe
Founder & Recipe Innovator
Expertise
Pacific Northwest cuisine, Single-serving recipe development, Sustainable sourcing and cooking, Modern comfort food
Education
Brightwater
Associate of Applied Science in Culinary Arts
Focus: Sustainable cooking, seasonal ingredients, and food systems education
Jack grew up with a fishing rod in one hand and a cast-iron skillet in the other. After graduating from Brightwater: A Center for the Study of Food, he set out to prove that cooking for one could still taste like a feast.
Jack believes that food should feel real: fresh, fearless, and a little wild, just like the rivers he grew up around. For Jack, every single dish is a small adventure, and the best ones are the ones you can cook with heart, not hassle.