The Sweetest Red Velvet Cheesecake Recipe for Valentine’s Day
Passion meets decadence in this irresistible red velvet cheesecake that promises to steal hearts this Valentine’s Day.
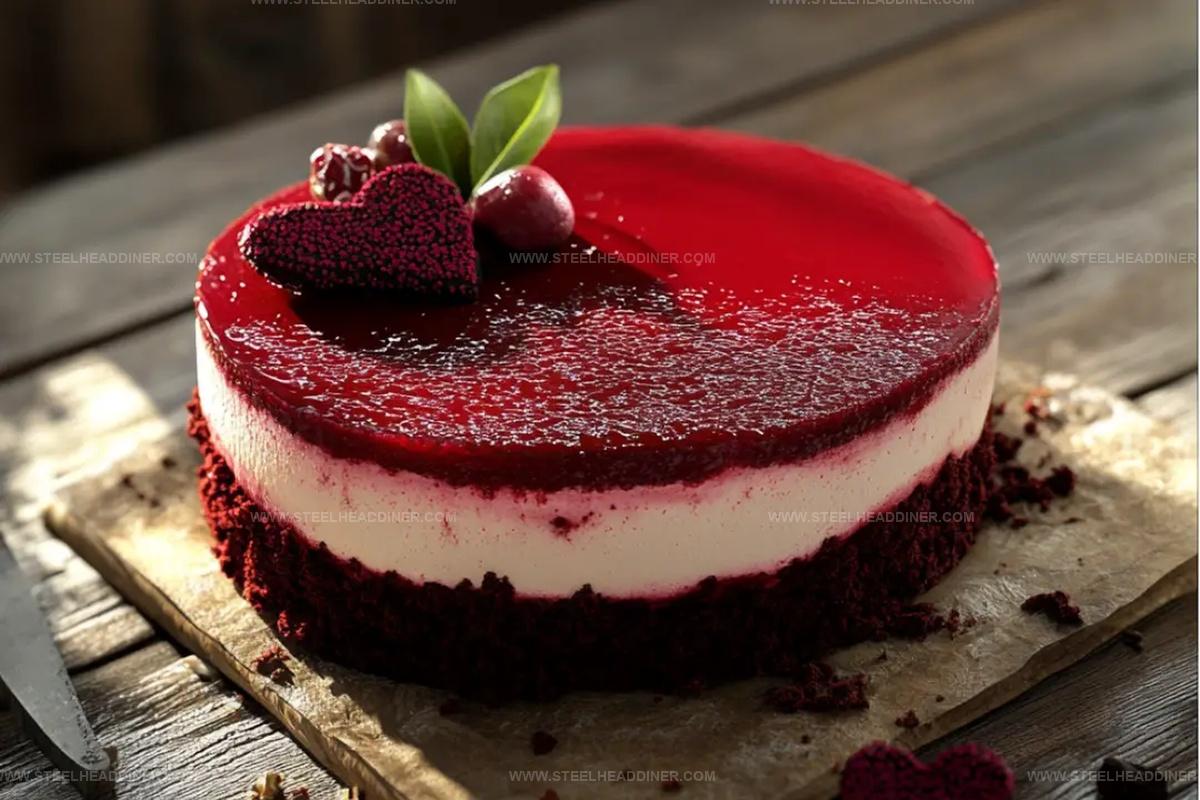
Layers of rich, velvety goodness combine classic romance with indulgent dessert perfection.
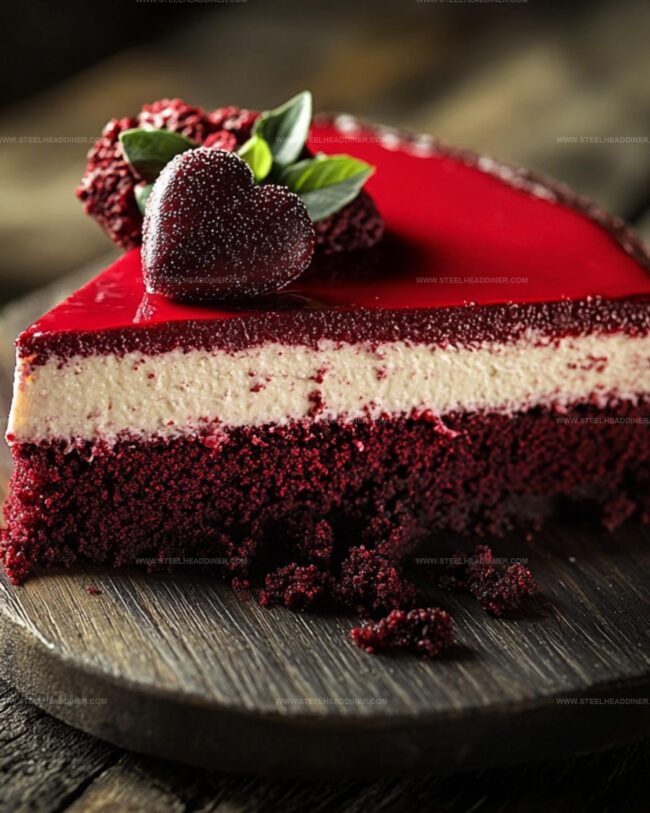
Creamy cheesecake nestled between luscious red velvet cake creates a stunning visual and flavor symphony.
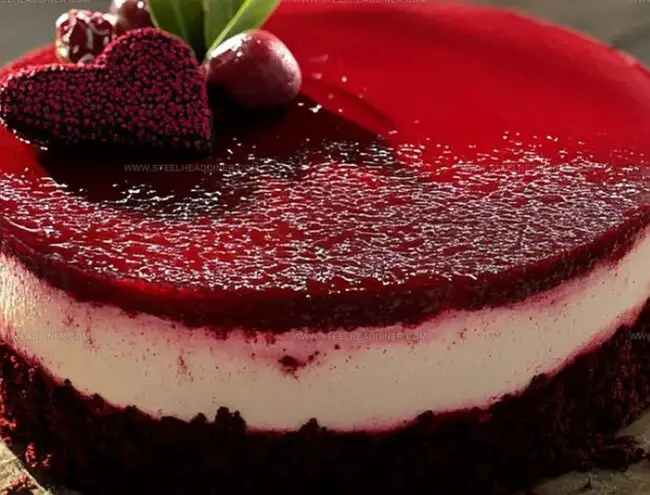
Delicate crimson hues hint at the love baked into every slice.
Smooth cream cheese filling provides a luxurious contrast to the tender cake layers.
The dessert whispers sweet promises of romance and culinary artistry.
Each forkful becomes a celebration of love and delectable craftsmanship that will make your special someone swoon.
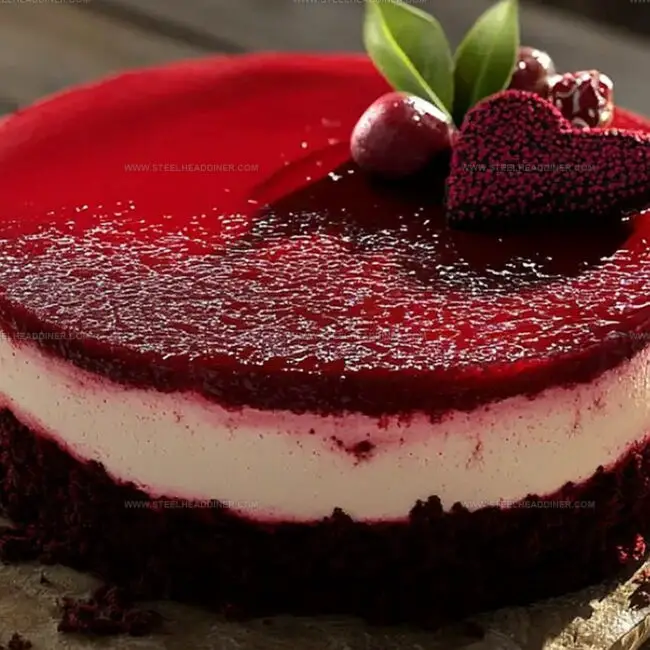
Valentines Day Red Velvet Cheesecake That Steals the Show
Ingredients for Valentines Red Velvet Cheesecake
Crust:Red Velvet Cheesecake Filling:Cream Cheese Whipped Cream Topping:Decoration:How to Make Valentines Day Red Velvet Cheesecake
Step 1: Craft the Chocolate Cookie Base
Warm up the oven to 325F (163C). Grease a 9-inch springform pan and line the bottom with parchment paper.
Grab your chocolate cookies and crush them into fine crumbs. Mix the crumbs with melted butter until they stick together perfectly.
Press this mixture firmly into the pan’s bottom, creating a solid foundation. Bake for 10 minutes and let it cool completely.
Step 2: Whip Up the Vibrant Cheesecake Mixture
In a large mixing bowl, blend cream cheese, sugar, and cocoa powder until silky smooth. Pour in sour cream, buttermilk, vinegar, and vanilla extract.
Mix thoroughly until everything is well combined. Add red food coloring to create that signature Valentine’s Day red hue.
Gently incorporate eggs one at a time, mixing on low speed. Be careful not to overmix the batter.
Pour this luscious mixture over the cooled crust and smooth the top with a spatula.
Step 3: Create a Water Bath and Bake
Wrap the springform pan completely in aluminum foil.
Place it inside a larger baking dish. Fill the outer dish with hot water, creating a water bath about 1 inch deep.
This technique helps prevent unsightly cracks in your cheesecake. Bake for 1 hour.
After the time is up, turn off the oven but leave the cheesecake inside with the door slightly ajar for an additional 30 minutes.
Step 4: Chill and Set
Remove the cheesecake from the oven and let it cool completely at room temperature.
Refrigerate for at least 6 hours or overnight to allow it to set perfectly.
Step 5: Whip Up the Dreamy Topping
In a mixing bowl, beat cream cheese, powdered sugar, and vanilla extract until smooth and creamy.
Gradually add cold heavy whipping cream and beat until stiff, luxurious peaks form.
Step 6: Decorate with Love
Carefully remove the cheesecake from the springform pan.
Pipe or spread the cream cheese whipped topping generously over the surface. For a romantic finish, sprinkle chocolate shavings, scatter heart-shaped sprinkles, or arrange fresh berries to create a stunning Valentine’s Day dessert.
Pro Tips for Red Velvet Cheesecake Success
Variations on Valentines Red Velvet Cheesecake
What Goes Well with Valentines Day Red Velvet Cheesecake
Storing Valentines Red Velvet Cheesecake
FAQs
Using a water bath and avoiding overmixing the eggs are key. The water bath creates gentle, even heat, while minimal egg mixing prevents air bubbles that cause cracking.
The edges should be set but the center slightly jiggly. After baking, letting it sit in the oven with the door slightly open helps it cool gradually and prevents cracks.
Absolutely! This cheesecake needs at least 6 hours of refrigeration, so it’s perfect for preparing a day in advance. The flavors actually improve as it chills.
Print
Valentines Day Red Velvet Cheesecake Recipe
- Total Time: 2 hours
- Yield: 12 1x
Description
Red velvet cheesecake whispers romance on Valentine’s Day, blending rich cocoa and creamy Philadelphia cream cheese into a luxurious dessert. Smooth layers of passion melt hearts, promising sweet moments shared between lovers.
Ingredients
Cake Ingredients:
- 24 ounces (680 grams) cream cheese, room temperature
- 3 large eggs
- 1 cup sugar
- 1/2 cup sour cream
- 1/4 cup buttermilk
Coloring and Flavoring Ingredients:
- 2 tablespoons cocoa powder
- 1 tablespoon red food coloring
- 1 teaspoon white vinegar
- 2 teaspoons vanilla extract
Crust and Topping Ingredients:
- 2 cups chocolate cookie crumbs
- 5 tablespoons butter, melted
- 4 ounces (113 grams) cream cheese, room temperature
- 1 cup heavy whipping cream, cold
- 1/2 cup powdered sugar
- 1 teaspoon vanilla extract
Instructions
- Craft the foundation by preheating the oven to 325F (163C). Coat a 9-inch springform pan with grease and line the bottom with parchment paper.
- Combine chocolate cookie crumbs with melted butter until uniformly mixed. Press the mixture compactly into the pan’s base.
- Bake the crust for 10 minutes, then set aside to cool completely.
- In a large mixing bowl, whip cream cheese, sugar, and cocoa powder until achieving a silky texture.
- Incorporate sour cream, buttermilk, vinegar, and vanilla extract, blending until thoroughly integrated.
- Introduce red food coloring, ensuring an even, vibrant hue throughout the mixture.
- Gently fold in eggs one at a time, mixing on low speed until just combined. Avoid overmixing.
- Pour the batter over the cooled crust, smoothing the surface with a spatula.
- Encase the springform pan in aluminum foil and place within a larger baking dish.
- Create a water bath by adding hot water to the outer dish, approximately 1 inch deep.
- Bake for 1 hour, then turn off the oven, leaving the door slightly ajar, and let the cheesecake rest for an additional 30 minutes.
- Remove from the oven and allow to cool completely at room temperature.
- Refrigerate for a minimum of 6 hours or overnight to set.
- Prepare the cream cheese whipped topping by beating cream cheese, powdered sugar, and vanilla extract until smooth.
- Gradually add cold heavy whipping cream, beating until stiff peaks form.
- Carefully remove the cheesecake from the springform pan.
- Decorate the top by piping or spreading the cream cheese whipped cream.
- Embellish with chocolate shavings, heart-shaped sprinkles, or fresh berries for a romantic presentation.
Notes
- Ensure cream cheese is at room temperature to prevent lumps and create a smooth, creamy texture.
- Use full-fat cream cheese for the richest, most indulgent cheesecake experience.
- Avoid overmixing the batter to prevent air bubbles and a tough cheesecake texture.
- Create a perfect water bath by wrapping the pan tightly in aluminum foil to prevent water seepage.
- Customize the decoration with personalized toppings like edible rose petals or red sugar crystals for an extra romantic touch.
- Replace chocolate cookie crumbs with gluten-free graham crackers or almond flour.
- Make ahead and freeze the cheesecake for up to 2 weeks, maintaining its delicious flavor and texture.
- Prep Time: 30 minutes
- Cook Time: 1 hour 30 minutes
- Category: Desserts
- Method: Baking
- Cuisine: American
Nutrition
- Serving Size: 12
- Calories: 422 kcal
- Sugar: 29 g
- Sodium: 232 mg
- Fat: 32 g
- Saturated Fat: 19 g
- Unsaturated Fat: 12 g
- Trans Fat: 0.5 g
- Carbohydrates: 22 g
- Fiber: 1 g
- Protein: 6 g
- Cholesterol: 97 mg
Maya Thompson
Culinary Content Creator & Nutrition Enthusiast
Expertise
Healthy single-serving recipes, Meal prepping for individuals, Integrating nutrition into everyday cooking, Vegetarian and plant-based cuisine
Education
The Chef’s Academy at Harrison College
Associate of Applied Science in Culinary Arts
Focus: Nutrition, meal planning, and culinary techniques for healthy living.
Maya found her passion in the kitchen by mixing good food with good energy. After earning her culinary degree at The Chef’s Academy at Harrison College, she made it her mission to keep cooking simple, wholesome, and packed with flavor.
At Steelhead Diner, Maya shares easy, healthy recipes built for real life. For Maya, great food seems like a celebration of everyday moments, made better one fresh bite at a time.