
Sweet Cereal Ice Cream Sandwiches Recipe: A Playful Treat
Creamy, dreamy cereal ice cream sandwiches dance between childhood nostalgia and gourmet delight.
Summer afternoons beg for this delectable cereal ice cream sandwiches treat that combines sweet memories with cool refreshment.
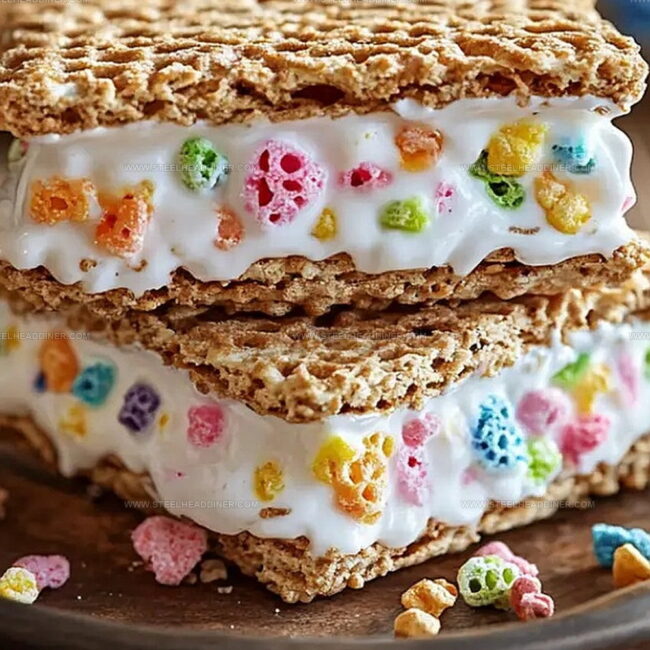
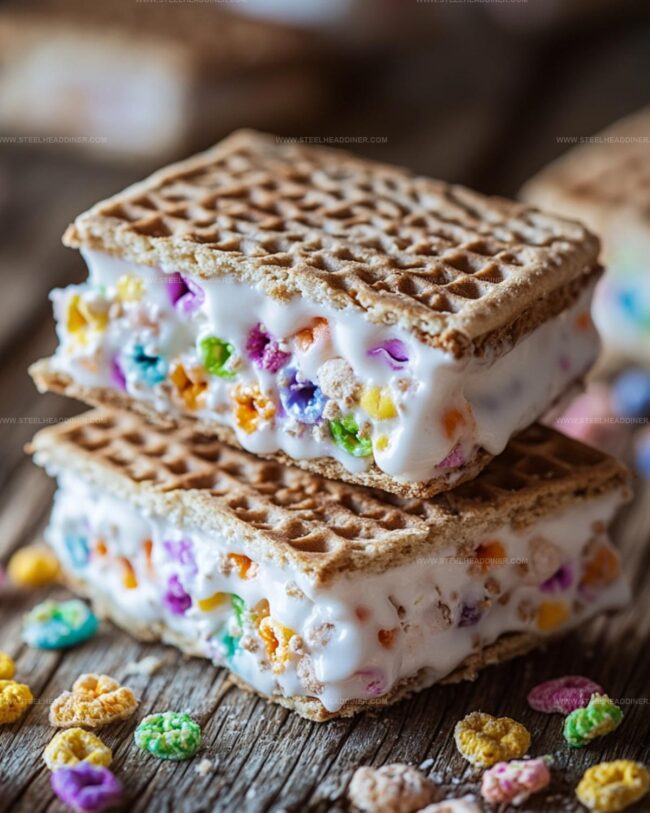
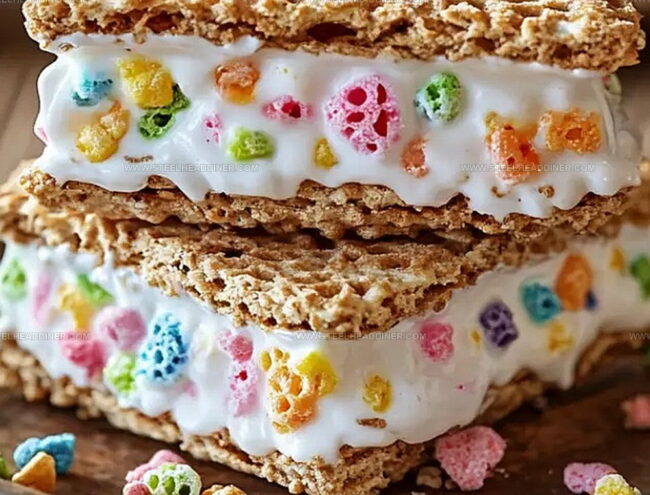
Crisp, golden cereal creates the perfect crunchy exterior for these irresistible frozen delights.
Every bite promises a symphony of textures and flavors that will transport you back to carefree moments.
The magic happens when simple ingredients transform into an extraordinary dessert that sparks joy.
Chilled and decadent, these sandwiches offer a playful twist on classic frozen treats.
You’ll want to master this recipe and become the dessert hero at your next gathering.
Cereal Ice Cream Sandwiches That Are Fun and Easy
Ingredients for Cereal Ice Cream Sandwiches
Main Ingredients:Binding Ingredients:Flavor Enhancers:How to Make Cereal Ice Cream Sandwiches
Step 1: Prepare Cookie Layers
Spread your favorite cereal evenly across a baking sheet lined with parchment paper. Use a rolling pin to gently crush the cereal into smaller pieces, creating a uniform base for your ice cream sandwich.
Step 2: Melt Binding Mixture
In a microwave-safe bowl, combine marshmallows and butter. Heat in short bursts, stirring between each interval, until the mixture becomes smooth and fully melted.
This will act as the glue to hold your cereal layers together.
Step 3: Create Cereal Slabs
Pour the melted marshmallow mixture over the crushed cereal.
Carefully mix until every piece is coated. Press the mixture firmly into the baking sheet, creating an even layer about half an inch thick.
Let it cool and set at room temperature.
Step 4: Cut Sandwich Bases
Once the cereal layer has completely cooled and hardened, use a sharp knife to cut into rectangular or square shapes.
These will serve as the top and bottom of your ice cream sandwiches.
Step 5: Add Ice Cream Filling
Select your preferred ice cream flavor.
Allow it to soften slightly at room temperature for easier spreading. Place one cereal base on a piece of parchment paper, then generously spread the softened ice cream on top.
Step 6: Assemble Sandwiches
Carefully place the second cereal base on top of the ice cream layer. Gently press down to ensure a secure seal.
Wrap each sandwich individually in parchment paper or plastic wrap.
Step 7: Chill and Serve
Transfer the wrapped sandwiches to the freezer.
Let them set for at least one hour to ensure the ice cream is firm and the layers are well-bonded. Remove from the freezer a few minutes before serving to allow slight softening.
Tips for Cereal Ice Cream Sandwiches
Variations on Cereal Ice Cream Sandwiches
Pairing Ideas for Cereal Ice Cream Sandwiches
Storage Tips for Cereal Ice Cream Sandwiches
FAQs
You’ll need vanilla ice cream, your favorite cereal (like corn flakes or rice krispies), and optional melted chocolate for coating.
Yes, you can prepare them in advance and store them in the freezer for up to a week. Just wrap each sandwich individually in plastic wrap.
No special equipment is required – just a baking sheet, parchment paper, and basic kitchen tools like a knife and spatula will work perfectly.
Absolutely! These sandwiches are super easy and fun to assemble, making them a great activity for children to help with in the kitchen.
Print
Cereal Ice Cream Sandwiches Recipe
- Total Time: 15 minutes
- Yield: 6 1x
Description
Nostalgic cereal ice cream sandwiches blend childhood memories with cool summer indulgence. Sweet, crunchy cereal cookies embrace creamy vanilla ice cream, creating a playful dessert you’ll crave again and again.
Ingredients
Main Ingredients:
- 5 cups rice cereal
- 2 cups strawberry ice cream
- 4 cups miniature marshmallows
Binding Ingredients:
- 1/2 cup smooth peanut butter
- 2 tablespoons (30 milliliters) unsalted butter
Garnish:
- 1/4 cup chopped freeze-dried strawberries
Instructions
- Prepare a baking sheet lined with parchment paper, ensuring a flat surface for assembling the ice cream sandwiches.
- Soften the ice cream at room temperature for 5-10 minutes to make it easier to spread.
- Arrange cereal in a single layer, creating a rectangular base approximately the same size as your desired sandwich shape.
- Carefully spread softened ice cream evenly across the cereal layer, maintaining a consistent thickness of about 1/2 inch.
- Gently press a second layer of cereal on top of the ice cream, creating a complete sandwich structure.
- Use a sharp knife to cut the large sandwich into individual rectangular portions.
- Place the cut sandwiches on the prepared baking sheet and immediately transfer to the freezer.
- Freeze the sandwiches for 15-20 minutes to allow them to set and become firm.
- For optimal texture and easier handling, keep sandwiches stored in the freezer until ready to serve.
- Optional: Let sandwiches sit at room temperature for 2-3 minutes before consuming to soften slightly and enhance flavor.
Notes
- Boost flavor by mixing cereals like Fruity Pebbles and Cocoa Puffs for a colorful, multi-textured treat.
- Soften ice cream slightly before spreading to ensure smooth, even coverage between cereal layers.
- Create dairy-free versions by using coconut or almond milk-based ice cream alternatives for allergy-friendly options.
- Wrap individual sandwiches in parchment paper for easy storage and clean freezer organization.
- Prep Time: 15 minutes
- Cook Time: 0 minutes
- Category: Desserts, Snacks
- Method: Freezing
- Cuisine: American
Nutrition
- Serving Size: 6
- Calories: 405 kcal
- Sugar: 23 g
- Sodium: 80 mg
- Fat: 19 g
- Saturated Fat: 7 g
- Unsaturated Fat: 11 g
- Trans Fat: 0.2 g
- Carbohydrates: 50 g
- Fiber: 2 g
- Protein: 7 g
- Cholesterol: 25 mg
Maya Thompson
Culinary Content Creator & Nutrition Enthusiast
Expertise
Healthy single-serving recipes, Meal prepping for individuals, Integrating nutrition into everyday cooking, Vegetarian and plant-based cuisine
Education
The Chef’s Academy at Harrison College
Associate of Applied Science in Culinary Arts
Focus: Nutrition, meal planning, and culinary techniques for healthy living.
Maya found her passion in the kitchen by mixing good food with good energy. After earning her culinary degree at The Chef’s Academy at Harrison College, she made it her mission to keep cooking simple, wholesome, and packed with flavor.
At Steelhead Diner, Maya shares easy, healthy recipes built for real life. For Maya, great food seems like a celebration of everyday moments, made better one fresh bite at a time.