
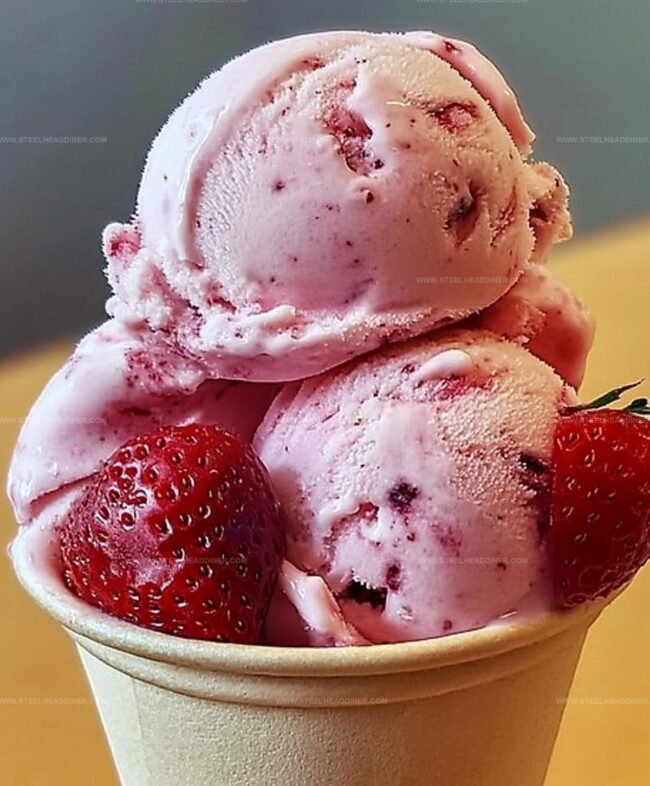
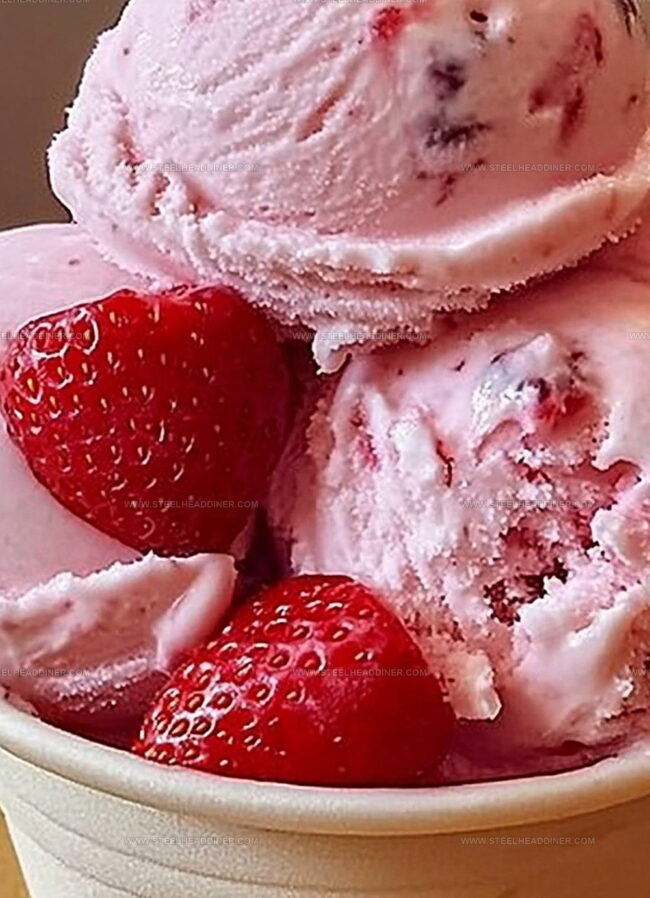
The Best Homemade Strawberry Vanilla Bean Ice Cream Recipe
Sweet summer memories dance through this creamy homemade strawberry vanilla bean ice cream that transforms ordinary dessert moments into pure bliss.
Ripe strawberries whisper nostalgic stories from childhood gardens.
Rich vanilla pods add elegant depth to each smooth spoonful.
Culinary magic happens when simple ingredients combine with careful technique.
Fresh cream mingles with vibrant fruit, creating a dessert that feels both luxurious and comforting.
Each scoop promises a delightful escape from everyday stress.
You’ll want to savor this delectable treat slowly, letting every cool, dreamy bite melt on your tongue.
Creamy Strawberry Vanilla Bean Ice Cream Magic

Ingredients for Homemade Strawberry Vanilla Bean Ice Cream
Fresh Fruit:Dairy Base:Sweeteners and Flavoring:How to Create a Creamy and Smooth Ice Cream at Home
Step 1: Prepare Strawberry Mixture
Grab fresh strawberries and sugar. Combine them in a bowl, letting the mixture sit and macerate for 20 minutes.
Gently mash the strawberries to release their natural juices and create a vibrant fruity base.
Step 2: Infuse Cream Base
Gather these ingredients:Split the vanilla bean lengthwise and scrape out the tiny seeds.
Combine milk, cream, and vanilla bean in a saucepan. Warm the mixture over medium heat, ensuring it doesn’t reach a boiling point.
The goal is to create a rich, aromatic foundation for the ice cream.
Step 3: Prepare Egg Custard
Separate egg yolks and whisk them with remaining sugar until the mixture transforms into a pale, creamy texture.
This step builds the luxurious base for your homemade ice cream.
Step 4: Temper the Custard
Slowly stream the warm cream mixture into the egg yolks, whisking continuously.
This technique prevents the eggs from scrambling and creates a smooth custard. Transfer the mixture back to the saucepan.
Step 5: Cook the Custard
Cook the mixture over low heat, stirring constantly. Watch for the perfect consistency – it should coat the back of a spoon smoothly.
This indicates the custard is perfectly thickened.
Step 6: Chill the Base
Strain the custard through a fine-mesh sieve to ensure a silky texture.
Allow the mixture to cool completely, then refrigerate for 4 hours. This chilling process helps develop deeper flavors.
Step 7: Churn the Ice Cream
Pour the chilled custard into an ice cream maker. Churn according to the manufacturer’s instructions.
During the final minutes of churning, fold in the macerated strawberries, creating beautiful swirls of fruity goodness.
Step 8: Freeze and Serve
Transfer the freshly churned ice cream to a freezer-safe container.
Let it firm up for at least 2 hours. When ready, scoop and enjoy the creamy, fruity delight you’ve created from scratch.
Tips for Perfect Texture and Flavor in Your Ice Cream

Flavor Variations to Customize Your Ice Cream Experience
Serving Suggestions for Homemade Strawberry Vanilla Ice Cream
How to Store Homemade Ice Cream for Best Results
FAQs
Yes, you can use the no-churn method by whipping heavy cream until stiff peaks form and folding in the sweetened condensed milk and other ingredients, then freezing.
The custard is ready when it coats the back of a spoon and you can draw a line through it with your finger that stays clear without running.
Yes, use 1-2 teaspoons of pure vanilla extract as a substitute for the vanilla bean, adding it after the custard has cooled.
Straining helps remove any potential bits of cooked egg and ensures a smooth, silky texture in your final ice cream.
Print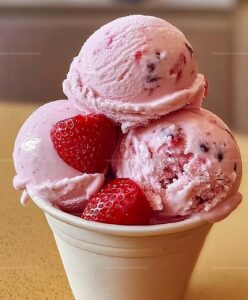
Creamy Homemade Strawberry Vanilla Bean Ice Cream Recipe
- Total Time: 1 hour 15 minutes
- Yield: 6 1x
Description
Smooth homemade strawberry vanilla bean ice cream blends ripe summer strawberries with fragrant Madagascar vanilla. Rich cream and fresh ingredients create a delightful dessert you’ll savor with each elegant spoonful.
Ingredients
Dairy and Eggs:
- 2 cups heavy cream
- 1 cup whole milk
- 4 large egg yolks
Fruits and Sweeteners:
- 2 cups fresh strawberries, hulled and chopped
- 3/4 cup granulated sugar
Flavoring:
- 1 vanilla bean or 2 teaspoons vanilla extract
Instructions
- Macerate strawberries with sugar for 20 minutes, gently crushing to release juices and enhance flavor.
- Create a vanilla-infused cream base by warming milk, heavy cream, and split vanilla bean to just below boiling point, allowing aromatics to develop.
- Whip egg yolks with remaining sugar until mixture transforms into a pale, silky consistency.
- Temper egg mixture by gradually incorporating warm cream, whisking continuously to prevent curdling.
- Return custard to saucepan, cooking on low heat and stirring until mixture thickens and coats the back of a spoon (approximately 170°F).
- Strain custard through fine-mesh sieve to ensure smooth texture, then rapidly cool and refrigerate for 4 hours.
- Process chilled custard in ice cream maker for 20-25 minutes, incorporating macerated strawberries during final churning moments.
- Transfer to freezer-safe container and freeze for minimum 2 hours to allow proper setting and flavor melding.
- Let ice cream soften at room temperature for 5 minutes before serving to achieve optimal scooping consistency.
Notes
- Macerate strawberries thoroughly to release natural sweetness and intensify fruit flavor before mixing into custard base.
- Temper egg yolks carefully by gradually adding hot milk to prevent scrambling and ensure smooth, silky custard texture.
- Use fresh, ripe strawberries at peak season for most vibrant and natural fruit taste in the ice cream.
- Consider dairy-free alternatives by substituting coconut milk and cream for a lighter, plant-based version of this luxurious dessert.
- Prep Time: 45 minutes
- Cook Time: 30 minutes
- Category: Desserts
- Method: Simmering
- Cuisine: American
Nutrition
- Serving Size: 6
- Calories: 322 kcal
- Sugar: 28 g
- Sodium: 45 mg
- Fat: 26 g
- Saturated Fat: 16 g
- Unsaturated Fat: 9 g
- Trans Fat: 0.5 g
- Carbohydrates: 21 g
- Fiber: 2 g
- Protein: 4 g
- Cholesterol: 150 mg
Jack Monroe
Founder & Recipe Innovator
Expertise
Pacific Northwest cuisine, Single-serving recipe development, Sustainable sourcing and cooking, Modern comfort food
Education
Brightwater
Associate of Applied Science in Culinary Arts
Focus: Sustainable cooking, seasonal ingredients, and food systems education
Jack grew up with a fishing rod in one hand and a cast-iron skillet in the other. After graduating from Brightwater: A Center for the Study of Food, he set out to prove that cooking for one could still taste like a feast.
Jack believes that food should feel real: fresh, fearless, and a little wild, just like the rivers he grew up around. For Jack, every single dish is a small adventure, and the best ones are the ones you can cook with heart, not hassle.