
Irresistibly Flaky Apple Pie Bars Recipe for Sweet Comfort
Crafting delectable flaky apple pie bars requires more than just mixing ingredients – it’s about creating a sensory experience that transports you to cozy autumn afternoons.
Sweet apples mingle with buttery pastry, promising a dessert that feels like a warm embrace.
Crisp, golden edges hint at the delightful texture waiting to surprise you.
Homemade baking isn’t complicated when you break down each step with care and patience.
Cinnamon and nutmeg weave their magic, turning simple ingredients into something extraordinary.
Sharing these bars means spreading joy, one delicious bite at a time.
Bake these and watch faces light up with pure happiness.
Flaky Apple Pie Bars That Everyone Will Rave About
All the Ingredients Needed to Create Perfect Apple Pie Bars
Crust Ingredients:Filling Ingredients:Glaze Ingredients:Detailed Instructions for Making Flaky and Delicious Pie Bars
Step 1: Whip Up the Dreamy Crust
Grab your food processor and toss in flour, butter, salt, and sugar. Pulse these ingredients until they look like tiny, delicate crumbs.
Drizzle in ice water slowly, watching the dough magically come together. Split the dough into two equal portions, wrap each in plastic wrap, and let them chill in the refrigerator for half an hour.
Step 2: Create the Luscious Apple Filling
In a large mixing bowl, combine:Let the mixture sit and mingle for 10 minutes, allowing the flavors to dance and develop.
Step 3: Build Your Pie Bar Foundation
Roll out the first portion of chilled dough to perfectly fit a greased 9×13-inch baking pan.
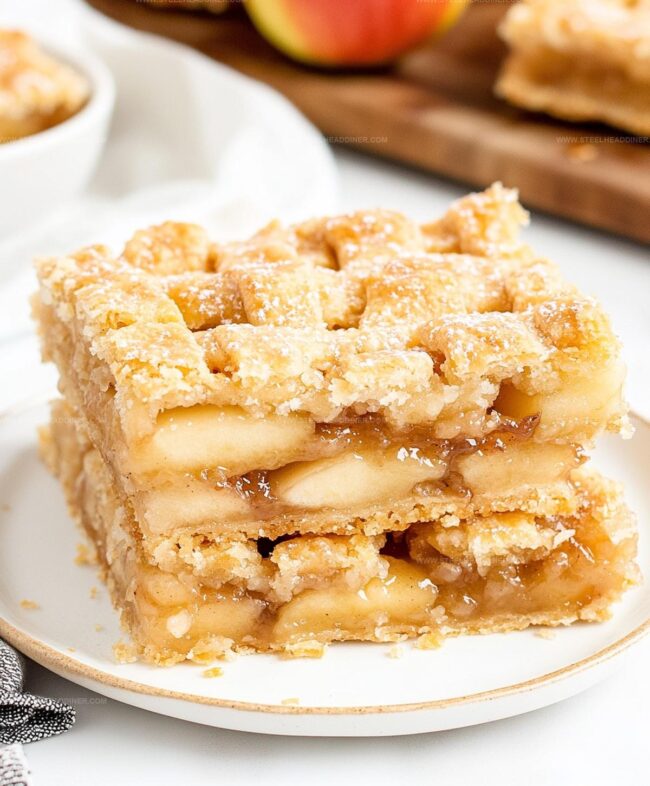
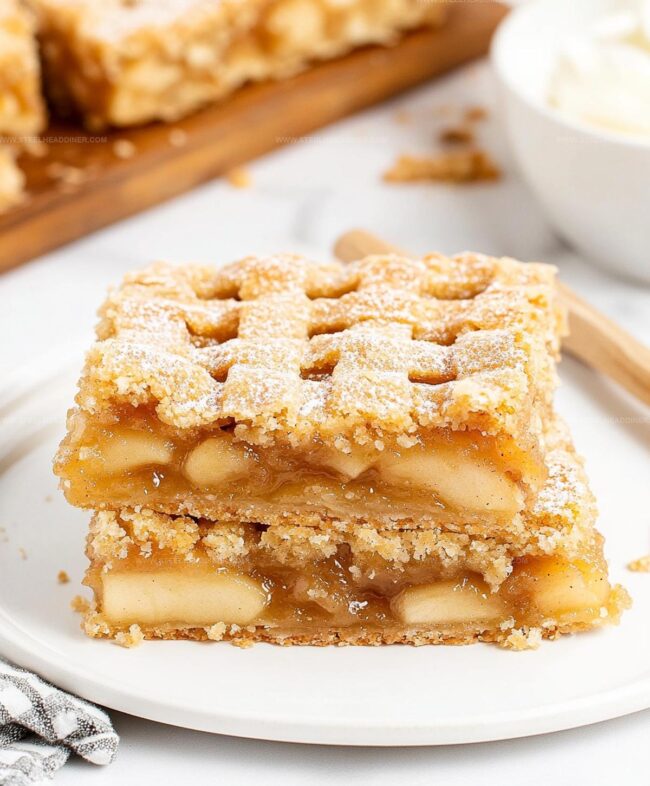
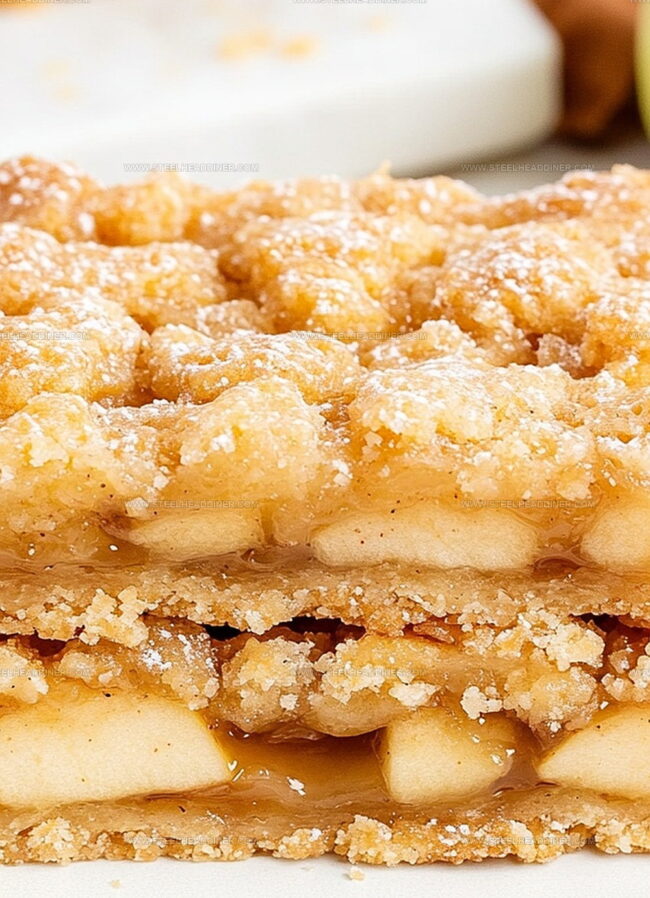
Spread the apple filling evenly across the crust, creating a tempting layer of fruity goodness. Roll out the second dough portion and gently place it on top, carefully sealing the edges to lock in all the deliciousness.
Step 4: Bake to Golden Perfection
Fire up the oven to 375F (190C). Slide in your pie bar creation and bake for 35-40 minutes until it turns a gorgeous golden brown.
The aroma will have everyone drooling!
Step 5: Add the Finishing Sweet Touch
Whisk together powdered sugar, milk, and vanilla until you create a silky smooth glaze.
Once the bars have cooled completely, drizzle this heavenly glaze over the top.
Step 6: Slice and Savor
Cut into beautiful bars and prepare for a flavor explosion.
These apple pie bars are ready to steal the show at any gathering!
Tips to Achieve the Perfect Crust and Flavor in Apple Pie Bars

Creative Twists to Customize Your Apple Pie Bars Experience
What to Serve with Apple Pie Bars for a Complete Treat
Storing Apple Pie Bars So They Stay Fresh and Tasty Longer
FAQs
Granny Smith or Honeycrisp are ideal because they hold their shape and provide a nice balance of tartness and sweetness during baking.
Yes, substitute regular flour with a gluten-free all-purpose flour blend that includes xanthan gum for better texture and binding.
Pre-bake the bottom crust for 10 minutes before adding the apple filling, and ensure your apples aren’t too watery by letting them sit and drain excess liquid before assembling.
A food processor helps create the perfect pie crust, but you can also use a pastry cutter or two knives to blend the dough if you don’t have one.
Print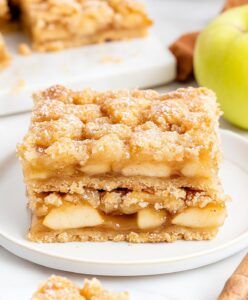
Easy Apple Pie Bars Recipe
- Total Time: 1 hour 35 minutes
- Yield: 12 1x
Description
Homemade Apple Pie Bars bring classic American dessert flavors into a convenient handheld treat. Buttery pastry and cinnamon-spiced apples create a delightful balance you will savor with each delicious bite.
Ingredients
Main Ingredients:
- 4 cups apples, peeled and diced
- 2 1/2 cups all-purpose flour
- 1 cup unsalted butter, cold and cubed
Sweeteners and Spices:
- 1/2 cup granulated sugar
- 1/4 cup granulated sugar
- 1 teaspoon cinnamon
- 1/4 teaspoon nutmeg
- 1 cup powdered sugar
Additional Ingredients:
- 1/2 teaspoon salt
- 1/2 cup ice water
- 1 tablespoon cornstarch
- 1 teaspoon vanilla extract
- 1 tablespoon lemon juice
- 2 tablespoons milk
- 1/2 teaspoon vanilla extract
Instructions
- Craft the pastry base by blending flour, chilled butter, salt, and sugar in a food processor until texture resembles coarse crumbs. Gradually introduce ice water until dough coheres.
- Divide dough into two equal portions, encase in plastic wrap, and refrigerate for half an hour to firm up the texture.
- Create apple filling by combining sliced apples with sugar, aromatic spices, cornstarch, vanilla extract, and lemon juice. Allow mixture to macerate for 10 minutes, enabling flavors to meld.
- Preheat oven to 375°F (190°C). Retrieve chilled dough and roll first portion to fit a greased 9×13-inch baking pan, ensuring even coverage.
- Distribute apple mixture uniformly across the bottom crust, maintaining consistent thickness.
- Roll second dough portion and carefully layer atop the filling, crimping edges to seal and prevent leakage.
- Create decorative venting by piercing top crust with small knife slits to release steam during baking.
- Bake for 35-40 minutes until golden brown and filling bubbles slightly around edges.
- Remove from oven and allow complete cooling on wire rack for optimal setting.
- Prepare glaze by whisking powdered sugar with milk and vanilla until silky smooth.
- Drizzle glaze artfully across cooled bars, allowing it to set for several minutes before slicing.
- Cut into rectangular portions and serve at room temperature.
Notes
- Chill dough thoroughly to ensure maximum flakiness and prevent shrinking during baking.
- Let apple mixture rest to release excess moisture, preventing soggy bottom crust.
- Use cold butter and ice water for creating ultra-crispy, tender pastry layers.
- Experiment with different apple varieties like Honeycrisp or Granny Smith for varied texture and sweetness.
- Prep Time: 55 minutes
- Cook Time: 40 minutes
- Category: Desserts, Snacks
- Method: Baking
- Cuisine: American
Nutrition
- Serving Size: 12
- Calories: 230 kcal
- Sugar: 14 g
- Sodium: 90 mg
- Fat: 10 g
- Saturated Fat: 6 g
- Unsaturated Fat: 4 g
- Trans Fat: 0.2 g
- Carbohydrates: 33 g
- Fiber: 1.5 g
- Protein: 2 g
- Cholesterol: 30 mg
Jack Monroe
Founder & Recipe Innovator
Expertise
Pacific Northwest cuisine, Single-serving recipe development, Sustainable sourcing and cooking, Modern comfort food
Education
Brightwater
Associate of Applied Science in Culinary Arts
Focus: Sustainable cooking, seasonal ingredients, and food systems education
Jack grew up with a fishing rod in one hand and a cast-iron skillet in the other. After graduating from Brightwater: A Center for the Study of Food, he set out to prove that cooking for one could still taste like a feast.
Jack believes that food should feel real: fresh, fearless, and a little wild, just like the rivers he grew up around. For Jack, every single dish is a small adventure, and the best ones are the ones you can cook with heart, not hassle.