
The Best No-Bake Chocolate Biscuit Cake Recipe for Sweet Moments
Chocolate lovers rejoice with this decadent no-bake chocolate biscuit cake that promises pure indulgence.
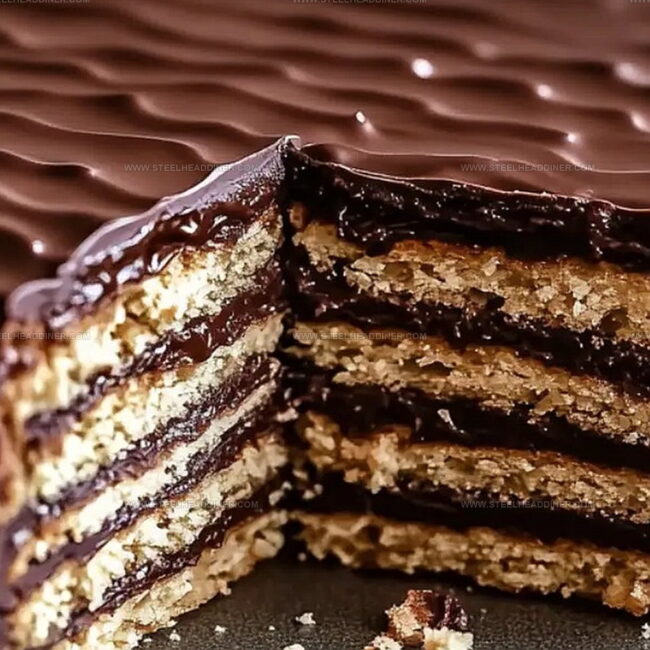
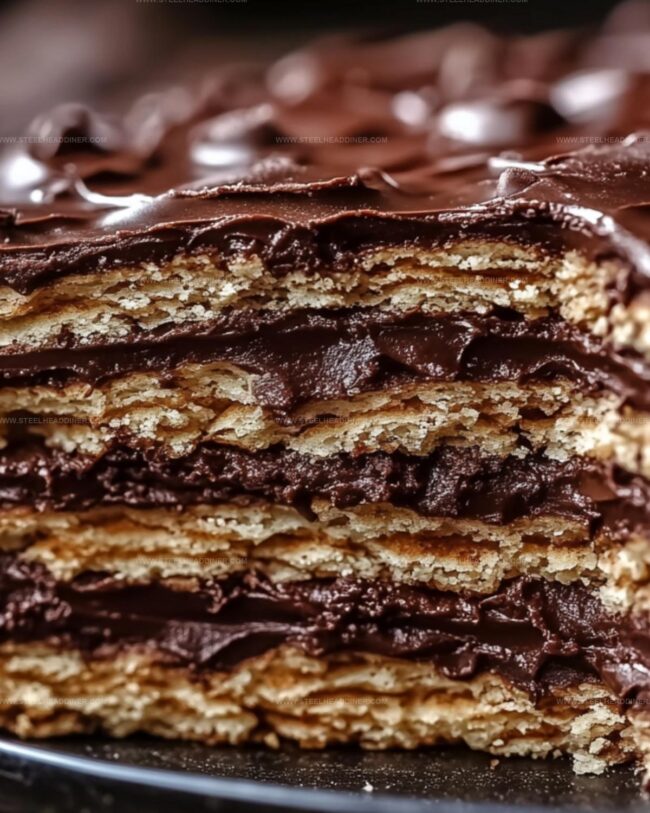
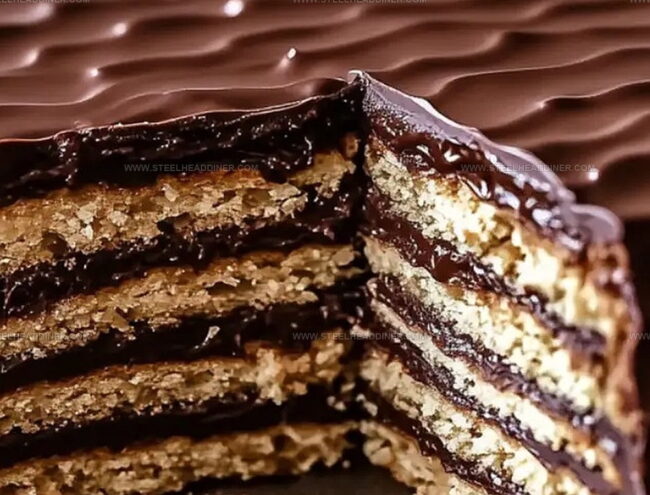
Crushing crisp biscuits into a luscious no-bake chocolate biscuit cake creates a dessert that melts in your mouth.
Each layer bursts with rich, creamy chocolate and delightful crunch.
The recipe demands minimal effort but delivers maximum flavor and satisfaction.
Smooth chocolate coating blankets crunchy biscuit layers, creating a dessert that looks impressive and tastes incredible.
This no-fuss treat comes together quickly, making it perfect for spontaneous sweet cravings.
Prepare to dazzle everyone with this irresistible chocolatey delight that disappears faster than you can slice it.
Secrets Behind No-Bake Chocolate Biscuit Cake
Ingredients For Chocolate Biscuit Cake
Base Ingredients:Dairy Components:Preparation Ingredients:Clear Steps For No-Bake Biscuit Cake
Step 1: Crush Biscuits Into Tasty Pieces
Grab your favorite biscuits and break them into chunky, irregular pieces that will create exciting texture in your cake. Use your hands to crumble them, making each piece a unique size that adds character to the dessert.
Step 2: Prepare Your Mixing Space
Choose a spacious mixing bowl and grab your essential tools: a spatula, whisk, or mixing spoon. If using a loaf pan, lightly grease it or line with parchment paper.
For a roll method, prepare aluminum foil ready for shaping.
Step 3: Create Chocolate Magic Mixture
Melt butter gently in a saucepan or microwave.
Add these ingredients:Whisk everything together until the mixture becomes smooth and glossy, creating a rich chocolate base that will bind your cake.
Step 4: Combine Biscuits With Chocolate Goodness
Pour the chocolate mixture over the broken biscuit pieces.
Gently fold and mix until every piece gets coated with the decadent chocolate sauce. Ensure each biscuit chunk is completely embraced by the chocolatey mixture.
Step 5: Shape Your Delightful Dessert
Transfer the mixture into your prepared pan or shape it into a log using aluminum foil. Press down firmly to eliminate air pockets and create a compact, delicious treat.
Step 6: Chill And Set
Place your creation in the freezer for 2-3 hours. The cake will transform from a soft mixture to a firm, sliceable dessert that’s ready to be enjoyed.
Step 7: Slice And Serve
Remove from freezer, slice into beautiful pieces, and serve immediately. Store any remaining slices in the freezer for future sweet moments.
Tips To Get No-Bake Biscuit Cake Perfect
Delicious Variations For Biscuit Cake
Pairing Options For Chocolate Biscuit Cake
Storage Tips For No-Bake Biscuit Cake
FAQs
Absolutely! Any plain or sweet biscuits like graham crackers, digestive biscuits, or even chocolate chip cookies work well. Just ensure they’re dry and can hold their shape when mixed with the chocolate mixture.
Yes! This no-bake recipe is perfect for children. They can help break biscuits, mix ingredients, and shape the cake. Adult supervision is recommended for handling melted butter and measuring ingredients.
When stored in an airtight container in the freezer, this cake can last up to 2-3 weeks. Just let it sit at room temperature for a few minutes before serving to soften slightly.
Print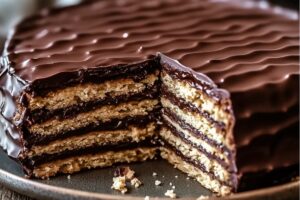
Easy No-Bake Chocolate Biscuit Cake Recipe
- Total Time: 15 minutes
- Yield: 8 1x
Description
Chocolate lovers rejoice over this classic British No-Bake Chocolate Biscuit Cake, a simple dessert blending rich cocoa with crisp biscuits. Sweet memories of afternoon tea come alive in this effortless treat you’ll want to share with friends and family.
Ingredients
Main Ingredients:
- 2 packs Marie biscuits (36 pieces, 180 grams)
- 6 tablespoons cocoa powder
- 1/2 can (200 grams / 7 ounces) sweetened condensed milk
Binding Ingredients:
- 1/2 cup (100 grams) butter, melted
Preparation Ingredients:
- None
Instructions
- Crush biscuits into rustic, uneven fragments, ensuring varied textures for a more interesting bite.
- Prepare a loaf pan by lightly coating with butter or line with parchment paper, creating a smooth surface for easy removal.
- Melt butter in a spacious mixing bowl, then whisk in rich cocoa powder and velvety condensed milk until the mixture transforms into a glossy, uniform consistency.
- Gently incorporate the biscuit chunks into the chocolate base, stirring carefully to ensure each piece is generously coated with the decadent mixture.
- Transfer the mixture into the prepared pan, pressing firmly and evenly to eliminate air pockets and create a compact structure.
- Alternatively, use aluminum foil to shape the mixture into a cylindrical log, rolling and twisting the edges to secure the form.
- Place the pan or log in the freezer for 2-3 hours, allowing the cake to solidify and develop a rich, fudgy texture.
- Once completely set, remove from freezer and slice into clean, precise portions using a sharp knife.
- Serve immediately or store remaining slices in an airtight container in the freezer for future enjoyment.
Notes
- Customize biscuit size by breaking them into smaller or larger chunks for varying textures and bite experiences.
- Choose high-quality cocoa powder for richer, more intense chocolate flavor that elevates the entire dessert.
- Try different biscuit types like graham crackers, digestive biscuits, or chocolate cookies to create unique variations of the cake.
- Consider adding optional mix-ins like chopped nuts, dried fruits, or chocolate chips to enhance flavor complexity and provide delightful unexpected crunch.
- Prep Time: 15 minutes
- Cook Time: 0 minutes
- Category: Desserts, Snacks
- Method: Freezing
- Cuisine: British
Nutrition
- Serving Size: 8
- Calories: 289
- Sugar: 20 g
- Sodium: 45 mg
- Fat: 14 g
- Saturated Fat: 8 g
- Unsaturated Fat: 5 g
- Trans Fat: 0.2 g
- Carbohydrates: 37 g
- Fiber: 3 g
- Protein: 4 g
- Cholesterol: 30 mg
Maya Thompson
Culinary Content Creator & Nutrition Enthusiast
Expertise
Healthy single-serving recipes, Meal prepping for individuals, Integrating nutrition into everyday cooking, Vegetarian and plant-based cuisine
Education
The Chef’s Academy at Harrison College
Associate of Applied Science in Culinary Arts
Focus: Nutrition, meal planning, and culinary techniques for healthy living.
Maya found her passion in the kitchen by mixing good food with good energy. After earning her culinary degree at The Chef’s Academy at Harrison College, she made it her mission to keep cooking simple, wholesome, and packed with flavor.
At Steelhead Diner, Maya shares easy, healthy recipes built for real life. For Maya, great food seems like a celebration of everyday moments, made better one fresh bite at a time.