
Spooky-Sweet Halloween Chocolate Cookies Recipe for Treat Lovers
Spooky spirits dance through my kitchen whenever I whip up these delightful Halloween chocolate cookies that spark pure joy.
Sweet aromas of cocoa and warm spices fill every corner of my home.
Dark chocolate chips melt into ghostly shapes against a rich background.
Crisp edges crackle with festive magic while soft centers promise indulgent comfort.
My grandmother’s secret touch involves a pinch of cinnamon that adds mysterious depth.
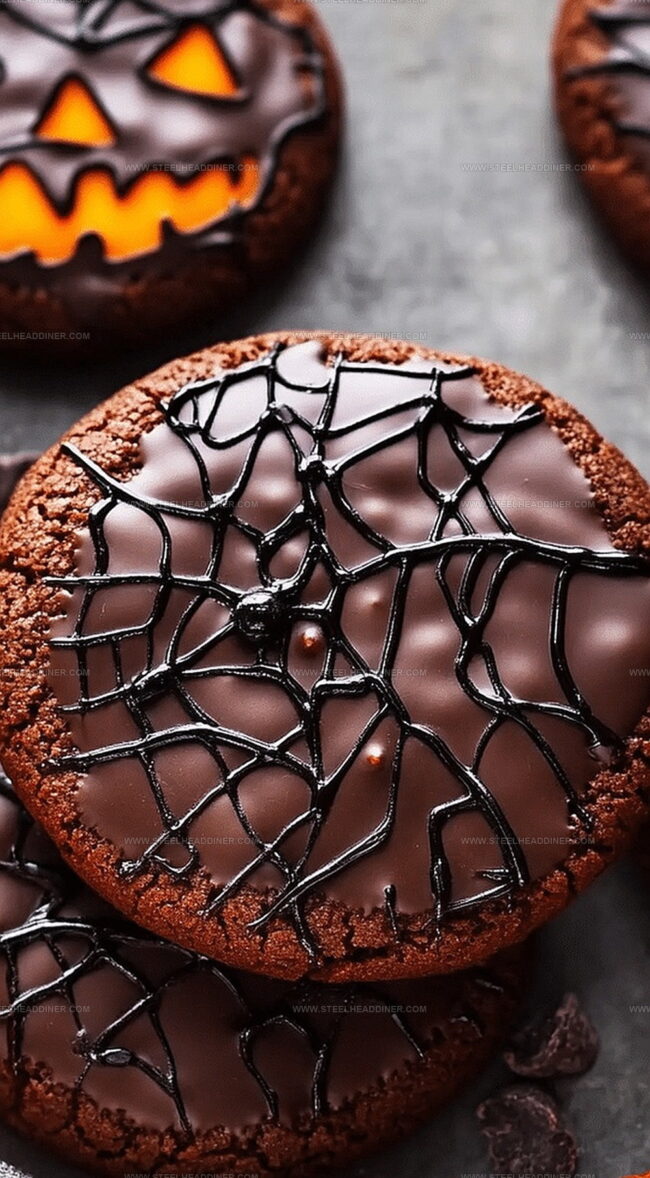
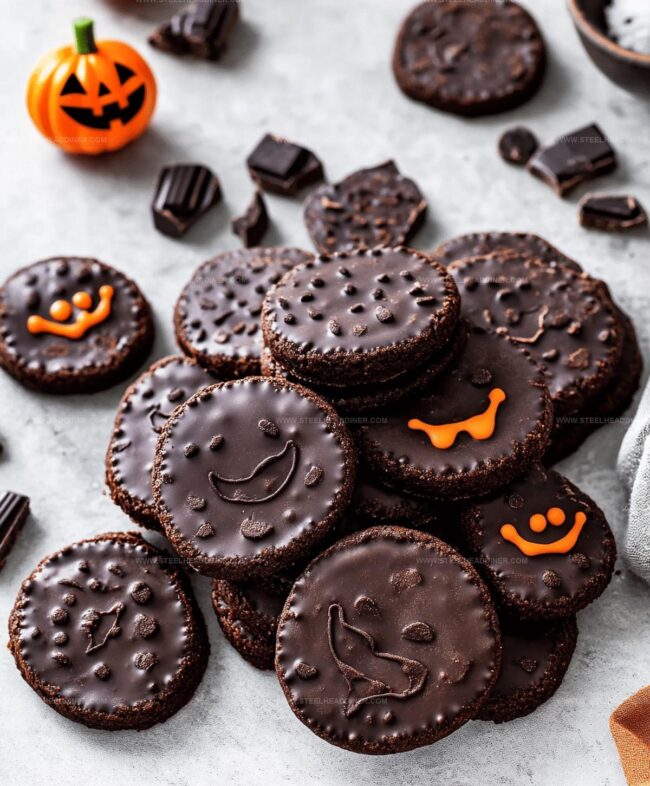
Kids absolutely adore decorating these treats with candy eyes and orange sprinkles.
Baking becomes an adventure when you unleash creativity with these wickedly delicious morsels.
Halloween Chocolate Cookies Brings Spooky Joy
Get Ready for Halloween Chocolate Cookies
For the Base:For the Dry Ingredients:For the Mix-Ins and Decorations:Steps to Create Halloween Chocolate Cookies at Home
Step 1: Prepare Baking Station
Set up your oven at 350°F. Line a baking sheet with parchment paper for easy cookie removal and clean-up.
Step 2: Create Creamy Sugar Base
In a large mixing bowl, blend together:Whip until the mixture becomes light and fluffy with a smooth texture.
Step 3: Incorporate Wet Ingredients
Add eggs one at a time, mixing thoroughly after each addition.
Pour in vanilla extract and blend until everything is perfectly combined.
Step 4: Mix Dry Ingredients
In a separate bowl, combine:Whisk these ingredients until they are evenly distributed.
Step 5: Combine Wet and Dry Mixtures
Gradually fold dry ingredients into the wet mixture. Stir until a smooth, consistent cookie dough forms.
Step 6: Add Chocolate Excitement
Gently fold chocolate chips into the dough, ensuring they are evenly spread throughout.
Step 7: Shape Spooky Cookies
Roll the dough into small balls, about 1-inch in diameter.
Place them on the prepared baking sheet with enough space between each cookie.
Step 8: Decorate with Halloween Spirit
Slightly flatten each cookie.
Sprinkle Halloween-themed decorations or candy on top for a festive touch.
Step 9: Bake to Perfection
Place the baking sheet in the preheated oven.
Bake for 10-12 minutes until cookie edges are set but centers remain soft and gooey.
Step 10: Cool and Serve
Let cookies rest on the baking sheet for 5 minutes.
Transfer to a wire rack to cool completely. Enjoy your spooky chocolate treats!
Suggestions for Halloween Chocolate Cookies Success

Festive Variations for Halloween Chocolate Cookies
Show Off Halloween Chocolate Cookies at Your Party
Storing Halloween Chocolate Cookies for the Season
FAQs
Yes, you can substitute chocolate chips with chopped chocolate bars, dark chocolate, milk chocolate, or even white chocolate to customize the flavor.
Chill the dough for 30 minutes before baking, and ensure your butter isn’t too soft. This helps maintain the cookie’s shape and prevents excessive spreading.
Absolutely! Kids will love rolling the dough into balls, adding Halloween sprinkles, and watching them transform in the oven. It’s a fun and easy baking activity.
The Halloween sprinkles or candy decorations on top give these chocolate cookies a spooky and celebratory touch, perfect for the holiday season.
Print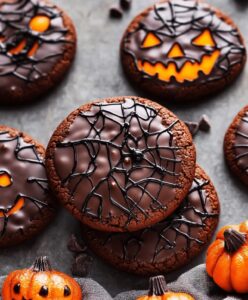
Halloween Chocolate Cookies Recipe
- Total Time: 32 minutes
- Yield: 24 1x
Description
Spooky halloween chocolate cookies offer a delightful blend of rich cocoa and festive spirit. Chocolate lovers can savor these eerie treats that bring seasonal excitement to your dessert table.
Ingredients
- 1 cup unsalted butter (softened)
- 1 cup granulated sugar
- 1 cup brown sugar (packed)
- 2 large eggs
- 2 tsps vanilla extract
- 2 1/4 cups (280 g) all-purpose flour
- 3/4 cup (75 g) unsweetened cocoa powder
- 1 tsp baking soda
- 1/2 tsp salt
- 1 cup chocolate chips
- Halloween-themed sprinkles
- candy eyes
- M&Ms
Instructions
- Heat oven to 350F (175C) and line baking sheet with parchment paper for non-stick surface.
- In mixing bowl, cream butter with granulated and brown sugars until mixture becomes airy and pale.
- Incorporate eggs individually, then blend in vanilla extract thoroughly.
- Separately combine flour, cocoa powder, baking soda, and salt through whisking to ensure even distribution.
- Gradually integrate dry ingredients into wet mixture, stirring until uniform consistency develops.
- Gently fold chocolate chips throughout dough, distributing evenly.
- Form dough into 1-inch spherical shapes, positioning them with adequate spacing on prepared sheet.
- Press cookies slightly flat and decorate tops with festive Halloween sprinkles or themed candy decorations.
- Bake 10-12 minutes, watching for set edges while maintaining soft, tender centers.
- Allow cookies to rest on baking sheet for 5 minutes to stabilize structure, then transfer to wire cooling rack for complete cooling.
Notes
- Make extra crispy edges by chilling dough for 30 minutes before baking, which prevents excessive spreading and creates a more structured cookie.
- Swap chocolate chips with festive Halloween candy pieces like orange and black M&Ms or chopped Reese’s for a spooky themed twist.
- Use gluten-free flour blend and dairy-free butter alternatives to accommodate guests with dietary restrictions without compromising rich chocolate flavor.
- Enhance moisture by adding 2 tablespoons of sour cream or Greek yogurt to the wet ingredients, ensuring soft and tender cookie texture.
- Prep Time: 20 minutes
- Cook Time: 12 minutes
- Category: Desserts, Snacks
- Method: Baking
- Cuisine: American
Nutrition
- Serving Size: 24
- Calories: 180
- Sugar: 14 g
- Sodium: 70 mg
- Fat: 9 g
- Saturated Fat: 5 g
- Unsaturated Fat: 4 g
- Trans Fat: 0.1 g
- Carbohydrates: 24 g
- Fiber: 2 g
- Protein: 2 g
- Cholesterol: 25 mg
Jack Monroe
Founder & Recipe Innovator
Expertise
Pacific Northwest cuisine, Single-serving recipe development, Sustainable sourcing and cooking, Modern comfort food
Education
Brightwater
Associate of Applied Science in Culinary Arts
Focus: Sustainable cooking, seasonal ingredients, and food systems education
Jack grew up with a fishing rod in one hand and a cast-iron skillet in the other. After graduating from Brightwater: A Center for the Study of Food, he set out to prove that cooking for one could still taste like a feast.
Jack believes that food should feel real: fresh, fearless, and a little wild, just like the rivers he grew up around. For Jack, every single dish is a small adventure, and the best ones are the ones you can cook with heart, not hassle.