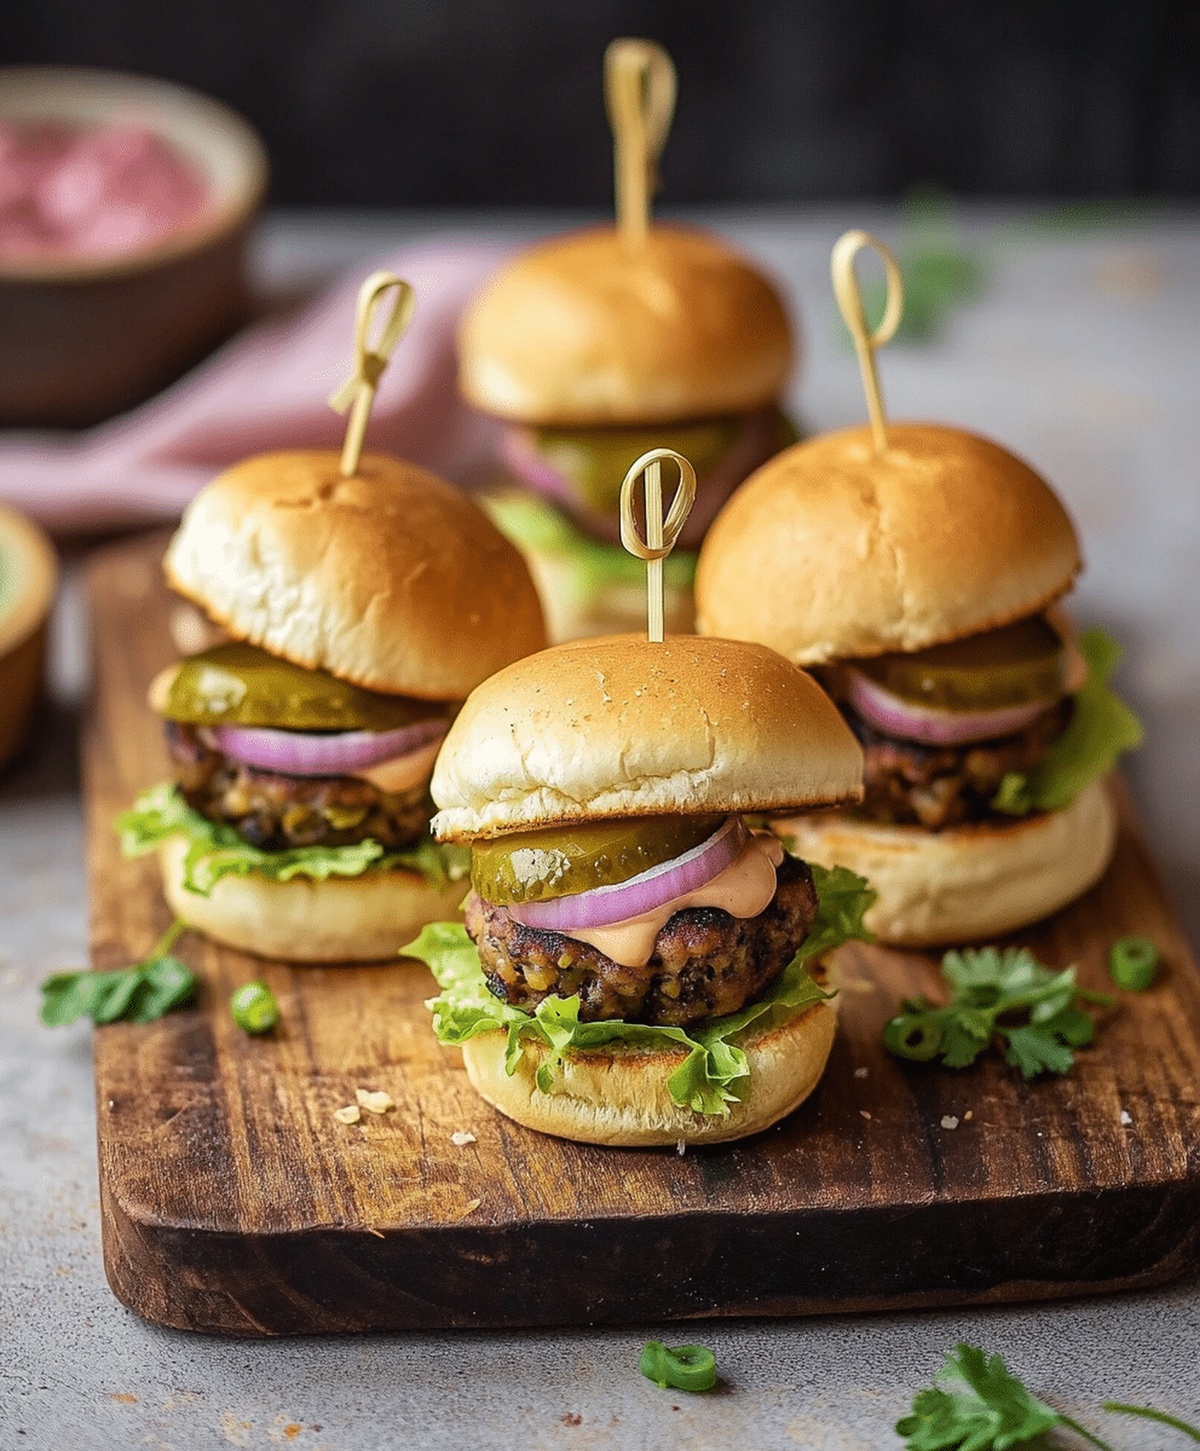
Easy Mini Sliders Recipe: Tasty Bite-Sized Burger Joy
Crafting the perfect mini sliders brings a burst of flavor to any casual gathering.
Small sandwiches pack tremendous taste into bite-sized delights that everyone adores.
These compact burgers deliver maximum satisfaction with minimal effort.
Friends and colleagues will marvel at your culinary skills when you serve these delectable mini creations.
Juicy meat nestled between soft buns creates an irresistible combination that sparks conversation.
Each slider becomes a canvas for your creativity, allowing endless variations of toppings and seasonings.
You’ll want to experiment and make these miniature masterpieces your signature dish.
What Makes Mini Sliders Shine
What You Need For Mini Sliders
For the Meat:For the Seasonings:For the Assembly:Optional Toppings:How To Cook Mini Sliders

Step 1: Blend Flavor-Packed Beef Mixture
In a spacious mixing bowl, combine ground beef with garlic powder, onion powder, salt, and pepper. Gently mix the ingredients using your hands to ensure even distribution of seasonings without overworking the meat, which helps maintain a tender texture.
Step 2: Shape Perfect Petite Patties
Divide the seasoned beef mixture into 6 equal portions. Carefully form each portion into small, compact patties with uniform thickness.
Use your fingertips to create a slight indentation in the center of each patty, which helps them cook evenly and prevents bulging.
Step 3: Sizzle and Cook Patties
Preheat a skillet over medium heat.
Carefully place the beef patties into the hot pan, allowing them to cook without moving them around. Sear each side for 3-4 minutes, ensuring the internal temperature reaches 160°F for food safety.
Step 4: Melt Cheesy Goodness
During the final minute of cooking, top each patty with a slice of cheese. Let the cheese melt slightly, creating a creamy, luxurious layer that adds extra richness to the sliders.
Step 5: Toast Golden Buns
While the patties are cooking, lightly toast the slider buns in a separate pan or toaster until they achieve a delicate golden-brown color and develop a slight crispness.
Step 6: Assemble and Serve Mouthwatering Sliders
Carefully place each cheesy patty onto a toasted bun.
Customize with your favorite toppings such as:Serve the sliders immediately while they’re warm and enjoy the burst of flavors in every bite.
Handy Insights For Mini Sliders
Taste Tweaks For Mini Sliders
Best Pairings With Mini Sliders
Keeping Mini Sliders Fresh Longer
FAQs
Gently press a small dimple in the center of each patty with your thumb before cooking, which helps the sliders maintain their shape and prevents them from puffing up in the middle.
Yes, you can form the patties ahead of time and store them in the refrigerator, covered, for up to 24 hours before cooking to save preparation time.
Use a meat thermometer to ensure the internal temperature reaches 160°F (71°C), which indicates the ground beef is safely cooked through.
Print
Mini Sliders Recipe
- Total Time: 20 minutes
- Yield: 6 1x
Description
Mini sliders from Mexico blend zesty jalapeño-infused beef with tangy lime crema and fresh cilantro. Quick preparation and bold flavors make these bite-sized sandwiches perfect for gatherings you’ll enjoy sharing with friends.
Ingredients
- 1 lb (454 g) ground beef
- 6 slider buns
- 6 slices cheese (optional)
- 1 tsp (5 ml) garlic powder
- 1 tsp (5 ml) onion powder
- Salt, to taste
- Pepper, to taste
- Toppings: lettuce
- Toppings: tomato
- Toppings: pickles
- Toppings: ketchup
- Toppings: mustard
Instructions
- Combine ground beef with garlic powder, onion powder, salt, and pepper in a mixing bowl, gently blending ingredients to maintain meat’s tenderness.
- Carefully partition the seasoned meat mixture into 6 uniform portions, molding each into compact, round patties with gentle pressure.
- Preheat a skillet to medium heat for approximately 2-3 minutes, ensuring even cooking surface temperature.
- Place patties into the heated skillet, cooking for 3-4 minutes on the first side until a golden-brown crust develops.
- Flip patties and cook an additional 2-3 minutes, monitoring internal temperature to reach 160°F for food safety.
- During the final minute of cooking, layer a cheese slice atop each patty, allowing it to melt smoothly.
- While meat cooks, lightly toast slider buns in a separate pan or toaster until edges become crisp and golden.
- Arrange cooked patties onto toasted buns, adding preferred condiments like lettuce, tomato, pickles, or special sauce.
- Serve immediately while patties remain hot and cheese is perfectly melted.
Notes
- Choose high-quality ground beef with a fat content around 80/20 for juicier, more flavorful sliders that won’t dry out during cooking.
- Season meat mixture gently to avoid overworking the beef, which can make patties tough and dense.
- Create a small dimple in the center of each patty to prevent them from puffing up and ensure even cooking.
- Try different cheese types like sharp cheddar, pepper jack, or blue cheese for unique flavor profiles.
- For gluten-free options, swap traditional slider buns with lettuce wraps or gluten-free mini rolls.
- Keep patties uniform in size to guarantee consistent cooking times and prevent some sliders from being over or undercooked.
- Prep Time: 10 minutes
- Cook Time: 10 minutes
- Category: Lunch, Dinner, Appetizer, Snacks
- Method: Frying
- Cuisine: American
Nutrition
- Serving Size: 6
- Calories: 330 kcal
- Sugar: 3 g
- Sodium: 550 mg
- Fat: 18 g
- Saturated Fat: 7 g
- Unsaturated Fat: 8 g
- Trans Fat: 0.5 g
- Carbohydrates: 22 g
- Fiber: 1.5 g
- Protein: 20 g
- Cholesterol: 55 mg
Maya Thompson
Culinary Content Creator & Nutrition Enthusiast
Expertise
Healthy single-serving recipes, Meal prepping for individuals, Integrating nutrition into everyday cooking, Vegetarian and plant-based cuisine
Education
The Chef’s Academy at Harrison College
Associate of Applied Science in Culinary Arts
Focus: Nutrition, meal planning, and culinary techniques for healthy living.
Maya found her passion in the kitchen by mixing good food with good energy. After earning her culinary degree at The Chef’s Academy at Harrison College, she made it her mission to keep cooking simple, wholesome, and packed with flavor.
At Steelhead Diner, Maya shares easy, healthy recipes built for real life. For Maya, great food seems like a celebration of everyday moments, made better one fresh bite at a time.