
Heavenly No Bake Eclair Cake Recipe: Effortless Sweet Magic
Delightful no bake eclair cake promises a creamy, dreamy dessert that skips the oven entirely.
Cool kitchens welcome this simple treat without stress or complicated techniques.
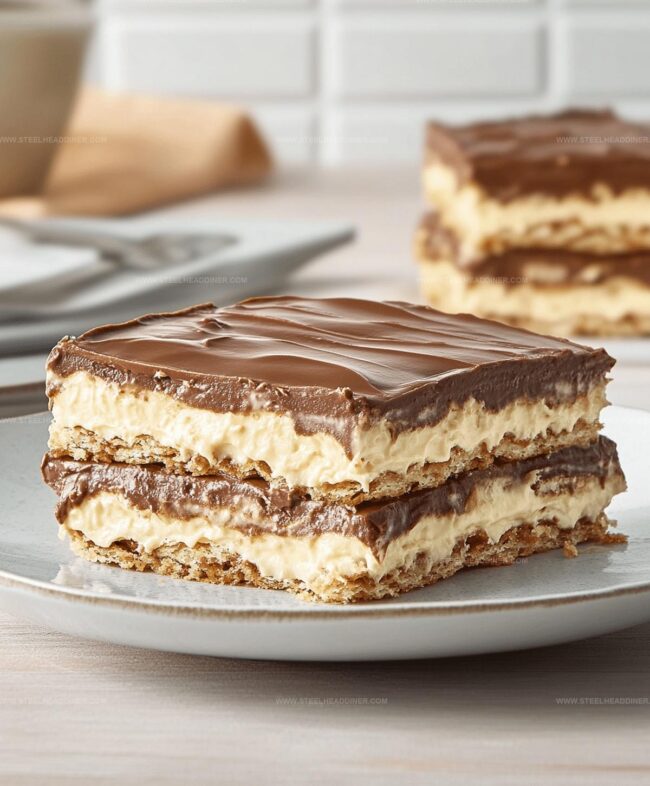
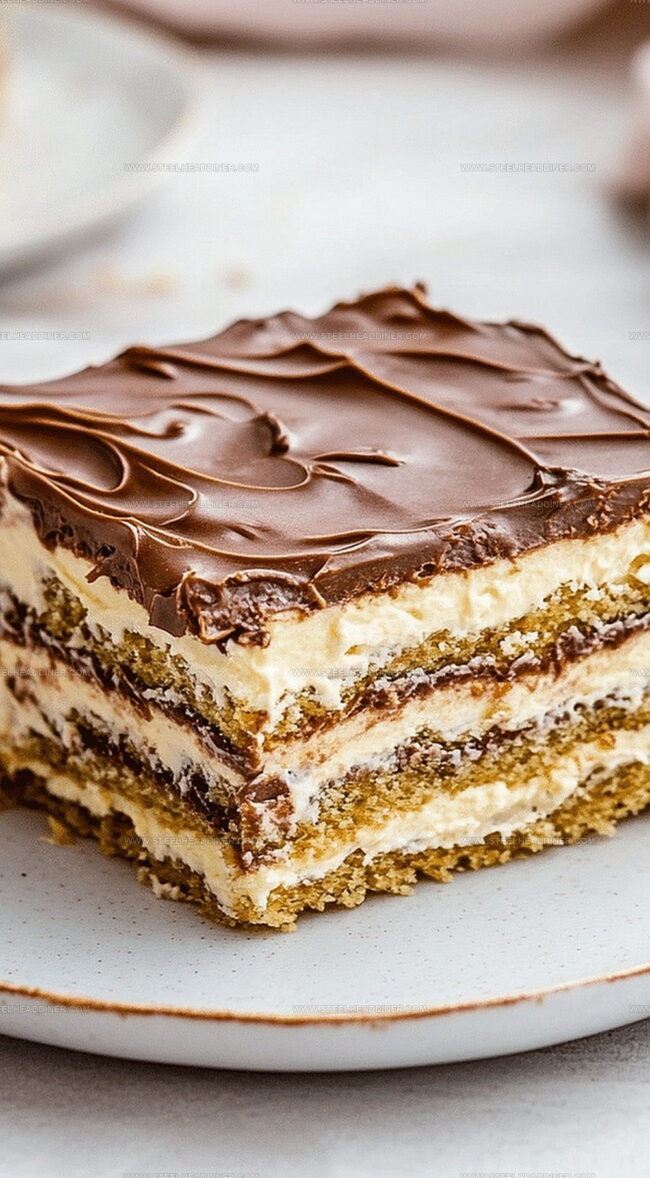
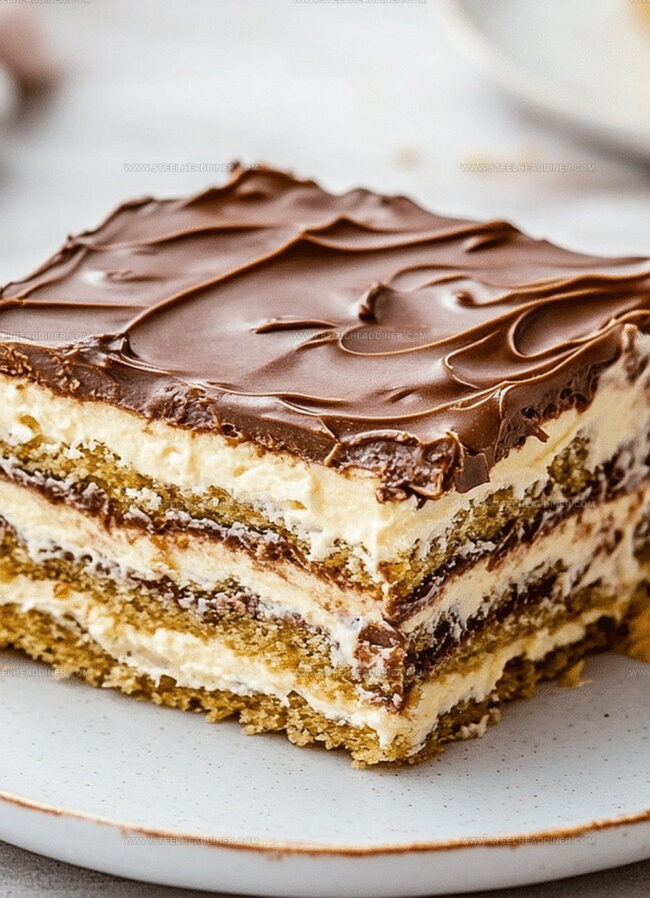
Layers of graham crackers, pudding, and whipped topping create magic in minutes.
Chocolate lovers will swoon over the rich, decadent finish that feels like a bakery-quality indulgence.
Minimal ingredients mean maximum flavor with zero complicated steps.
Refrigeration does all the hard work while you relax and anticipate a spectacular dessert.
You can impress everyone without breaking a sweat or spending hours in the kitchen.
Dive into this effortless recipe and watch smiles bloom around your table.
What Makes No Bake Eclair Cake So Tasty
Ingredients Needed for No Bake Eclair Cake
For the Base:For the Filling:For the Topping:How to Prepare No Bake Eclair Cake

Step 1: Whip Up Creamy Pudding Base
In a mixing bowl, prepare the pudding mix by blending it with milk until smooth and creamy. Gently fold in the whipped topping, creating a light and fluffy mixture that will be the heart of your no-bake dessert.
Step 2: Create First Delicious Layer
Grab a rectangular baking dish and start your first layer by carefully arranging graham crackers to cover the bottom completely. Spoon half of the pudding mixture evenly over the crackers, ensuring a smooth and even spread.
Step 3: Build Another Tasty Layer
Repeat the layering process by adding another set of graham crackers on top of the pudding mixture. Pour the remaining pudding mixture over these crackers, creating a second delightful layer that adds richness to the dessert.
Step 4: Crown with Chocolate Frosting
Place the final layer of graham crackers on top of the pudding. Take your chocolate frosting and spread it generously across the surface, creating a decadent chocolatey topping that will make your dessert irresistible.
Step 5: Chill and Set
Carefully transfer the assembled dessert to the refrigerator. Let it rest and set for at least 4 hours, though overnight is even better.
This chilling time allows the flavors to meld and the texture to become perfectly soft and creamy.
Step 6: Serve and Enjoy
When ready to serve, slice the eclair cake into neat squares.
Serve chilled and watch as everyone delights in this easy, no-bake treat that looks and tastes like you spent hours in the kitchen.
Tips for No Bake Eclair Cake Success
Alternative Versions of No Bake Eclair Cake
Serving Suggestions for No Bake Eclair Cake
Storage Tips for No Bake Eclair Cake
FAQs
The main ingredients are graham crackers, instant vanilla pudding mix, milk, whipped topping, and chocolate frosting.
While pudding mix is traditional, you can substitute with homemade vanilla custard or vanilla pudding from scratch for a similar creamy texture.
The No Bake Eclair Cake will stay fresh for 3-4 days when stored in an airtight container in the refrigerator.
Yes, this is an easy, no-bake dessert that kids can help prepare by layering ingredients and spreading frosting with minimal adult supervision.
Print
No Bake Eclair Cake Recipe
- Total Time: 15 minutes
- Yield: 12 1x
Description
Classic no bake eclair cake blends creamy pudding, graham crackers, and chocolate frosting into a delightful dessert. Cool layers meld together for an irresistible treat you’ll want to share with friends and family.
Ingredients
- 1 box graham crackers
- 2 (3.4 oz) packages instant vanilla pudding mix
- 3 cups milk
- 1 (8 oz) container whipped topping (like Cool Whip)
- 1 (16 oz) container chocolate frosting
Instructions
- Whisk pudding mix with milk according to package directions, then gently incorporate whipped topping to create a smooth, creamy filling.
- Arrange a single layer of graham crackers across the bottom of a rectangular dish, ensuring complete coverage.
- Carefully spread half of the pudding mixture evenly over the graham cracker base, making sure to reach all corners.
- Add another layer of graham crackers directly on top of the pudding layer, creating a uniform surface.
- Pour the remaining pudding mixture over the second graham cracker layer, smoothing it with a spatula for a consistent texture.
- Complete the dessert with a final layer of graham crackers, creating a neat top surface.
- Generously coat the entire top layer with chocolate frosting, ensuring complete and even coverage.
- Chill in the refrigerator for a minimum of 4 hours, preferably overnight, to allow flavors to meld and texture to set.
- When ready to serve, cut into clean squares and enjoy the cool, creamy dessert straight from the refrigerator.
Notes
- Swap graham crackers with gluten-free alternatives like gluten-free vanilla wafers for those with dietary restrictions.
- Reduce sugar content by using sugar-free pudding mix and low-fat whipped topping for a lighter version.
- Enhance flavor by adding a splash of vanilla extract or a sprinkle of cinnamon to the pudding mixture for extra depth.
- Customize toppings by drizzling caramel sauce or sprinkling chopped nuts over the chocolate frosting for added texture and taste.
- Prep Time: 15 minutes
- Cook Time: 0 minutes
- Category: Desserts
- Method: None
- Cuisine: American
Nutrition
- Serving Size: 12
- Calories: 250 kcal
- Sugar: 20 g
- Sodium: 150 mg
- Fat: 10 g
- Saturated Fat: 5 g
- Unsaturated Fat: 4 g
- Trans Fat: 0.1 g
- Carbohydrates: 35 g
- Fiber: 1 g
- Protein: 3 g
- Cholesterol: 15 mg
Maya Thompson
Culinary Content Creator & Nutrition Enthusiast
Expertise
Healthy single-serving recipes, Meal prepping for individuals, Integrating nutrition into everyday cooking, Vegetarian and plant-based cuisine
Education
The Chef’s Academy at Harrison College
Associate of Applied Science in Culinary Arts
Focus: Nutrition, meal planning, and culinary techniques for healthy living.
Maya found her passion in the kitchen by mixing good food with good energy. After earning her culinary degree at The Chef’s Academy at Harrison College, she made it her mission to keep cooking simple, wholesome, and packed with flavor.
At Steelhead Diner, Maya shares easy, healthy recipes built for real life. For Maya, great food seems like a celebration of everyday moments, made better one fresh bite at a time.