The Ultimate Peanut Butter Butterfinger Cheesecake Recipe Awaits
Sweet tooths go wild for this decadent peanut butter Butterfinger cheesecake that promises pure indulgence.
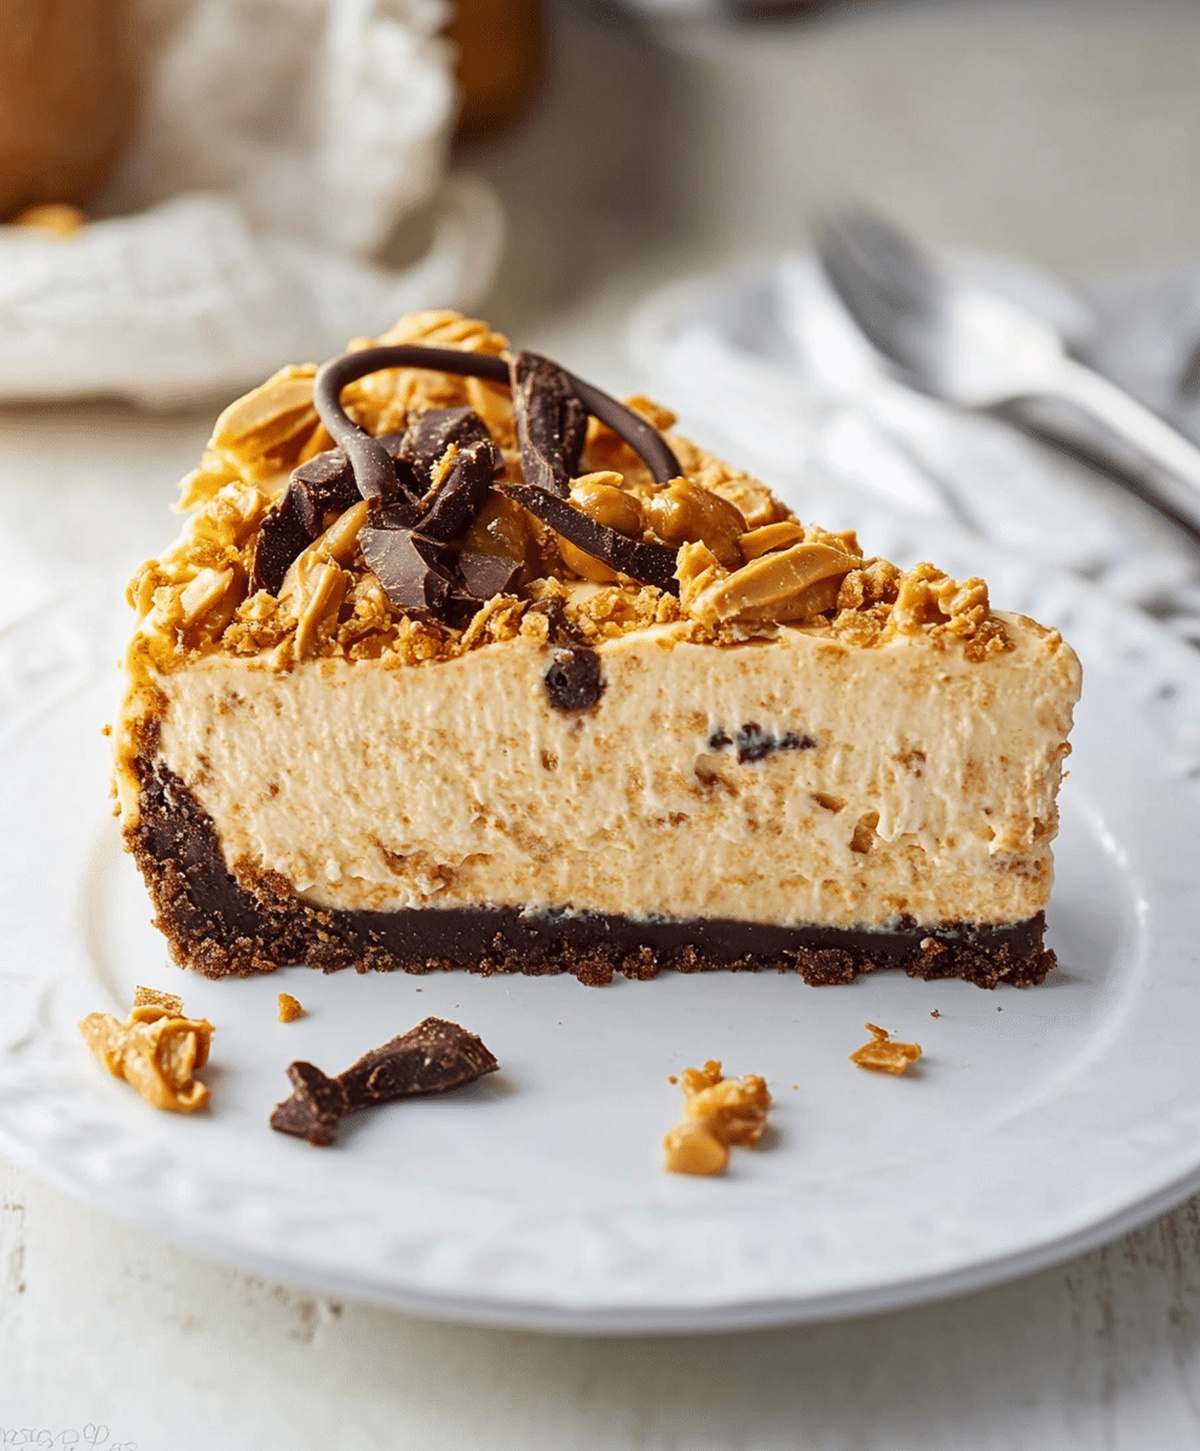
Creamy layers combine rich textures with crunchy candy bits for an unforgettable dessert experience.
Chocolate graham cracker crusts provide a delightful foundation for each silky slice.
Candy bar pieces scattered throughout guarantee maximum flavor impact in every single bite.
Chocolate and peanut butter lovers will absolutely adore this incredible dessert combination.
Baking enthusiasts know that complex flavors emerge from simple, high-quality ingredients carefully blended together.
You won’t believe how easy it is to create such a stunning cheesecake that looks professionally prepared.
Peanut Butter Butterfinger Cheesecake Is a Treat

Peanut Butter Butterfinger Cheesecake Essentials
For the Crust:For the Filling:For the Topping and Mix-Ins:Instructions for Peanut Butter Butterfinger Cheesecake
Step 1: Prepare Oven and Crust
Warm up your oven to 325°F (163°C). Grab a springform pan and create a delightful graham cracker crust by pressing the crumbly mixture firmly into the bottom of the pan, ensuring an even and compact base for your cheesecake.
Ingredients for Crust:Step 2: Whip Up Creamy Cheesecake Filling
Using an electric mixer, blend cream cheese and sugar until silky smooth. Incorporate peanut butter, creating a rich and velvety texture.
Gently add eggs and vanilla extract, mixing thoroughly until the batter becomes light and airy.
Ingredients for Filling:Step 3: Add Crunchy Butterfinger Surprise
Crush Butterfinger candy bars into delectable chunks.
Fold these golden, crispy pieces directly into the cheesecake batter, distributing them evenly for a delightful crunch in every bite.
Step 4: Pour and Bake
Carefully pour the Butterfinger-studded batter over the prepared graham cracker crust.
Slide the pan into the preheated oven and bake for 55-65 minutes, watching for the center to set and become slightly firm.
Step 5: Cool and Chill
After baking, remove the cheesecake and let it cool completely at room temperature.
Refrigerate for a minimum of 4 hours, allowing the cheesecake to firm up and develop its rich, creamy texture.
Step 6: Garnish and Serve
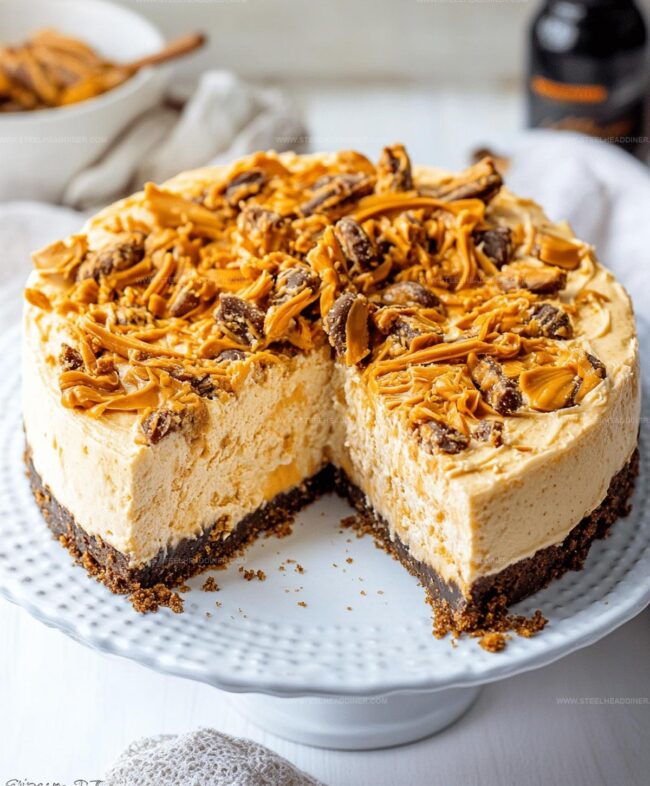
Before serving, sprinkle additional crushed Butterfinger pieces on top.
For extra indulgence, add a dollop of fresh whipped cream. Slice and enjoy this decadent dessert that combines creamy cheesecake with crunchy candy bar goodness.
Little Wins for Peanut Butter Butterfinger Cheesecake

Change Up Peanut Butter Butterfinger Cheesecake
Showing Off Peanut Butter Butterfinger Cheesecake
Keeping Peanut Butter Butterfinger Cheesecake Tasty
FAQs
The crushed Butterfinger candy bars provide a delightful crunch and caramel-like peanut butter flavor that perfectly complements the creamy cheesecake texture, adding both sweetness and a surprising crispy element to each bite.
While Butterfinger is recommended for its specific flavor profile, you can substitute with other chocolate or peanut butter candy bars like Reese’s or Crunch bars, though the taste will slightly differ from the original recipe.
This recipe is relatively straightforward and achievable for intermediate bakers. The key steps involve mixing ingredients smoothly, ensuring proper cream cheese consistency.
Print
Peanut Butter Butterfinger Cheesecake Recipe
- Total Time: 1 hour 20 minutes
- Yield: 12 1x
Description
Indulgent peanut butter butterfinger cheesecake blends creamy textures with crunchy candy bar pieces. Chocolate graham cracker crust and silky filling create an irresistible dessert that chocolate and peanut butter enthusiasts will crave.
Ingredients
- 1.5 cups graham cracker crumbs
- 1/3 cup (75 g) butter, melted
- 24 oz (680 g) cream cheese, softened
- 1 cup (240 g) peanut butter
- 1 cup (200 g) sugar
- 3 large eggs
- 1 tsp vanilla extract
- 4–5 Butterfinger candy bars, crushed
- 1 cup whipped cream (optional, for topping)
Instructions
- Calibrate the oven to 325F (163C) and construct a crisp graham cracker foundation directly inside a springform pan, firmly compressing the base.
- Whip cream cheese and sugar until velvety and uniform, then gently fold in peanut butter until completely integrated.
- Incorporate eggs and vanilla extract, blending smoothly to maintain a silky texture without overmixing.
- Delicately fold crushed Butterfinger fragments throughout the creamy mixture, ensuring even distribution.
- Transfer the luscious batter into the prepared crust, spreading evenly and eliminating potential air pockets.
- Position the cheesecake in the preheated oven and bake for 55-65 minutes, watching for a subtle jiggle in the center indicating perfect doneness.
- Remove from oven and allow to cool completely at room temperature, preventing immediate temperature shock.
- Refrigerate for a minimum of 4 hours, permitting the cheesecake to set and develop robust flavors.
- Prior to serving, garnish with additional crushed Butterfinger pieces and optional whipped cream for an indulgent presentation.
Notes
- Crush Butterfinger bars finely to ensure even distribution throughout the cheesecake for consistent sweet-salty crunch in every bite.
- Use room temperature cream cheese and eggs to prevent lumps and create a smoother, silkier cheesecake texture.
- Allow the cheesecake to cool gradually at room temperature before refrigerating to prevent surface cracking and maintain a creamy consistency.
- For gluten-free version, substitute graham crackers with gluten-free cookie crumbs and ensure Butterfinger bars are gluten-free.
- Prep Time: 20 minutes
- Cook Time: 1 hour
- Category: Desserts
- Method: Baking
- Cuisine: American
Nutrition
- Serving Size: 12
- Calories: 450 kcal
- Sugar: 28 g
- Sodium: 210 mg
- Fat: 32 g
- Saturated Fat: 12 g
- Unsaturated Fat: 15 g
- Trans Fat: 1 g
- Carbohydrates: 35 g
- Fiber: 2 g
- Protein: 8 g
- Cholesterol: 75 mg
Jack Monroe
Founder & Recipe Innovator
Expertise
Pacific Northwest cuisine, Single-serving recipe development, Sustainable sourcing and cooking, Modern comfort food
Education
Brightwater
Associate of Applied Science in Culinary Arts
Focus: Sustainable cooking, seasonal ingredients, and food systems education
Jack grew up with a fishing rod in one hand and a cast-iron skillet in the other. After graduating from Brightwater: A Center for the Study of Food, he set out to prove that cooking for one could still taste like a feast.
Jack believes that food should feel real: fresh, fearless, and a little wild, just like the rivers he grew up around. For Jack, every single dish is a small adventure, and the best ones are the ones you can cook with heart, not hassle.