
Addictive Buckeye Brownies Recipe: A Sweet Ohio-Inspired Treat
Chocolate and peanut butter lovers unite over this decadent buckeye brownies recipe that promises pure indulgence.
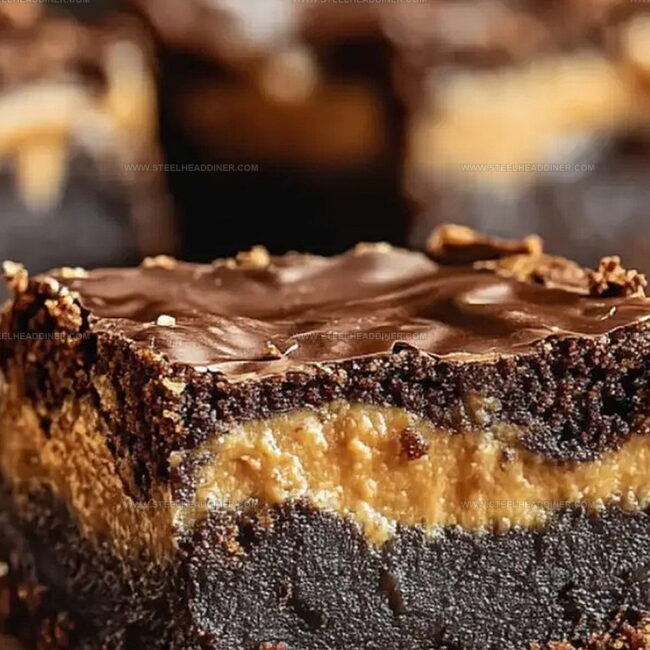
Rich, fudgy brownies serve as the perfect canvas for creamy peanut butter layers.
The classic combination melts hearts with each delectable bite.
These brownies blend nostalgic flavors from Ohio’s beloved dessert tradition.
Smooth peanut butter nestles between intense chocolate layers, creating a dessert that’s impossible to resist.
Each square delivers a harmonious balance of sweet and salty notes.
You’ll want to share these irresistible treats with everyone around you.
Buckeye Brownies – Rich and Nutty Indulgence
Ingredients for Decadent Buckeye Brownies
Brownie Layer Ingredients:Peanut Butter Fudge Layer Ingredients:Chocolate Topping Ingredients:Baking Instructions for Perfect Buckeye Brownies

Step 1: Create Chocolate Base
Warm your oven to 350F (177C). Grab an 8-inch square pan and line it with foil or parchment paper, letting edges hang over.
Spritz with cooking spray. In a roomy mixing bowl, whisk melted butter and sugar until they become best friends.
Crack in eggs and vanilla, stirring until silky smooth. Gently sift in:Whisk just until combined.
Pour the chocolatey goodness into the pan, spreading evenly like a cozy blanket. Bake for 23-28 minutes until a toothpick comes out with a few moist crumbs.
Let the brownie layer chill completely.
Step 2: Whip Up Peanut Butter Fudge Layer
Zap peanut butter and butter in the microwave, stirring every 30 seconds until dreamy smooth.
Mix in vanilla and salt. Gradually fold in powdered sugar, stirring between each addition.
The mixture might get stubborn – don’t worry! Use your hands to knead if needed.
Press the peanut butter mixture across the cooled brownies, creating an even blanket.
Step 3: Crown With Chocolate Topping
Melt chocolate chips and butter in the microwave, stirring at 50% power every 30 seconds until glossy.
Pour this liquid gold over the peanut butter layer, smoothing with a spatula. Slide into the refrigerator for 45-60 minutes until the chocolate sets like a rock-solid dream.
Step 4: Slice And Celebrate
Lift the entire creation out using the parchment edges. Slice into squares and devour these decadent buckeye brownies!
Pro Tips for Baking Buckeye Brownies Flawlessly

Flavor Variations to Customize Buckeye Brownies
Pairing Suggestions for Buckeye Brownies
Storage Advice to Keep Buckeye Brownies Fresh
FAQs
Cocoa powder provides a rich, intense chocolate flavor without adding extra fat, creating a denser and more concentrated brownie base.
Stick with creamy, commercial peanut butter as natural versions might separate and create a grainy texture when mixed with powdered sugar.
Look for a toothpick with a few moist crumbs when inserted – this ensures a fudgy, not dry, brownie texture. The edges should also look slightly set but not hard.
Print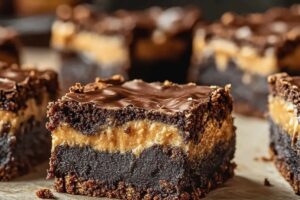
Buckeye Brownies Recipe
- Total Time: 50 minutes
- Yield: 9 1x
Description
Chocolate and peanut butter lovers rejoice with these sinful Buckeye Brownies that blend rich fudgy layers and creamy peanut butter perfection. Dessert enthusiasts will savor each delectable bite of this Ohio-inspired sweet treat that promises pure indulgence.
Ingredients
Chocolate Base:
- 1/2 cup (115g) unsalted butter
- 1 cup (200g) granulated sugar
- 1/2 cup (45g) unsweetened cocoa powder
- 1/2 cup (65g) all-purpose flour
- 1/4 teaspoon salt
Binding Ingredients:
- 2 large eggs
- 1 teaspoon pure vanilla extract
Topping/Filling:
(No ingredients listed in the original content)
Instructions
- Prepare the baking pan by lining an 8-inch square with foil or parchment paper, creating an overhang. Spray with nonstick cooking spray. Preheat oven to 350F (177C).
- Combine melted butter and sugar in a large bowl, whisking thoroughly until well integrated.
- Incorporate eggs and vanilla extract, continuing to whisk until the mixture becomes smooth and uniform.
- Carefully sift cocoa powder, flour, and salt into the wet ingredients. Gently whisk until just combined, avoiding overmixing.
- Transfer brownie batter into the prepared pan, spreading evenly with a spatula.
- Bake for 23-28 minutes, checking doneness with a toothpick that should emerge with a few moist crumbs. Allow brownies to cool completely.
- Microwave peanut butter and butter in 30-second intervals, stirring between each interval until completely smooth.
- Mix in vanilla extract and salt to the melted mixture.
- Gradually incorporate powdered sugar in three separate additions, mixing thoroughly after each. If needed, knead the mixture by hand to achieve a consistent texture.
- Flatten peanut butter mixture and distribute evenly over cooled brownies, creating a smooth layer.
- Melt chocolate chips and butter in microwave using 30-second intervals at 50% power, stirring between each interval until glossy and smooth.
- Pour melted chocolate over peanut butter layer, spreading carefully to create an even coating.
- Refrigerate for 45-60 minutes until chocolate sets completely.
- Remove from pan using parchment overhang, slice into bars, and serve.
Notes
- Check brownie doneness by inserting a toothpick near the center, looking for a few moist crumbs for the perfect fudgy texture.
- Soften peanut butter and butter gently in the microwave to prevent scorching and maintain smooth consistency.
- Use room temperature ingredients to ensure even mixing and better brownie structure.
- Customize by adding chopped nuts or sea salt on top for extra crunch and flavor complexity.
- Prep Time: 20 minutes
- Cook Time: 30 minutes
- Category: Desserts, Snacks
- Method: Baking
- Cuisine: American
Nutrition
- Serving Size: 9
- Calories: 193 kcal
- Sugar: 16 g
- Sodium: 69 mg
- Fat: 10 g
- Saturated Fat: 6 g
- Unsaturated Fat: 4 g
- Trans Fat: 0.3 g
- Carbohydrates: 23 g
- Fiber: 2 g
- Protein: 2 g
- Cholesterol: 37 mg
Maya Thompson
Culinary Content Creator & Nutrition Enthusiast
Expertise
Healthy single-serving recipes, Meal prepping for individuals, Integrating nutrition into everyday cooking, Vegetarian and plant-based cuisine
Education
The Chef’s Academy at Harrison College
Associate of Applied Science in Culinary Arts
Focus: Nutrition, meal planning, and culinary techniques for healthy living.
Maya found her passion in the kitchen by mixing good food with good energy. After earning her culinary degree at The Chef’s Academy at Harrison College, she made it her mission to keep cooking simple, wholesome, and packed with flavor.
At Steelhead Diner, Maya shares easy, healthy recipes built for real life. For Maya, great food seems like a celebration of everyday moments, made better one fresh bite at a time.