
Fluffy Homemade Pepperoni Pizza Bombs Recipe: Pure Joy In A Bite
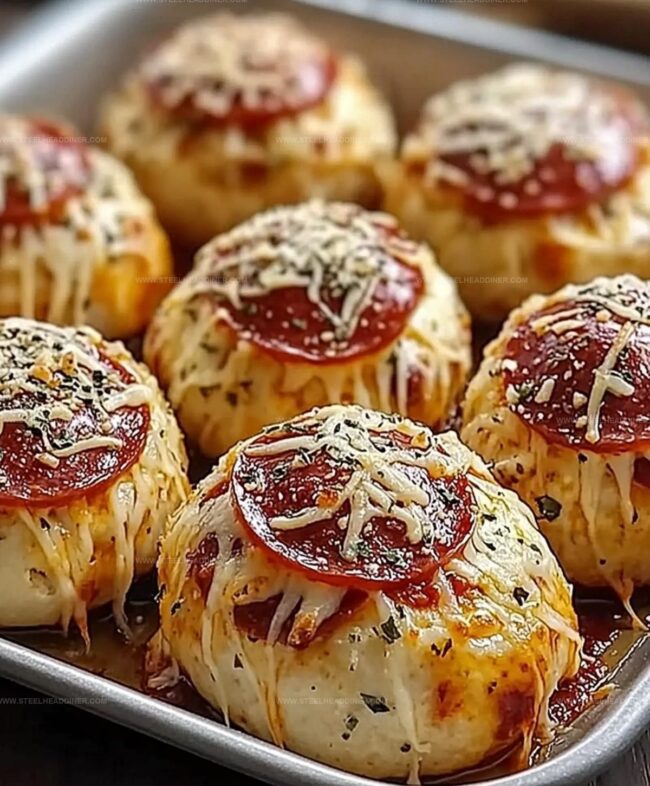
Crispy, golden pepperoni pizza bombs are a delightful twist on traditional pizza snacks that’ll make your taste buds dance with excitement.
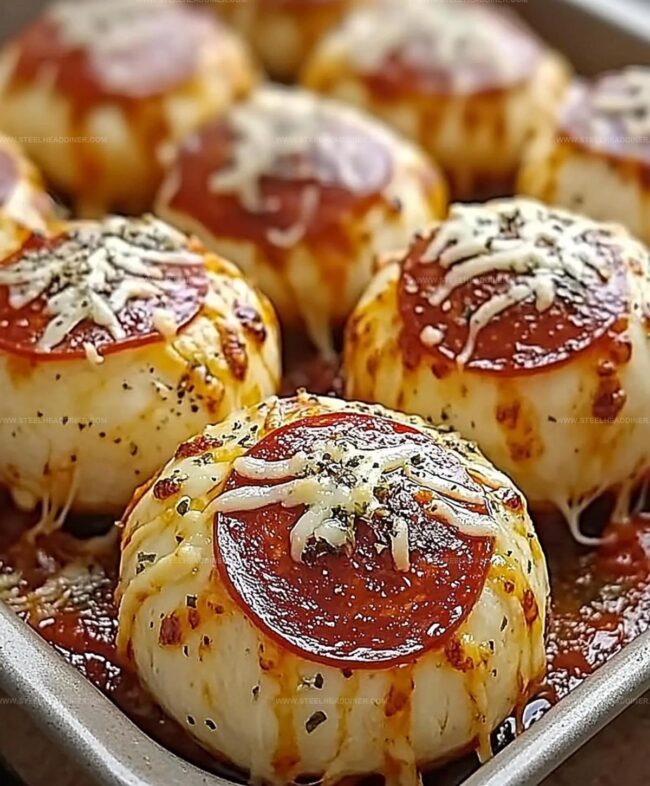
Melted cheese oozes from these bite-sized delights, creating an irresistible explosion of flavor in every single bite.
Small pockets of dough cradle savory pepperoni and gooey mozzarella, promising a mouthwatering experience.
Minimal preparation meets maximum satisfaction with this crowd-pleasing recipe.
Quick to assemble and even faster to devour, these little bombs pack a serious punch of Italian-inspired goodness.
Surprise everyone at your next gathering with these addictive, pop-in-your-mouth treats that guarantee smiles and empty plates.
You won’t be able to stop at just one of these crispy, cheesy wonders.
Pepperoni Pizza Bombs: Savory Bites Bursting with Flavor
Ingredients for Perfectly Stuffed Pepperoni Pizza Bombs
Main Ingredients:Sauce and Seasoning:Finishing Ingredients:How to Make Crispy and Delicious Pepperoni Pizza Bombs
Step 1: Prepare the Oven and Baking Surface
Heat the oven to 375 degrees Fahrenheit. Line a baking sheet with parchment paper to prevent sticking and ensure easy cleanup.
Step 2: Create Pizza Bomb Bases
Take each biscuit and gently flatten it out on a clean surface. Layer the following ingredients inside each biscuit:Step 3: Shape the Pizza Bombs
Carefully fold the biscuit edges over the filling, pinching and sealing them tightly to create a compact ball.
Ensure no filling escapes during baking.
Step 4: Position on Baking Sheet
Place each pizza bomb seam-side down on the prepared baking sheet, allowing space between them for even cooking.
Step 5: Add Flavor Enhancers
Brush the tops of the pizza bombs with a mixture of:Sprinkle Parmesan cheese over the top for an extra flavor boost.
Step 6: Bake to Golden Perfection
Slide the baking sheet into the preheated oven.
Bake until the pizza bombs turn a beautiful golden brown, typically 12-15 minutes.
Step 7: Serve and Enjoy
Remove from the oven and let cool slightly.
Serve warm with additional marinara sauce on the side for dipping.
Tips for Achieving the Best Texture and Flavor
Flavorful Twists to Make Your Pizza Bombs Unique
Serving Ideas That Pair Perfectly with Pepperoni Pizza Bombs
How to Store Pizza Bombs to Keep Them Crisp and Fresh
FAQs
Absolutely! Kids love these bite-sized pizza bombs because they’re easy to eat, cheesy, and packed with classic pepperoni flavor that children typically enjoy.
Yes, you can prepare them in advance and refrigerate before baking. Just add 2-3 extra minutes to the baking time when cooking directly from the refrigerator.
Refrigerated canned biscuits work perfectly. Choose the smaller, buttermilk-style biscuits for the best texture and easier sealing.
Definitely! These pizza bombs are great finger food for gatherings, super easy to make, and always a crowd-pleaser for both kids and adults.
Print
Cheesy Pepperoni Pizza Bombs Recipe
- Total Time: 30 minutes
- Yield: 8 1x
Description
Homemade pepperoni pizza bombs deliver explosive flavor in each delectable bite. Melted cheese, zesty marinara, and crispy dough create a perfect handheld snack you’ll crave repeatedly.
Ingredients
Main Ingredients:
- 1 can refrigerated biscuit dough
- 20 pepperoni slices
- 1 cup (240 milliliters) shredded mozzarella cheese
Cheese and Toppings:
- 1/4 cup (60 milliliters) grated Parmesan cheese
- 1/2 teaspoon garlic powder
- 1/2 teaspoon Italian seasoning
Sauce and Finishing:
- 1/2 cup (120 milliliters) marinara sauce
- 2 tablespoons (30 milliliters) melted butter
Instructions
- Arrange the oven rack in the middle position and heat to 375°F (190°C). Cover a baking sheet with parchment paper.
- Gently press each biscuit dough into a flat circular shape, creating a wider surface.
- Place a dollop of marinara sauce in the center of each flattened biscuit, leaving a small border around the edges.
- Scatter a modest portion of mozzarella cheese over the marinara, ensuring even distribution.
- Layer two pepperoni slices on top of the cheese, positioning them carefully.
- Carefully lift the edges of the biscuit dough and fold them toward the center, encasing the fillings completely.
- Pinch and seal the edges firmly to create a secure, compact ball with no openings.
- Position each pizza bomb seam-side down on the prepared baking sheet, maintaining space between them.
- Melt butter and mix with garlic powder and Italian seasoning in a small bowl.
- Generously brush the exterior of each pizza bomb with the seasoned butter mixture.
- Sprinkle grated Parmesan cheese over the tops, ensuring even coverage.
- Transfer the baking sheet to the preheated oven and bake for 12-15 minutes until the surface turns golden brown and crispy.
- Remove from oven and let cool for 2-3 minutes. Serve immediately with additional marinara sauce for dipping.
Notes
- Customize fillings by swapping pepperoni with ham, sausage, or vegetarian alternatives for diverse flavor profiles.
- Ensure tight sealing prevents filling from leaking during baking, creating messy results.
- Experiment with different cheese combinations like cheddar or provolone for unique taste experiences.
- Use gluten-free biscuit dough to make this recipe suitable for those with wheat sensitivities.
- Prep Time: 15 minutes
- Cook Time: 15 minutes
- Category: Lunch, Dinner, Appetizer, Snacks
- Method: Baking
- Cuisine: Italian
Nutrition
- Serving Size: 8
- Calories: 260 kcal
- Sugar: 2 g
- Sodium: 480 mg
- Fat: 15 g
- Saturated Fat: 7 g
- Unsaturated Fat: 6 g
- Trans Fat: 0.2 g
- Carbohydrates: 19 g
- Fiber: 1 g
- Protein: 12 g
- Cholesterol: 35 mg
Jack Monroe
Founder & Recipe Innovator
Expertise
Pacific Northwest cuisine, Single-serving recipe development, Sustainable sourcing and cooking, Modern comfort food
Education
Brightwater
Associate of Applied Science in Culinary Arts
Focus: Sustainable cooking, seasonal ingredients, and food systems education
Jack grew up with a fishing rod in one hand and a cast-iron skillet in the other. After graduating from Brightwater: A Center for the Study of Food, he set out to prove that cooking for one could still taste like a feast.
Jack believes that food should feel real: fresh, fearless, and a little wild, just like the rivers he grew up around. For Jack, every single dish is a small adventure, and the best ones are the ones you can cook with heart, not hassle.