
Dreamy Cherry Chocolate Cheesecake Recipe for Sweet Bliss
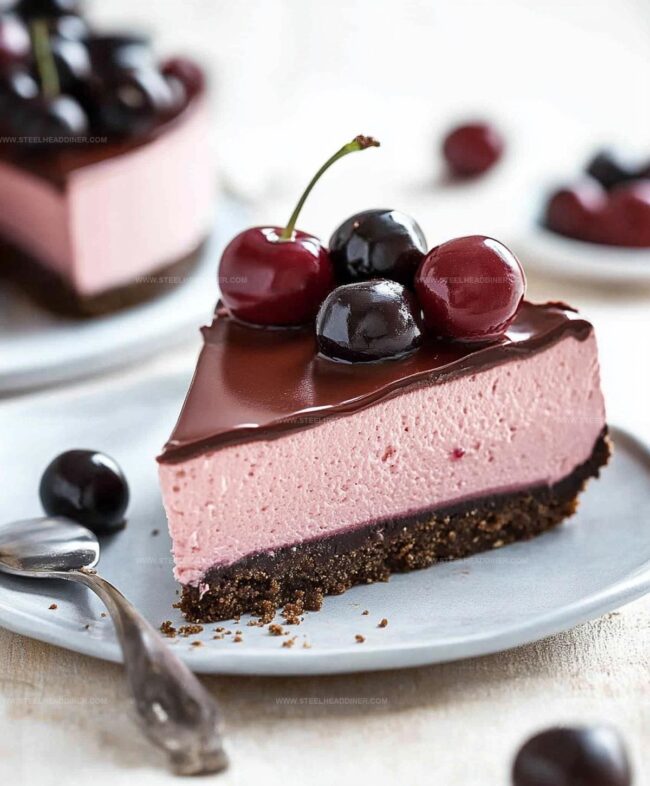
Sweet dreams come alive with a decadent cherry chocolate cheesecake that dances between rich indulgence and delightful simplicity.
Creamy layers meld chocolate deep intensity with bright, tangy cherries in every luxurious bite.
Soft cream cheese creates a velvety foundation for this irresistible dessert.
chocolate crumbs form a delectable crust that whispers of classic comfort.
Ripe cherries burst with natural sweetness, complementing the dark chocolate complex notes.
Summer memories and kitchen magic blend seamlessly in this elegant treat.
You’ll want to savor each carefully crafted slice and share the delicious experience with someone special.
Why Cherry Chocolate Cheesecake Is Loved
Ingredients for Cherry Chocolate Cheesecake
For the Crust:For the Cheesecake Filling:For the Garnish:How to Bake Cherry Chocolate Cheesecake
Step 1: Warm Up the Oven
Crank the oven to a cozy 325F (163C), preparing it for your delightful cheesecake adventure.
Step 2: Create the Crumbly Crust
Crush those cookies into fine crumbs and blend them with melted butter.
Press the mixture firmly into the bottom of a springform pan, creating a solid foundation for your dessert.
Step 3: Whip Up the Creamy Base
Grab a large mixing bowl and beat cream cheese with sugar until it becomes silky smooth.
Stir in sour cream and a splash of vanilla to enhance the rich flavor.
Step 4: Incorporate the Eggs
Gently add eggs one at a time, mixing just until they’re perfectly combined.
Be careful not to overmix – you want a luxurious, velvety texture.
Step 5: Blend in Chocolatey Goodness
Melt the chocolate and swirl it into the cheesecake mixture.
Carefully fold in the vibrant cherry pie filling, creating beautiful marbled swirls.
Step 6: Pour and Smooth
Transfer the luscious mixture into the prepared crust, using a spatula to create an even, tempting surface.
Step 7: Bake to Perfection
Slide the cheesecake into the preheated oven and bake for 55-60 minutes. Look for a set center that slightly jiggles when gently shaken.
Step 8: Cool Down Slowly
Turn off the oven and crack the door open. Let the cheesecake rest and cool gradually for one hour to prevent cracking.
Step 9: Chill and Set
Refrigerate the cheesecake for at least 4 hours or overnight, allowing it to firm up and develop deep, rich flavors.
Step 10: Decorate and Serve
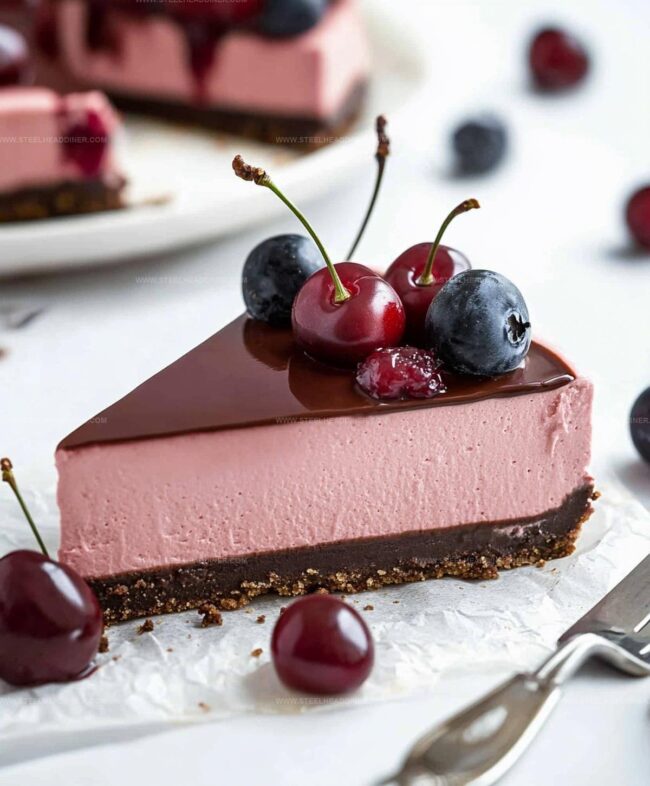
Before serving, crown your masterpiece with additional cherry pie filling and sprinkle with chocolate shavings for a show-stopping dessert.
Helpful Notes for Cherry Chocolate Cheesecake

Flavor Twists for Cherry Chocolate Cheesecake

Best Ways to Present Cherry Chocolate Cheesecake
How to Store Cherry Chocolate Cheesecake Properly
FAQs
Yes, you can use fresh cherries. Pit and chop them, then cook with a bit of sugar to create a similar consistency to pie filling.
Semi-sweet or dark chocolate are ideal. They provide rich flavor without making the cheesecake too sweet and complement the cherries perfectly.
Avoid overmixing the eggs and bake in a water bath. Also, letting the cheesecake cool slowly in the oven helps prevent surface cracking.
Absolutely! You can use chocolate cookie crumbs, digestive biscuits, or oreo cookies as an alternative base for the cheesecake crust.
Print
Cherry Chocolate Cheesecake Recipe
- Total Time: 1 hour 20 minutes
- Yield: 12 1x
Description
Indulgent cherry chocolate cheesecake blends rich chocolate with tangy cherries for a luxurious dessert. Creamy layers and chocolate crumb crust create a memorable sweet experience you’ll savor with each delightful bite.
Ingredients
- 3 (8 oz) packages cream cheese, softened
- 1 cup granulated sugar
- 3 large eggs
- 1/2 cup sour cream
- 1 cup cherry pie filling (plus more for topping)
- 1/2 cup semi-sweet chocolate chips, melted
- 1 1/2 cups chocolate cookie crumbs
- 1/4 cup melted butter
- 1 tsp vanilla extract
Instructions
- Prepare oven to 325F (163C) with rack positioned in center.
- Crush cookies and blend with melted butter, firmly pressing mixture into bottom of springform pan to create an even base.
- Using electric mixer, whip cream cheese and sugar until completely smooth and creamy, incorporating sour cream and vanilla extract thoroughly.
- Gently introduce eggs individually, mixing minimally after each addition to maintain light texture.
- Carefully melt chocolate and fold into cream cheese mixture, then gently swirl in cherry pie filling for marbled effect.
- Transfer mixture onto prepared crust, using spatula to distribute evenly and eliminate air pockets.
- Bake for 55-60 minutes, watching for slight jiggle in center while edges appear set.
- Once baking completes, turn off oven and leave door slightly ajar, allowing cheesecake to gradually cool for approximately one hour.
- Transfer cheesecake to refrigerator and chill for minimum 4 hours or preferably overnight to achieve perfect consistency.
- Before serving, generously top with additional cherry pie filling and sprinkle with chocolate shavings for elegant presentation.
Notes
- Use room temperature ingredients to ensure smooth, lump-free cheesecake batter and even mixing.
- Prevent cheesecake cracks by avoiding overmixing eggs and baking at a consistent, low temperature.
- Wrap the springform pan’s exterior with aluminum foil to prevent water seepage during potential water bath baking.
- For gluten-free version, substitute graham cracker crumbs with almond flour or gluten-free cookie crumbs.
- Prep Time: 20 minutes
- Cook Time: 1 hour
- Category: Desserts
- Method: Baking
- Cuisine: American
Nutrition
- Serving Size: 12
- Calories: 388 kcal
- Sugar: 29 g
- Sodium: 230 mg
- Fat: 28 g
- Saturated Fat: 16 g
- Unsaturated Fat: 10 g
- Trans Fat: 0.5 g
- Carbohydrates: 29 g
- Fiber: 1 g
- Protein: 6 g
- Cholesterol: 90 mg
Maya Thompson
Culinary Content Creator & Nutrition Enthusiast
Expertise
Healthy single-serving recipes, Meal prepping for individuals, Integrating nutrition into everyday cooking, Vegetarian and plant-based cuisine
Education
The Chef’s Academy at Harrison College
Associate of Applied Science in Culinary Arts
Focus: Nutrition, meal planning, and culinary techniques for healthy living.
Maya found her passion in the kitchen by mixing good food with good energy. After earning her culinary degree at The Chef’s Academy at Harrison College, she made it her mission to keep cooking simple, wholesome, and packed with flavor.
At Steelhead Diner, Maya shares easy, healthy recipes built for real life. For Maya, great food seems like a celebration of everyday moments, made better one fresh bite at a time.