
The Magic of Homemade Bubblegum Cloud Fudge: A Sweet Recipe
Sweet memories dance through kitchens when homemade bubblegum cloud fudge captures childhood wonder and culinary creativity.
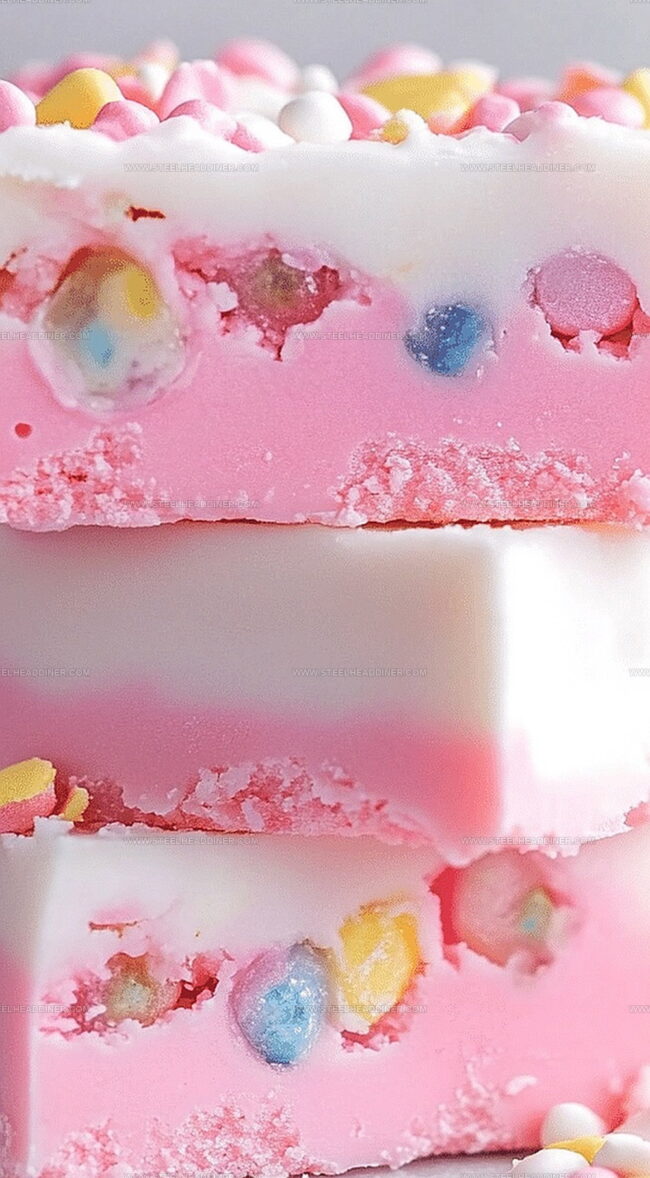
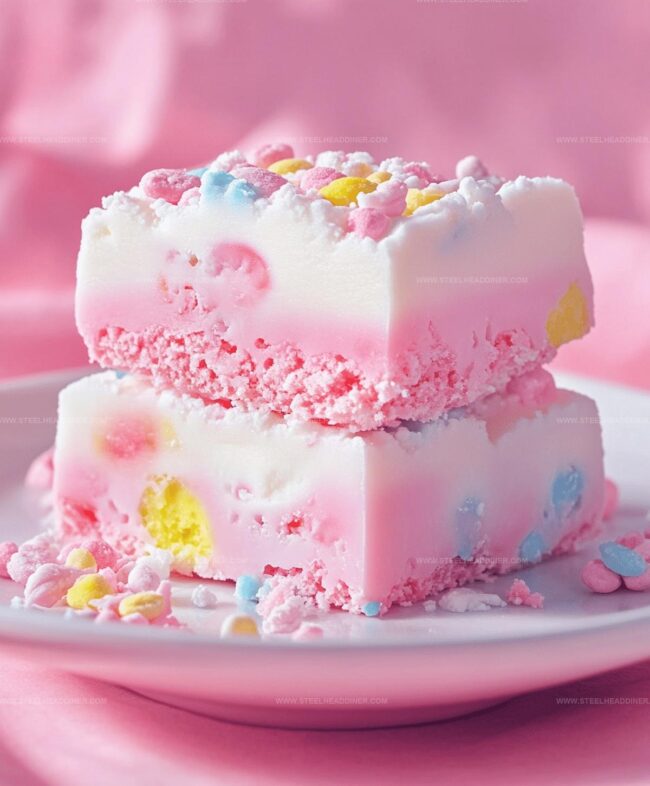
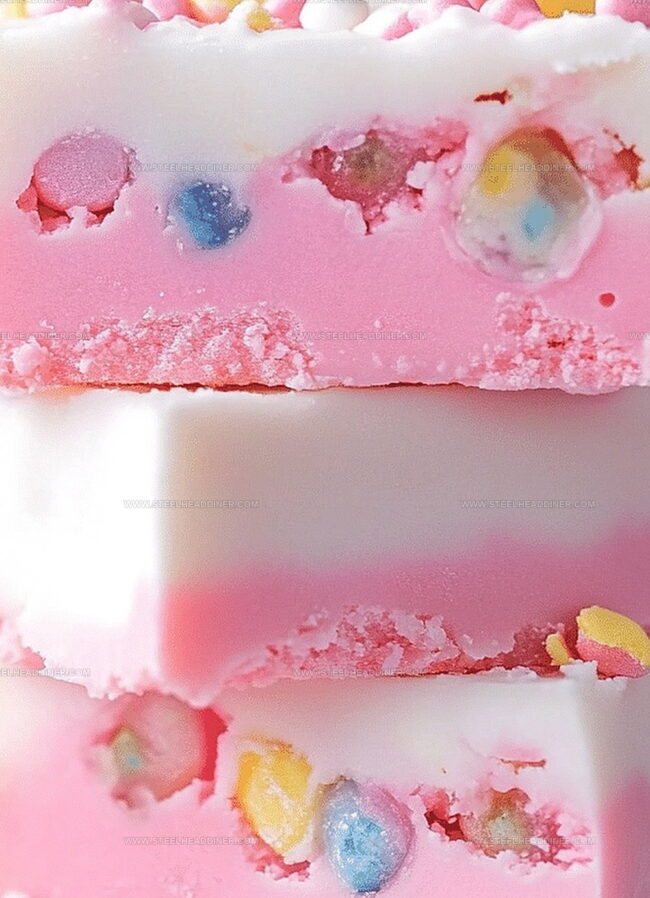
Soft pink swirls hint at playful nostalgia waiting to unfold.
Creamy textures melt into delightful surprises that spark joy.
Sugary clouds promise delectable moments of pure happiness.
Each bite carries whispers of carefree afternoons and spontaneous giggles.
Magical ingredients blend together, creating something unexpectedly charming.
Prepare to embark on a whimsical dessert adventure that promises delight in every single morsel.
Reasons to Love Homemade Bubblegum Cloud Fudge
Ingredients for Homemade Bubblegum Cloud Fudge
For the Core Ingredients:For the Flavor and Color:For the Optional Texture:For the Preparation:How to Prepare Homemade Bubblegum Cloud Fudge
Step 1: Prepare Baking Pan
Line an 8×8 inch baking pan with parchment paper, ensuring the paper hangs slightly over the edges for easy removal later.
Step 2: Create Creamy Chocolate Base
In a microwave-safe bowl, combine white chocolate chips and sweetened condensed milk.
Microwave in 30-second bursts, stirring between each interval, until the mixture becomes completely smooth and glossy.
Step 3: Infuse Bubblegum Magic
Introduce bubblegum flavoring and a vibrant food coloring to the melted chocolate mixture.
Stir thoroughly to distribute the flavor and color evenly throughout the creamy base.
Step 4: Add Fluffy Cloud Texture
For an extra dreamy touch, gently fold in marshmallow fluff, creating soft, billowy pockets throughout the fudge.
This step is optional but recommended for a more decadent treat.
Step 5: Set and Chill
Pour the colorful, fragrant mixture into the prepared pan.
Use a spatula to smooth the top, creating an even surface. Place the pan in the refrigerator and allow the fudge to set for 2-3 hours until firm.
Step 6: Slice and Savor
Remove the fudge from the refrigerator and lift it out of the pan using the parchment paper edges. Slice into bite-sized squares and enjoy the whimsical, cloud-like bubblegum fudge.
Pro Tips for Homemade Bubblegum Cloud Fudge
Flavor Twists for Homemade Bubblegum Cloud Fudge
Serving Suggestions for Homemade Bubblegum Cloud Fudge
How to Store Homemade Bubblegum Cloud Fudge
FAQs
Start with a high-quality bubblegum flavoring and add it gradually, tasting as you go. Begin with 1/2 teaspoon and adjust to your preference, ensuring the flavor is vibrant but not overwhelming.
Yes, use a double boiler method. Melt white chocolate chips and sweetened condensed milk over low heat, stirring constantly to prevent burning. This technique works equally well and provides more control.
Ensure you refrigerate it for the full 2-3 hours. If it’s still soft, add an extra hour of chilling time. The condensed milk and white chocolate need sufficient cooling to firm up completely.
Print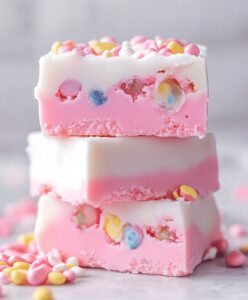
Homemade Bubblegum Cloud Fudge Recipe
- Total Time: 3 hours 15 minutes
- Yield: 12 1x
Description
Indulgent homemade bubblegum cloud fudge dazzles with its whimsical pink swirls and nostalgic candy flavor. Sweet memories bloom from each creamy square that melts smoothly on palates craving childhood delight.
Ingredients
- 2 cups (480 ml) white chocolate chips
- 1 can (14 oz/397 g) sweetened condensed milk
- 1 tsp (5 ml) bubblegum flavoring
- Pink food coloring (as needed)
- Marshmallow fluff (optional)
Instructions
- Prepare an 8×8 inch baking pan by carefully lining it with parchment paper, ensuring complete coverage of the bottom and sides.
- Combine white chocolate chips and sweetened condensed milk in a microwave-safe bowl, heating in 30-second increments and stirring thoroughly between each interval until achieving a silky, uniform consistency.
- Incorporate bubblegum flavoring and vibrant food coloring into the melted mixture, gently stirring until evenly distributed throughout the fudge base.
- For an ethereal texture, delicately fold marshmallow fluff into the mixture, creating soft, cloud-like pockets within the fudge.
- Transfer the luminous mixture into the prepared pan, using a spatula to create a smooth, even surface that promises a perfect cut.
- Refrigerate the fudge for 2-3 hours, allowing it to set completely and develop a firm, slice-able texture.
- Once chilled, remove from refrigerator and slice into precise square portions, revealing the dreamy, bubblegum-infused layers.
Notes
- Check chocolate quality by using premium white chocolate chips for smoother, richer fudge texture.
- Adjust bubblegum flavoring gradually to prevent overwhelming sweetness, starting with small amounts and tasting.
- Use gel food coloring for vibrant pink color without affecting fudge consistency, ensuring even distribution.
- Consider dietary alternatives like using dairy-free white chocolate chips and coconut condensed milk for vegan options.
- Prep Time: 15 minutes
- Cook Time: 3 hours
- Category: Desserts, Snacks
- Method: Blending
- Cuisine: American
Nutrition
- Serving Size: 12
- Calories: 190
- Sugar: 25 g
- Sodium: 30 mg
- Fat: 9 g
- Saturated Fat: 6 g
- Unsaturated Fat: 2.5 g
- Trans Fat: 0.1 g
- Carbohydrates: 27 g
- Fiber: 0.1 g
- Protein: 2 g
- Cholesterol: 10 mg
Maya Thompson
Culinary Content Creator & Nutrition Enthusiast
Expertise
Healthy single-serving recipes, Meal prepping for individuals, Integrating nutrition into everyday cooking, Vegetarian and plant-based cuisine
Education
The Chef’s Academy at Harrison College
Associate of Applied Science in Culinary Arts
Focus: Nutrition, meal planning, and culinary techniques for healthy living.
Maya found her passion in the kitchen by mixing good food with good energy. After earning her culinary degree at The Chef’s Academy at Harrison College, she made it her mission to keep cooking simple, wholesome, and packed with flavor.
At Steelhead Diner, Maya shares easy, healthy recipes built for real life. For Maya, great food seems like a celebration of everyday moments, made better one fresh bite at a time.