Gooey Chocolate Peanut Butter Rice Krispie Cups Recipe
Chocolate and peanut butter dance together in these decadent rice krispie cups that promise pure bliss.
Sweet memories of childhood treats collide with sophisticated flavors in this irresistible chocolate peanut butter rice krispie cups recipe.
The crispy texture melts perfectly with rich chocolate and creamy peanut butter.
Each bite delivers a symphony of crunch and smoothness that tantalizes your taste buds.
These no-bake delights come together in minutes with minimal effort.
The combination of marshmallow, chocolate, and peanut butter creates an addictive treat you won’t be able to resist.
Prepare to indulge in a dessert that transforms simple ingredients into a mouthwatering masterpiece.
Reasons To Love Chocolate Peanut Butter Krispie Cups

Ingredients Needed For Peanut Butter Krispie Cups
Main Ingredients:Additional Ingredients:Optional Toppings:Step-By-Step Peanut Butter Krispie Cups Instructions
Step 1: Prepare the Muffin Tin
Grab your muffin tin and line it with paper or silicone cupcake liners. This will make removing your tasty treats super easy later.
Step 2: Create Peanut Butter Base
In a saucepan, combine:Warm these ingredients over medium heat, stirring until they blend into a smooth, glossy mixture that looks absolutely mouthwatering.
Step 3: Mix in Crispy Goodness
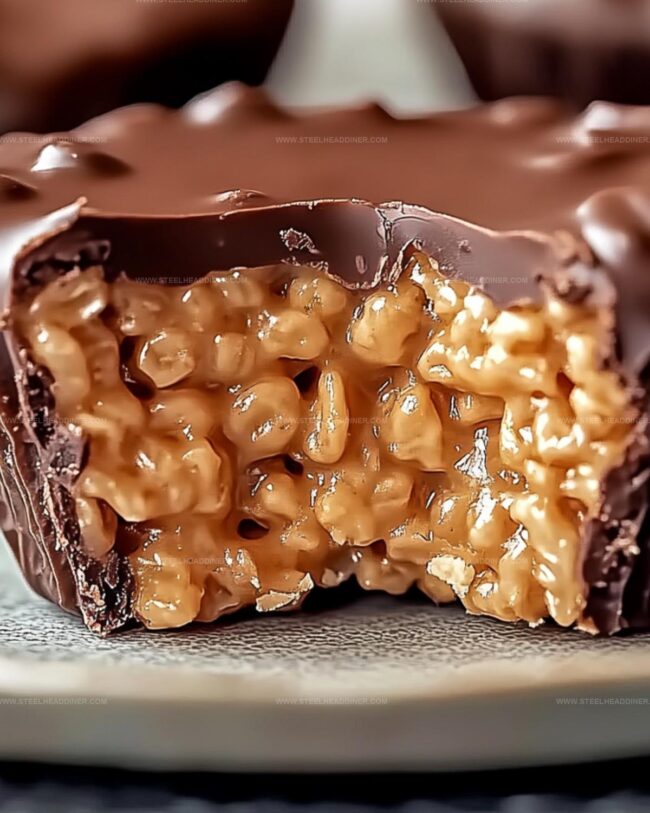
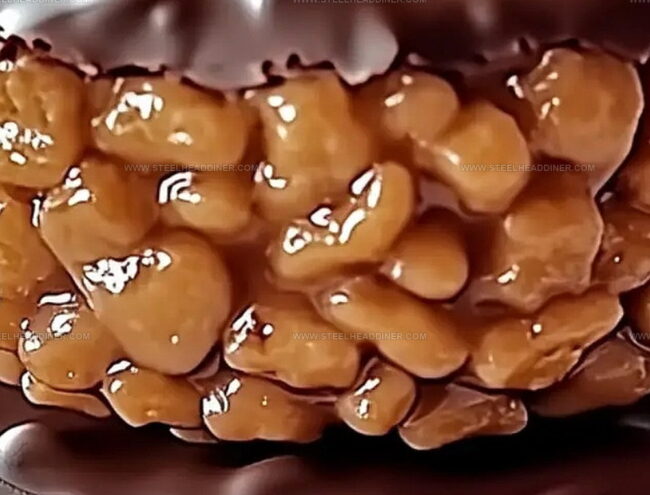
Pour the Rice Krispies into the warm peanut butter mixture.
Gently fold and stir until every single crisp is perfectly coated with the sweet and nutty sauce.
Step 4: Shape the Cups
Carefully spoon the Rice Krispies mixture into each muffin liner.
Use the back of your spoon to press down gently, creating perfect little cup shapes that will cradle the chocolate topping.
Step 5: Melt the Chocolate Magic
Place chocolate chips in a microwave-safe bowl.
Microwave in short 30-second bursts, stirring between each interval until the chocolate transforms into a smooth, glossy liquid.
Step 6: Top with Chocolate
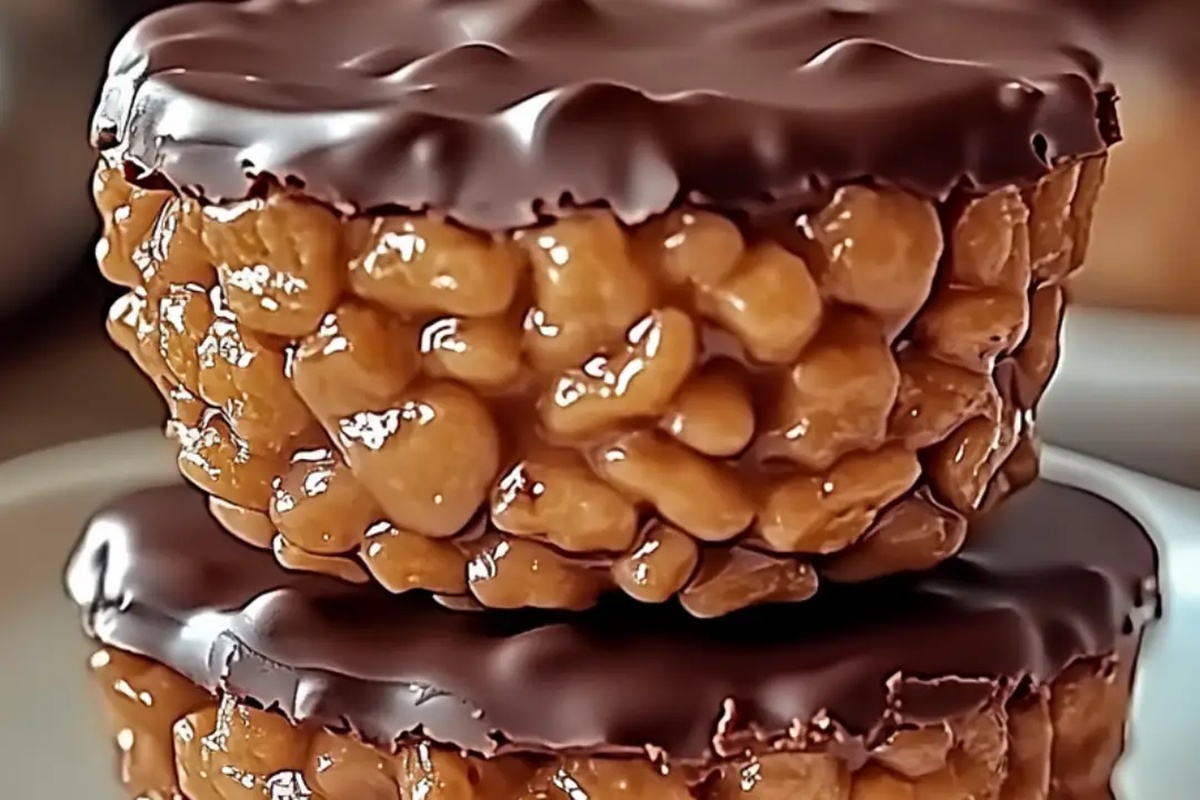
Drizzle the melted chocolate over each Rice Krispie cup.
Use a spoon or spatula to spread it evenly, ensuring complete chocolate coverage.
Step 7: Chill and Set
Pop the muffin tin into the refrigerator.
Let the treats chill for about an hour until the chocolate becomes firm and glossy.
Step 8: Serve and Enjoy
Carefully peel away the liners and reveal your decadent chocolate peanut butter Rice Krispie cups.
Get ready for a taste explosion!
Helpful Advice For Peanut Butter Krispie Cups
Creative Twists For Peanut Butter Krispie Cups
Foods That Pair Well With Peanut Butter Krispie Cups
Keeping Krispie Cups Fresh And Delicious
FAQs
Yes, you can substitute dark, milk, or white chocolate chips based on your preference. Experiment with different chocolate flavors to find your favorite.
Absolutely! Use gluten-free Rice Krispies or a similar gluten-free crispy rice cereal to create a gluten-free version of these cups.
Lightly coat your fingers with cooking spray or wet them slightly with water to help prevent the mixture from sticking while you press it into the muffin tin.
Print
Irresistible Chocolate Peanut Butter Rice Krispie Cups Recipe
- Total Time: 1 hour 15 minutes
- Yield: 18 1x
Description
Chocolate Peanut Butter Rice Krispie Cups blend creamy richness with crunchy nostalgia in one delightful treat. Sweet layers of marshmallow, peanut butter, and chocolate create a mouthwatering dessert you’ll crave again and again.
Ingredients
Main Ingredients:
- 1 cup chunky peanut butter
- 1.5 cups chocolate chips
- 3 cups Rice Krispies
Binding Ingredients:
- 6 tablespoons honey
Seasoning:
- 18 teaspoons salt
Instructions
- Prepare the muffin tin by lining with paper or silicone cupcake liners, ensuring even coverage for easy removal.
- Combine peanut butter, honey, and salt in a saucepan, heating over medium temperature until the mixture becomes silky and thoroughly blended.
- Incorporate Rice Krispies into the warm peanut butter mixture, gently folding until each cereal piece is completely coated with the sweet, sticky sauce.
- Carefully distribute the coated Rice Krispies into the prepared muffin tin, using gentle pressure to mold each portion into compact, uniform cup shapes.
- Create a smooth chocolate coating by microwaving chocolate chips in 30-second intervals, stirring between each cycle until completely melted and glossy.
- Drizzle the molten chocolate over each Rice Krispie cup, using a spoon or spatula to ensure total coverage and an even, appetizing finish.
- Transfer the filled muffin tin to the refrigerator, allowing the treats to solidify for approximately 60 minutes until the chocolate sets completely.
- Once chilled, delicately remove the paper liners and serve these decadent, no-bake confections at room temperature for optimal texture and flavor.
Notes
- Swap peanut butter with almond or sunflower seed butter for nut-free alternatives.
- Use dark chocolate for a richer, less sweet flavor profile.
- Gently press the Rice Krispies mixture to avoid dense, hard cups.
- Store in an airtight container in the refrigerator for up to a week to maintain freshness.
- Prep Time: 15 minutes
- Cook Time: 1 hour
- Category: Snacks, Desserts
- Method: Melting
- Cuisine: American
Nutrition
- Serving Size: 18
- Calories: 168
- Sugar: 7.5 g
- Sodium: 720 mg
- Fat: 8 g
- Saturated Fat: 2.4 g
- Unsaturated Fat: 5.6 g
- Trans Fat: 0 g
- Carbohydrates: 21 g
- Fiber: 1.2 g
- Protein: 4 g
- Cholesterol: 0 mg
Maya Thompson
Culinary Content Creator & Nutrition Enthusiast
Expertise
Healthy single-serving recipes, Meal prepping for individuals, Integrating nutrition into everyday cooking, Vegetarian and plant-based cuisine
Education
The Chef’s Academy at Harrison College
Associate of Applied Science in Culinary Arts
Focus: Nutrition, meal planning, and culinary techniques for healthy living.
Maya found her passion in the kitchen by mixing good food with good energy. After earning her culinary degree at The Chef’s Academy at Harrison College, she made it her mission to keep cooking simple, wholesome, and packed with flavor.
At Steelhead Diner, Maya shares easy, healthy recipes built for real life. For Maya, great food seems like a celebration of everyday moments, made better one fresh bite at a time.