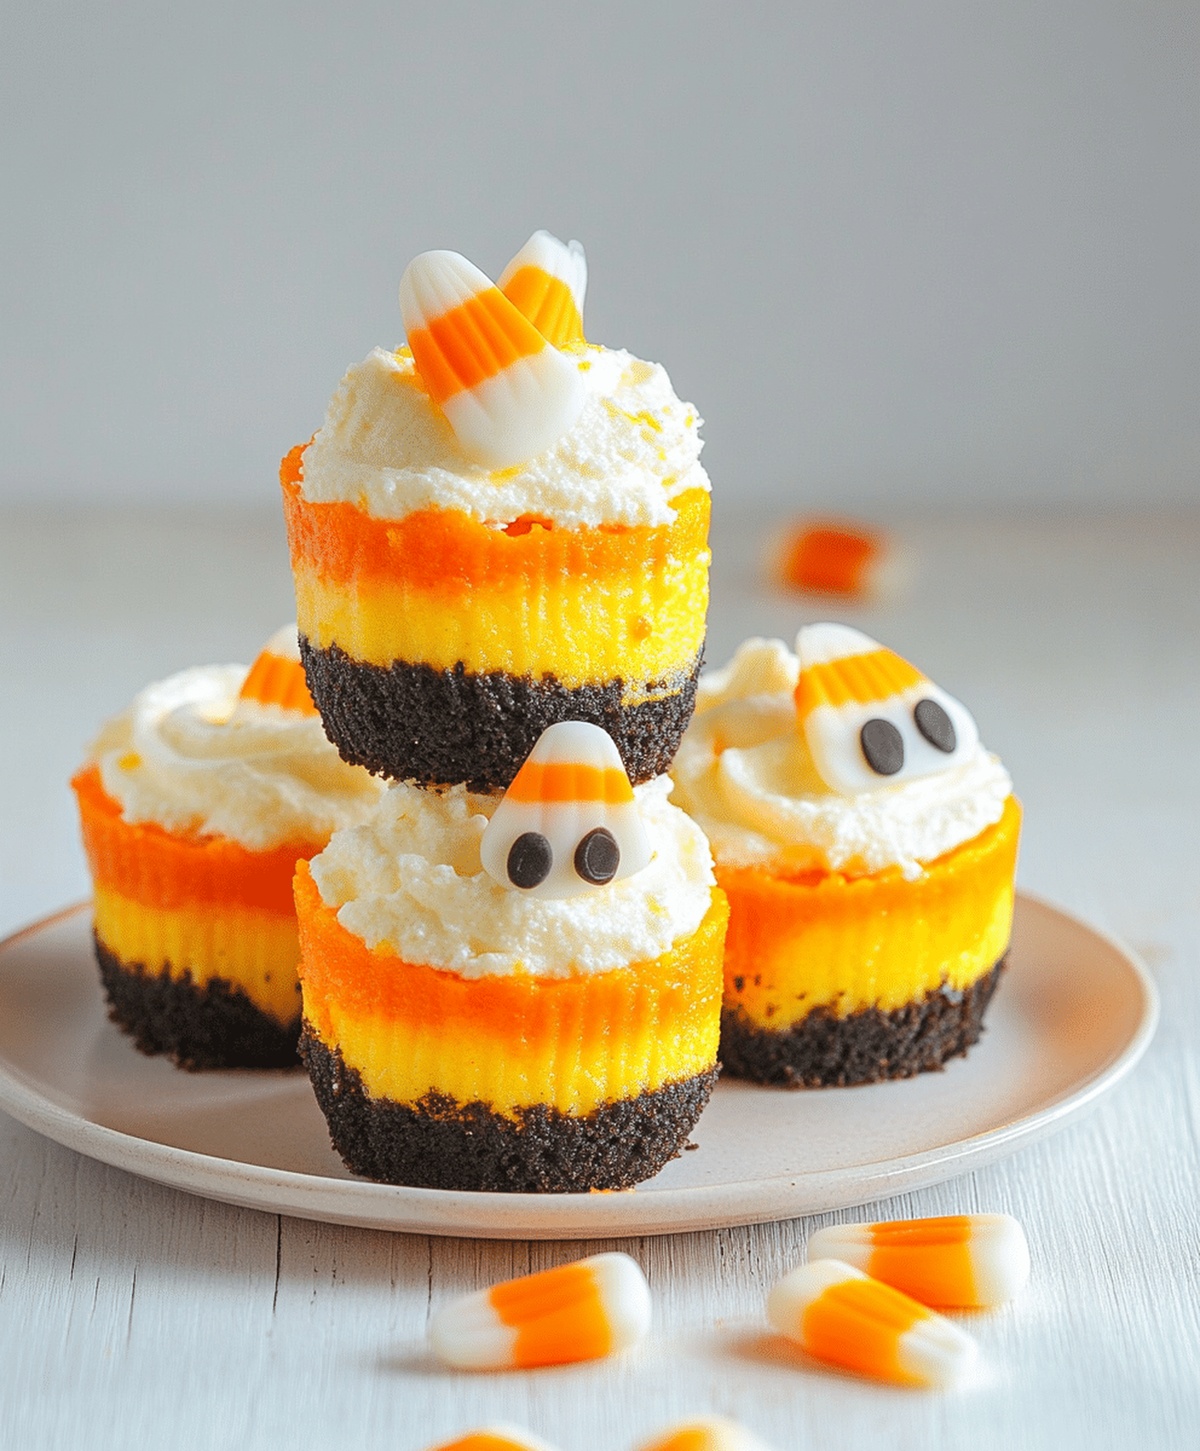
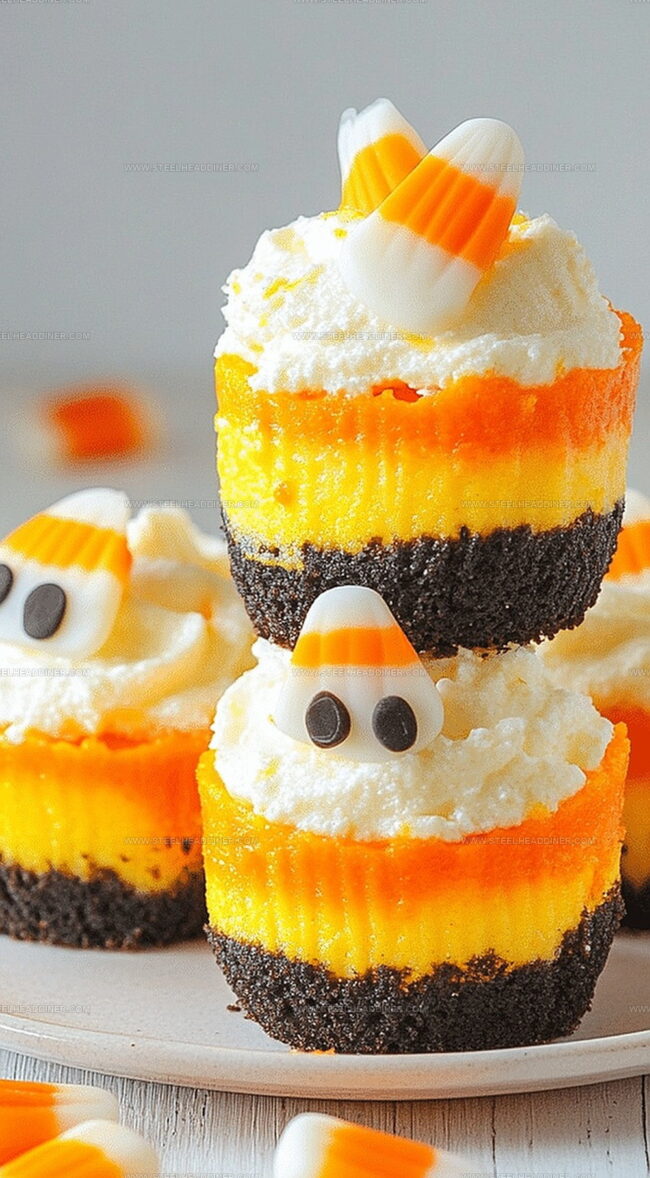
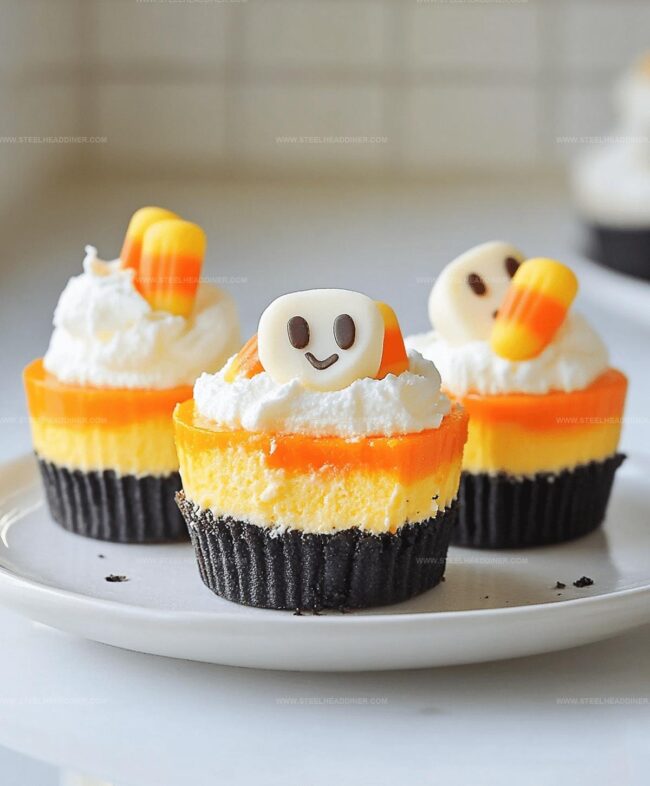
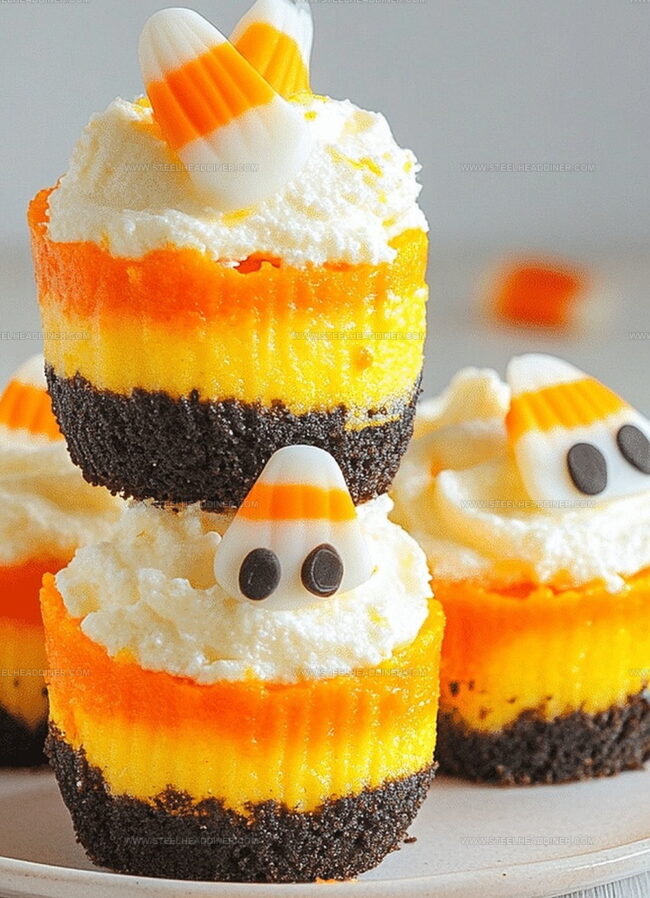
Adorable Mini Candy Corn Cheesecakes Recipe for Fall Treats
Crafting mini candy corn cheesecakes brings pure autumn magic right to your dessert table.
Sweet layers create a festive treat that celebrates seasonal joy.
Halloween parties come alive with these adorable miniature desserts.
Creamy textures and vibrant colors make each bite delightful.
Small individual portions guarantee everyone gets their perfect share.
Rich cream cheese blends smoothly with graham cracker crusts.
You’ll fall in love with these playful, bite-sized confections that capture fall’s whimsical spirit.
Let’s start making something deliciously memorable!
Mini Candy Corn Cheesecakes – Festive and Fun
Candy Corn Cheesecakes Ingredient Essentials
For the Crust:For the Cheesecake Base:For the Coloring and Topping:Making Mini Candy Corn Cheesecakes at Home
Step 1: Prepare Baking Setup
Grab your muffin tin and line it with adorable paper liners. Preheat the oven to a cozy temperature that will help your mini cheesecakes bake perfectly.
Step 2: Create Crumbly Crust
Crush graham crackers into fine crumbs and mix with melted butter. Gently press this buttery mixture into the bottom of each liner, creating a delicious foundation for your cheesecakes.
Step 3: Whip Up Creamy Cheesecake Base
In a large mixing bowl, blend cream cheese and sugar until silky smooth. Add vanilla extract and eggs, stirring until the mixture becomes light and fluffy.
Step 4: Color Your Cheesecake Layers
Divide the creamy batter into three separate bowls. Leave one portion white, and color another with vibrant yellow food coloring and the third with bright orange food coloring.
Step 5: Layer Colorful Batter
Carefully spoon the yellow batter as the first layer in each muffin cup. Gently add the orange batter on top of the yellow layer.
Finally, crown each mini cheesecake with the white batter.
Step 6: Bake and Cool
Place the muffin tin in the preheated oven and bake until the cheesecakes are set and slightly golden.
Remove and let them cool completely at room temperature.
Step 7: Chill and Garnish
Transfer the cooled cheesecakes to the refrigerator and let them chill for a few hours.
Before serving, add a dollop of fluffy whipped cream on top for extra decadence.
Tips for Mini Candy Corn Cheesecakes Success
Mini Candy Corn Cheesecakes – Fun Flavor Variations
Serving Mini Candy Corn Cheesecakes for Dessert
Mini Candy Corn Cheesecakes – How to Store Them
FAQs
Yes, you can prepare these mini cheesecakes up to 2-3 days in advance and store them in the refrigerator. Just add the whipped cream topping right before serving.
No, you only need a standard muffin tin, electric mixer, and basic baking tools. Silicone or paper liners work great for easy removal.
Use gel food coloring for vibrant colors and carefully spoon each colored batter layer gently into the muffin cups. Avoid stirring or mixing the layers to maintain sharp color separation.
Print
Mini Candy Corn Cheesecakes Recipe
- Total Time: 50 minutes
- Yield: 12 1x
Description
Sweet mini candy corn cheesecakes bring Halloween spirit to dessert tables with layered orange, yellow, and white creamy perfection. Delightful individual portions create festive charm that guests will adore.
Ingredients
- 1 cup graham cracker crumbs
- 1/4 cup butter (melted)
- 16 oz cream cheese (softened)
- 1/2 cup sugar
- 1 tsp vanilla extract
- 2 large eggs
- Yellow and orange food coloring
- Whipped cream (optional for topping)
Instructions
- Prepare a muffin tin by lining with cupcake papers and ensure the oven is preheated to the correct temperature.
- Create a foundational crust by combining graham cracker crumbs with melted butter, firmly pressing the mixture into the base of each liner.
- Using an electric mixer, whip cream cheese and sugar until achieving a silky, uniform consistency, then incorporate vanilla extract and eggs, blending thoroughly.
- Separate the cheesecake batter into three distinct sections, leaving one portion in its natural white state while tinting the remaining two with vibrant yellow and orange food coloring.
- Strategically layer the colored batters within each muffin cup, starting with the yellow base, followed by the orange middle layer, and concluding with the pristine white topping.
- Bake in the preheated oven for approximately 20-25 minutes, monitoring until the miniature cheesecakes set and develop a subtle golden edge.
- Allow the cheesecakes to cool completely at room temperature, then transfer to the refrigerator for thorough chilling.
- Optional: Garnish with a delicate swirl of whipped cream just before serving to enhance the visual appeal and add a creamy finish.
Notes
- Achieve a perfectly smooth cheesecake batter by ensuring cream cheese is at room temperature before mixing, preventing lumps and creating a silky texture.
- Prevent cracks by avoiding overmixing the batter and using a water bath during baking, which helps distribute heat evenly and maintains moisture.
- For gluten-free options, swap graham cracker crumbs with almond flour or gluten-free cookie crumbs, maintaining the same delicious crust structure.
- Enhance flavor complexity by adding a pinch of cinnamon or nutmeg to the graham cracker crust, complementing the sweet cheesecake profile.
- Prep Time: 25 minutes
- Cook Time: 25 minutes
- Category: Desserts
- Method: Baking
- Cuisine: American
Nutrition
- Serving Size: 12
- Calories: 210 kcal
- Sugar: 15 g
- Sodium: 120 mg
- Fat: 16 g
- Saturated Fat: 9 g
- Unsaturated Fat: 5 g
- Trans Fat: 0.3 g
- Carbohydrates: 12 g
- Fiber: 0.5 g
- Protein: 4 g
- Cholesterol: 55 mg
Jack Monroe
Founder & Recipe Innovator
Expertise
Pacific Northwest cuisine, Single-serving recipe development, Sustainable sourcing and cooking, Modern comfort food
Education
Brightwater
Associate of Applied Science in Culinary Arts
Focus: Sustainable cooking, seasonal ingredients, and food systems education
Jack grew up with a fishing rod in one hand and a cast-iron skillet in the other. After graduating from Brightwater: A Center for the Study of Food, he set out to prove that cooking for one could still taste like a feast.
Jack believes that food should feel real: fresh, fearless, and a little wild, just like the rivers he grew up around. For Jack, every single dish is a small adventure, and the best ones are the ones you can cook with heart, not hassle.