
Dreamy No-Bake Oreo Balls Recipe for Sweet Tooths
Crafting delectable Oreo balls brings pure joy to any dessert enthusiast’s kitchen adventure.
Sweet crumbles of chocolate cookies blend seamlessly with creamy ingredients.
Unexpected textures create magical moments of indulgence.
Minimal effort yields maximum deliciousness in these bite-sized treats.
Chocolate lovers will appreciate the simple yet sophisticated approach to this crowd-pleasing dessert.
Each Oreo ball promises a perfect balance of rich flavor and smooth consistency.
You can whip up these delightful morsels in minutes, making them ideal for spontaneous gatherings or sudden sweet cravings.
Prepare to be amazed by how quickly these irresistible treats disappear from your serving plate.
Why Oreo Balls Are A Crowd Favorite
Ingredients for Oreo Balls
For the Base:For the Coating:For the Optional Garnish:How to Make Oreo Balls
Step 1: Crushing Oreo Cookies
Grab a food processor or place Oreo cookies in a sealed plastic bag and crush them into fine crumbs using a rolling pin. Ensure the cookies are completely pulverized with no large chunks remaining.
Ingredients:Step 2: Mixing Creamy Base
In a spacious mixing bowl, combine the crushed Oreo crumbs with softened cream cheese. Use a spatula or electric mixer to blend the ingredients until they form a smooth, uniform mixture that holds together easily.
Ingredients:Step 3: Shaping Delightful Bites
Using clean hands or a small cookie scoop, roll the mixture into compact bite-sized spheres. Arrange the formed balls on a baking sheet lined with parchment paper, ensuring they are not touching each other.
Step 4: Chilling and Firming
Place the baking sheet with Oreo balls in the freezer. Allow them to chill for approximately 15-20 minutes until they become firm and hold their shape perfectly.
Step 5: Chocolate Coating Preparation
Melt chocolate in a microwave-safe bowl or using a double boiler. Stir occasionally to ensure smooth and even melting.
Ingredients:Step 6: Dipping and Coating
Remove the chilled Oreo balls from the freezer. Using a fork or dipping tool, carefully submerge each ball into the melted chocolate.
Gently tap to remove excess chocolate and return to the lined baking sheet.
Step 7: Final Chilling and Decorating
Refrigerate the chocolate-covered Oreo balls until the chocolate sets completely.
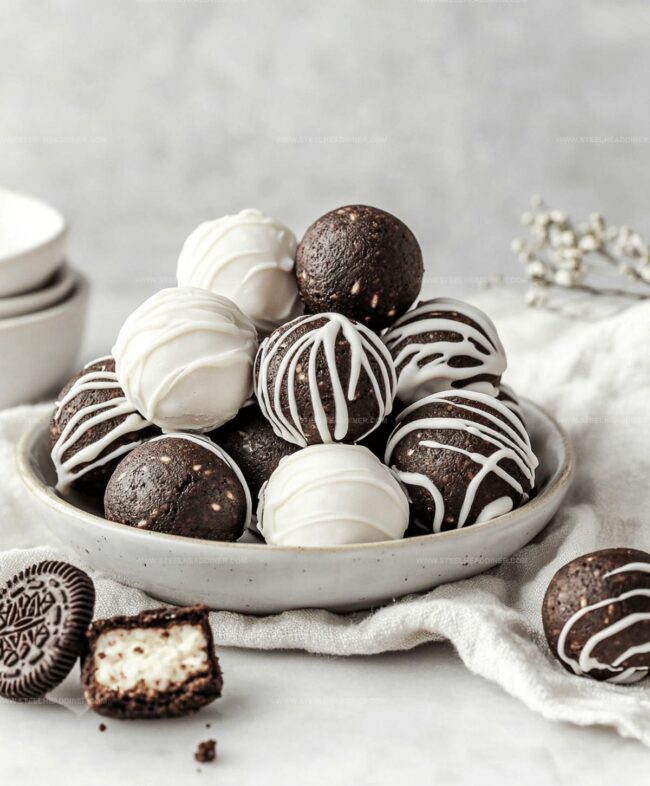
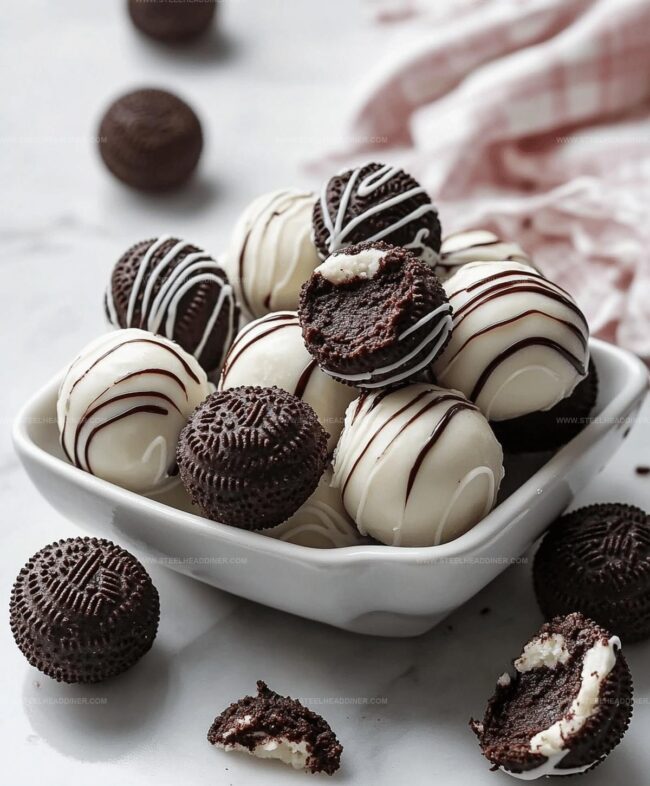
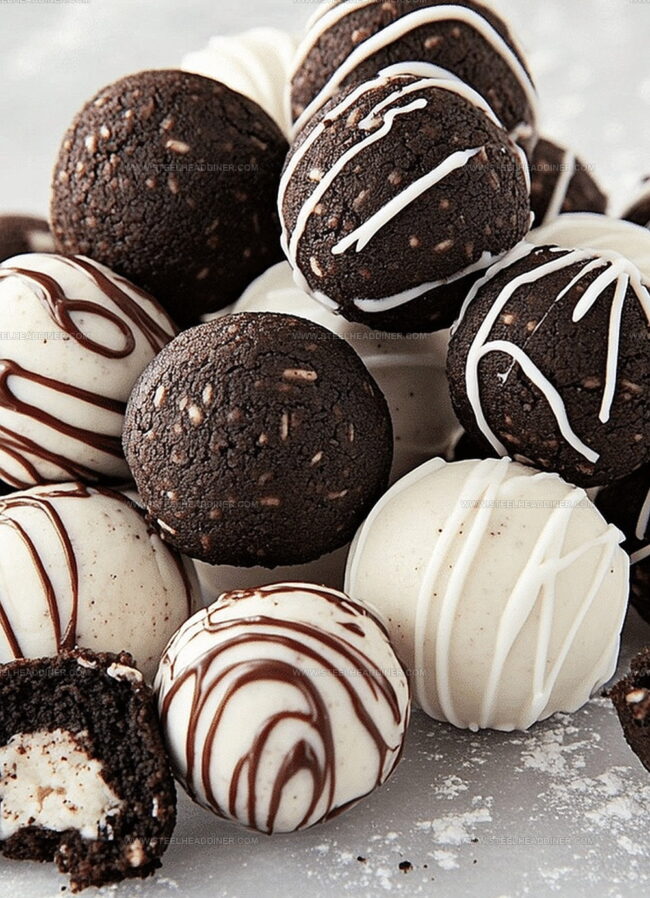
For extra flair, drizzle with contrasting chocolate or sprinkle with additional crushed Oreo crumbs.
Helpful Tips for Perfect Oreo Balls

Different Twists on Oreo Balls
Serving Ideas for Oreo Balls
Storage Recommendations for Oreo Balls
FAQs
Yes, you can experiment with different Oreo flavors like mint, peanut butter, or birthday cake to create unique variations of the Oreo balls.
No, you just need a mixing bowl, baking sheet, and basic kitchen tools like a spoon or food processor to crush the Oreos.
Oreo balls can be stored in the refrigerator for up to a week, making them a great make-ahead dessert for parties or gatherings.
Absolutely! Kids can help crush the Oreos, mix the ingredients, and roll the balls, making it a fun family cooking activity.
Print
Oreo Balls Recipe
- Total Time: 15 minutes
- Yield: 24 1x
Description
Irresistible chocolate Oreo balls deliver pure indulgence in one delightful bite. Creamy cream cheese and crushed cookies combine with melted chocolate for a simple yet elegant dessert everyone will adore.
Ingredients
- 8 oz (226 g) cream cheese, softened
- 36 Oreo cookies, crushed
- 12 oz (340 g) semi-sweet chocolate, melted (or white chocolate, if preferred)
Instructions
- Crush Oreo cookies finely in a food processor or with a rolling pin until they resemble coarse breadcrumbs.
- Mix crushed Oreos with softened cream cheese in a mixing bowl, blending thoroughly until a uniform consistency is achieved.
- Using clean hands, shape the mixture into compact, uniform spheres approximately one inch in diameter.
- Arrange the formed balls on a parchment-lined baking sheet, ensuring they do not touch each other.
- Chill the Oreo balls in the freezer for 15-20 minutes to firm up and maintain their shape during coating.
- Melt chocolate using a double boiler or microwave, stirring until smooth and completely liquid.
- Carefully dip each chilled Oreo ball into the melted chocolate, gently tapping to remove excess coating.
- Return chocolate-covered balls to the parchment-lined sheet, maintaining space between each piece.
- Refrigerate for approximately 10-15 minutes until the chocolate shell hardens completely.
- Optional: Decorate by drizzling contrasting chocolate or sprinkling crushed Oreo crumbs on top for added visual appeal.
- Store in an airtight container in the refrigerator for up to one week.
Notes
- Chill cream cheese beforehand to ensure smoother mixing and easier blending with Oreo crumbs.
- Use a food processor to crush Oreos uniformly, creating a consistent texture for the balls.
- Wear disposable gloves when rolling balls to prevent sticky hands and maintain a clean workspace.
- Melt chocolate using a double boiler or microwave in short intervals, stirring frequently to avoid burning.
- For gluten-free version, substitute regular Oreos with gluten-free chocolate sandwich cookies.
- Keep Oreo balls refrigerated in an airtight container for up to one week, maintaining their delicious flavor and texture.
- Try different chocolate coatings like white, dark, or milk chocolate for varied taste experiences.
- Prep Time: 15 minutes
- Cook Time: 0 minutes
- Category: Snacks, Desserts
- Method: Freezing
- Cuisine: American
Nutrition
- Serving Size: 24
- Calories: 138
- Sugar: 11 g
- Sodium: 70 mg
- Fat: 8 g
- Saturated Fat: 5 g
- Unsaturated Fat: 2 g
- Trans Fat: 0 g
- Carbohydrates: 16 g
- Fiber: 1 g
- Protein: 1 g
- Cholesterol: 13 mg
Maya Thompson
Culinary Content Creator & Nutrition Enthusiast
Expertise
Healthy single-serving recipes, Meal prepping for individuals, Integrating nutrition into everyday cooking, Vegetarian and plant-based cuisine
Education
The Chef’s Academy at Harrison College
Associate of Applied Science in Culinary Arts
Focus: Nutrition, meal planning, and culinary techniques for healthy living.
Maya found her passion in the kitchen by mixing good food with good energy. After earning her culinary degree at The Chef’s Academy at Harrison College, she made it her mission to keep cooking simple, wholesome, and packed with flavor.
At Steelhead Diner, Maya shares easy, healthy recipes built for real life. For Maya, great food seems like a celebration of everyday moments, made better one fresh bite at a time.