Fluffy Sno Ball Brownies Recipe: Sweet Bliss in Every Bite
Chocolate lovers swoon over these decadent Sno ball brownies that blend rich, fudgy layers with nostalgic marshmallow magic.
Every bite promises a delightful dance of textures and flavors that transport you back to childhood treat memories.
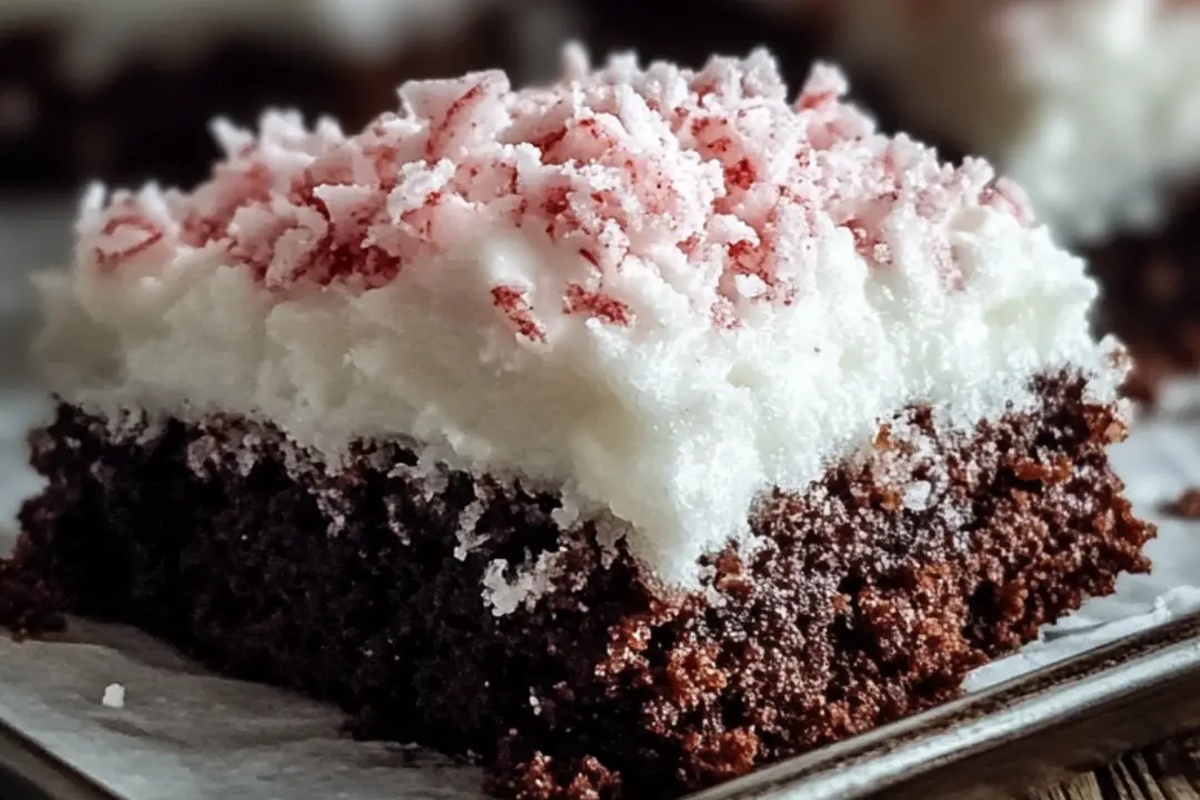
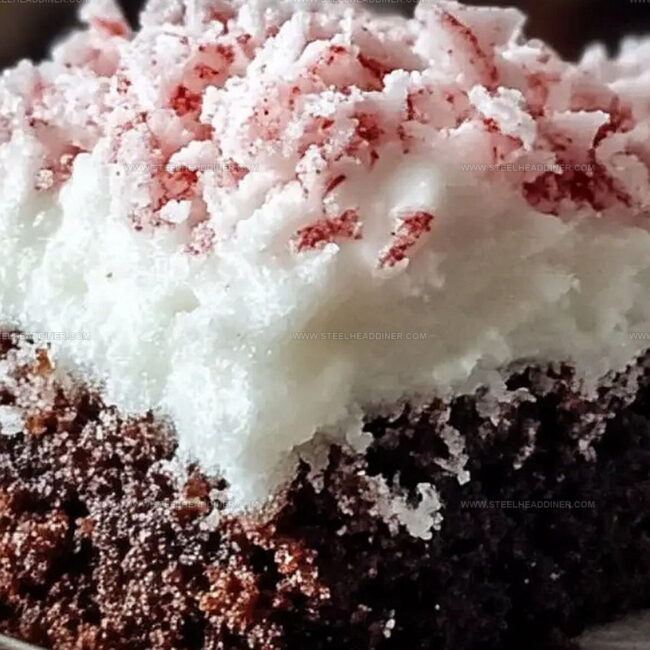
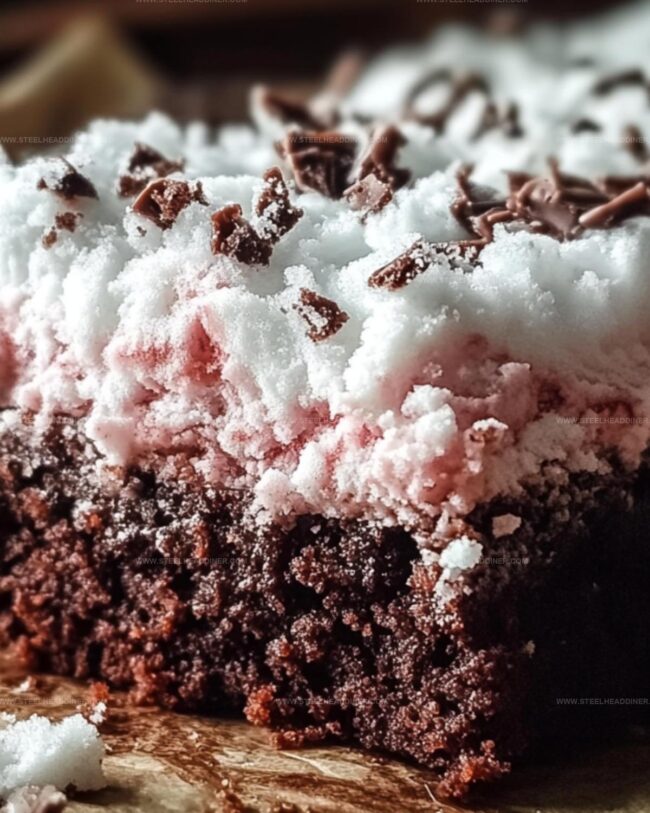
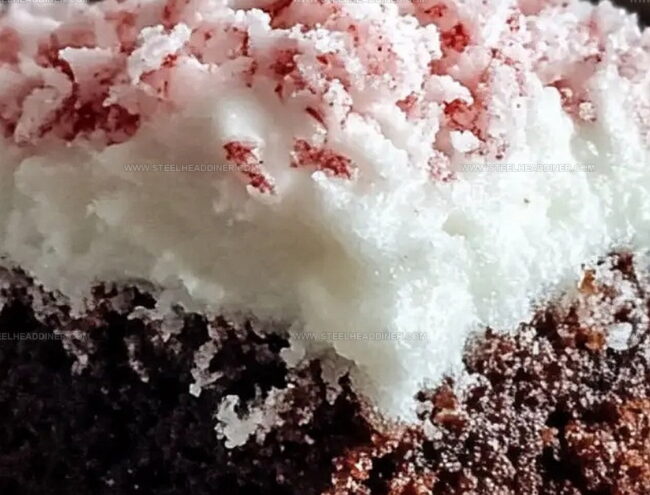
Soft, pillowy marshmallow cream nestles between dense chocolate brownie layers, creating an irresistible dessert sensation.
The classic coconut coating adds a delightful crunch and sweet finish to this indulgent creation.
Topped with a generous sprinkle of shredded coconut, these brownies elevate your typical dessert experience.
Each slice delivers a perfect balance of chocolatey richness and sweet, fluffy marshmallow delight.
You’ll want to share these show-stopping treats with everyone at your next gathering.
Soft And Chewy Sno Ball Brownies
Ingredients For Sno Ball Brownies
Base Ingredients:Frosting Layer:Decorative Ingredients:Clear Steps For Sno Ball Brownies
Step 1: Warm Up the Oven
Turn on the oven and set it to the temperature recommended on the brownie mix box. This helps create the perfect baking environment for your delicious treat.
Step 2: Whip Up the Brownie Batter
Mix the brownie batter following the instructions on the package. Stir everything together until you have a smooth, chocolatey mixture that looks absolutely irresistible.
Step 3: Prepare the Baking Pan
Grease the baking pan or line it with parchment paper to ensure your brownies won’t stick and come out perfectly.
Step 4: Bake to Perfection
Pour the batter into the prepared pan and slide it into the preheated oven.
Bake according to the package instructions. Once done, let the brownies cool completely – patience is key!
Step 5: Create Dreamy Marshmallow Frosting
In a mixing bowl, blend the vanilla frosting and marshmallow cream until you have a smooth, fluffy mixture that looks like a cloud of sweetness.
Step 6: Transform Coconut into Pink Magic
Grab a bowl and pour in the shredded coconut.
Add a few drops of hot pink food coloring, then use a fork to toss and mix. Keep adding color until the coconut becomes a vibrant, eye-catching pink.
Step 7: Bring It All Together
Spread the marshmallow frosting evenly over the cooled brownies. Sprinkle the pink coconut on top, creating a delightful and playful dessert that looks as amazing as it tastes.
Step 8: Slice and Serve
Cut the brownies into squares and get ready to wow your friends and family with these spectacular Sno Ball Brownies!
Tips For Moist Sno Ball Brownies
Flavor Variations For Sno Ball Brownies
Pairings For Sno Ball Brownies
Storing Sno Ball Brownies Properly
FAQs
Yes, absolutely! You can use your favorite homemade brownie recipe as the base for these Sno Ball Brownies.
You can substitute marshmallow cream with marshmallow fluff, which has a very similar texture and consistency.
If you don’t have hot pink food coloring, you can use regular pink or even mix red and white food coloring to achieve the desired shade of pink for the coconut.
Yes, you can prepare Sno Ball Brownies a day in advance. Just store them in an airtight container in the refrigerator until ready to serve.
Print
Sno Ball Brownies Recipe
- Total Time: 50 minutes
- Yield: 12 1x
Description
Chocolate lovers will adore these Sno Ball Brownies, blending rich fudgy layers with marshmallow and coconut glamour. Pillowy pink coconut peaks crown decadent chocolate depths, creating a playful dessert that delights both kids and nostalgic adults.
Ingredients
Main Ingredients:
- 1 family-size brownie mix (for a 13x9 inch pan)
- 1 can (16 ounces / 454 grams) vanilla cake frosting
- 1 jar (7 ounces / 198 grams) marshmallow cream
Supporting Ingredients:
- 3 cups sweetened flaked coconut
- 4–8 drops hot pink food coloring
Brownie Mix Additions:
- 1–2 eggs
- 1/3 cup vegetable oil
- 1/2 cup water
Instructions
- Prepare the oven according to the brownie mix package temperature guidelines and set up a 9×13-inch baking pan with parchment paper or grease.
- Create the brownie batter following the package directions, ensuring thorough mixing for a consistent texture.
- Transfer the batter into the prepared pan, spreading it evenly to promote uniform baking.
- Bake the brownies as instructed on the package, then allow them to cool completely at room temperature.
- Craft the marshmallow frosting by blending vanilla frosting and marshmallow cream until smooth and creamy.
- Spread the marshmallow frosting uniformly across the cooled brownie surface, creating an even layer.
- Transform the shredded coconut into a vibrant pink by gradually adding hot pink food coloring.
- Gently toss the coconut with a fork, incorporating color incrementally until achieving a bright pink hue.
- Generously sprinkle the pink coconut over the marshmallow frosting, covering the entire surface.
- Slice the decorated brownies into square portions and serve immediately for maximum freshness.
Notes
- Elevate brownies by using high-quality cocoa mix for richer chocolate flavor.
- Ensure brownies are completely cool before adding frosting to prevent melting and maintain clean layers.
- Use disposable gloves when mixing food coloring into coconut to avoid stained hands and achieve even color distribution.
- Try alternative coconut colors like pastel blue or lavender for different themed desserts or seasonal variations.
- Prep Time: 20 minutes
- Cook Time: 30 minutes
- Category: Desserts, Snacks
- Method: Baking
- Cuisine: American
Nutrition
- Serving Size: 12
- Calories: 365
- Sugar: 33 g
- Sodium: 150 mg
- Fat: 18 g
- Saturated Fat: 7 g
- Unsaturated Fat: 9 g
- Trans Fat: 0.5 g
- Carbohydrates: 48 g
- Fiber: 1.5 g
- Protein: 2.5 g
- Cholesterol: 25 mg
Maya Thompson
Culinary Content Creator & Nutrition Enthusiast
Expertise
Healthy single-serving recipes, Meal prepping for individuals, Integrating nutrition into everyday cooking, Vegetarian and plant-based cuisine
Education
The Chef’s Academy at Harrison College
Associate of Applied Science in Culinary Arts
Focus: Nutrition, meal planning, and culinary techniques for healthy living.
Maya found her passion in the kitchen by mixing good food with good energy. After earning her culinary degree at The Chef’s Academy at Harrison College, she made it her mission to keep cooking simple, wholesome, and packed with flavor.
At Steelhead Diner, Maya shares easy, healthy recipes built for real life. For Maya, great food seems like a celebration of everyday moments, made better one fresh bite at a time.