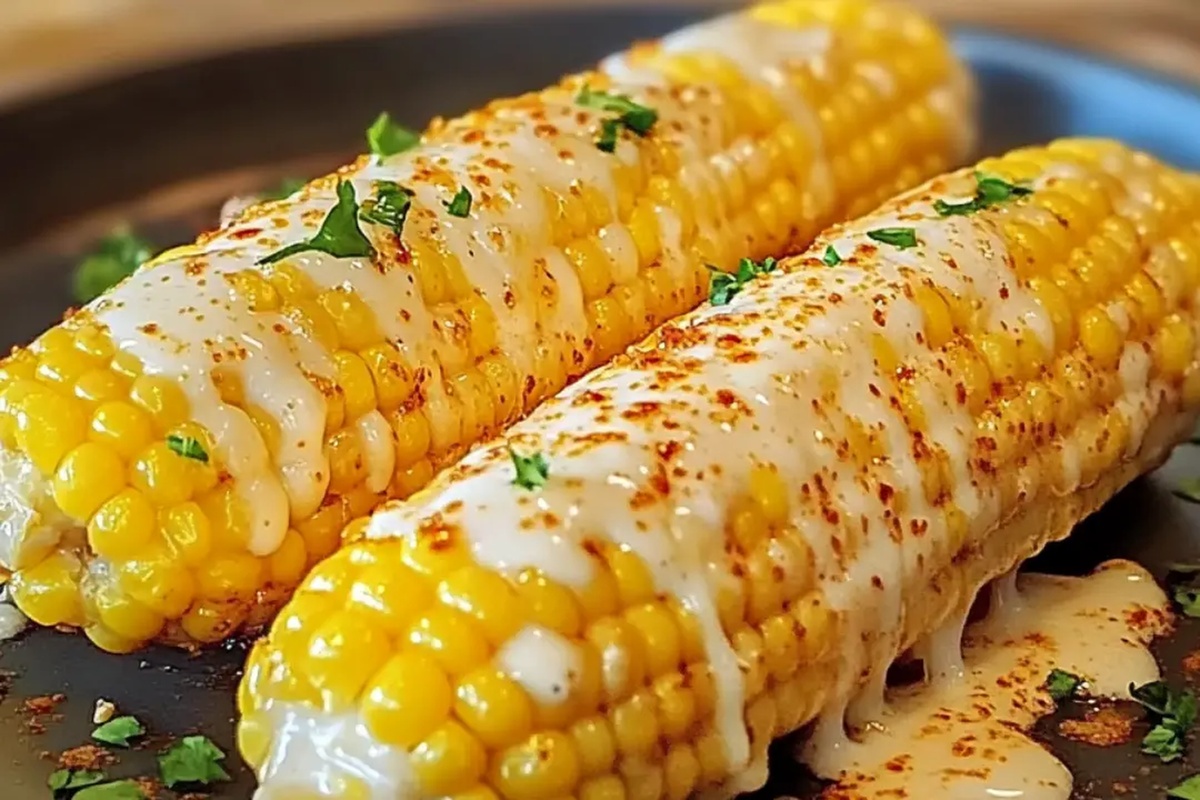
Irresistible Cheesy Garlic Butter Corn On The Cob Recipe
Summer barbecues come alive with this irresistible cheesy garlic butter corn on the cob recipe that transforms ordinary side dishes into extraordinary delights.
Crisp kernels burst with rich, creamy flavors that dance across your palate.
Melted butter mingles with sharp garlic, creating a mouthwatering combination that screams comfort.
Each golden ear of corn becomes a canvas for savory indulgence.
Cheese adds a decadent layer of richness that elevates this classic summer staple.
Prepare to savor every single bite of this simple yet stunning side dish.
You won’t be able to resist seconds of this crowd-pleasing corn.
Cheesy Garlic Butter Corn on the Cob That’s Addictive
Ingredients for Cheesy Garlic Butter Corn on the Cob
Main Ingredients:Butter and Seasonings:Optional Cooking Methods:How to Make Cheesy Garlic Butter Corn on the Cob
Step 1: Fire Up the Oven
Crank your oven to a toasty 400F. Got a grill or stovetop?
Those work perfectly too! This is your starting line for corn magic.
Step 2: Create Flavor-Packed Butter Blend
Grab a small bowl and mix together these tasty ingredients:Toss in some fresh parsley to give it that extra zing.
Step 3: Lovingly Coat the Corn
Take your corn and give it a luxurious bath in the butter mixture.
Make sure every single inch gets covered in deliciousness.
Step 4: Choose Your Cooking Adventure
Oven Route: Spread corn on a baking sheet and roast for 20-25 minutes.
Flip halfway to ensure even golden goodness.
Grill Route: Dance those cobs over medium heat for 10-15 minutes, rotating to get those beautiful char marks.
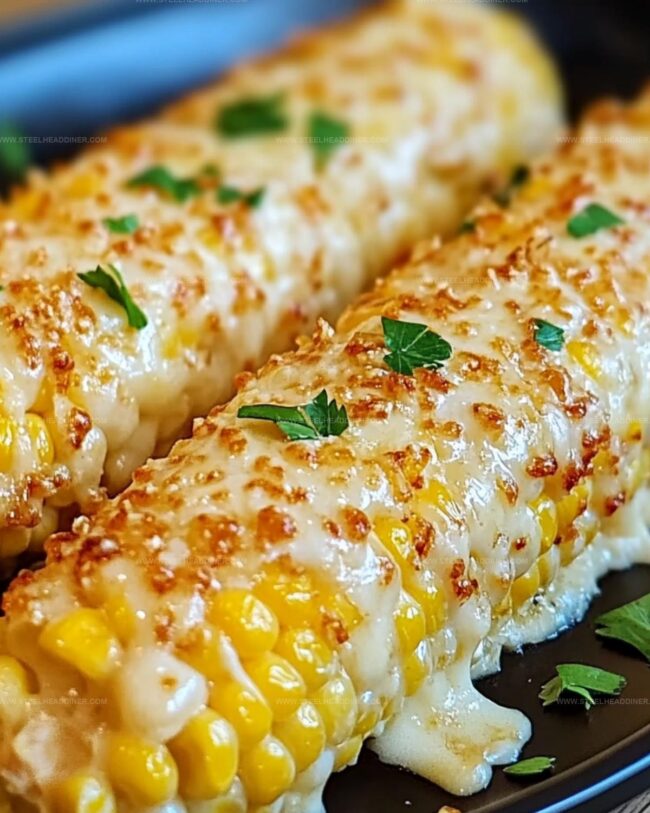
Step 5: Cheese It Up
During the final 5 minutes, shower your corn with shredded cheese. If using the oven, crank up the broiler for 2-3 minutes to create a melty, slightly crispy cheese top.
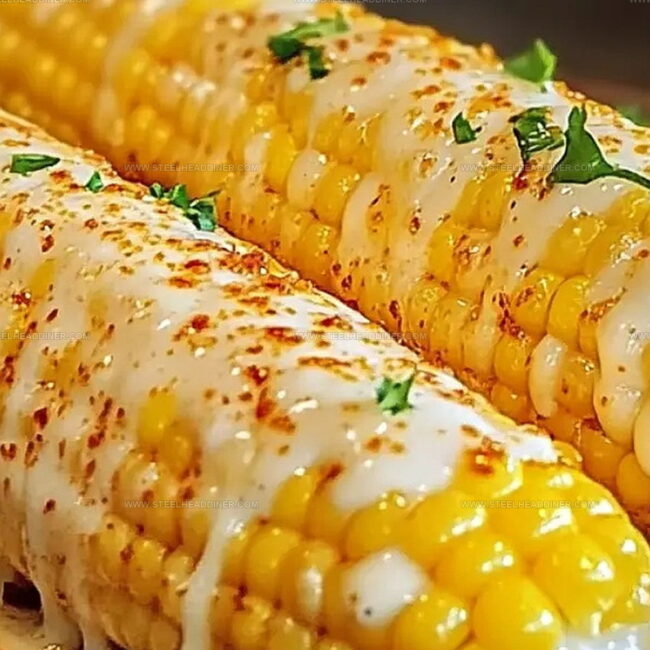
Step 6: Serve with Swagger
Pull your corn from the heat, drizzle any remaining butter, and sprinkle extra parsley if you’re feeling fancy. Devour immediately while it’s hot and heavenly!
Tips for Cheesy Garlic Butter Corn on the Cob

Variations on Cheesy Garlic Butter Corn on the Cob
Pairing Suggestions for Cheesy Garlic Butter Corn on the Cob
Storage Advice for Cheesy Garlic Butter Corn on the Cob
FAQs
Yes, you can use frozen corn on the cob. Thaw it completely and pat dry before applying the garlic butter mixture. Keep in mind that cooking time might slightly vary.
Cheddar, parmesan, or mozzarella are excellent choices. Sharp cheddar provides the most robust flavor, while mozzarella gives a creamy texture.
Add extra chili powder, red pepper flakes, or a dash of hot sauce to the garlic butter mixture. Adjust the amount according to your spice preference.
Yes, this corn recipe is vegetarian-friendly. Just ensure the cheese you use is made without animal rennet if you want a strict vegetarian version.
Print
Cheesy Garlic Butter Corn On The Cob Recipe
- Total Time: 35 minutes
- Yield: 4 1x
Description
Corn enthusiasts will adore this cheesy garlic butter corn on the cob, a mouthwatering side dish that elevates summer’s favorite vegetable. Melted butter, fragrant garlic, and sharp cheese create an irresistible combination you’ll want to savor with every delicious bite.
Ingredients
Main Ingredients:
- 4 ears of corn
- 1 cup shredded cheese (cheddar, mozzarella, or a blend)
Butter and Seasoning:
- 1/4 cup unsalted butter (melted)
- 3 cloves garlic (minced)
- 1/2 teaspoon paprika
- 1/4 teaspoon chili powder (optional, for heat)
- Salt and pepper (to taste)
Optional Creamy Element:
- 1/4 cup heavy cream or milk
- 1 tablespoon fresh parsley (chopped)
Instructions
- Crank the oven to a sizzling 400F (200C), preparing for a flavor-packed corn transformation.
- Craft a zesty butter blend by whisking melted butter with minced garlic, paprika, chili powder, salt, and pepper until smooth and fragrant.
- Fold in freshly chopped parsley to elevate the butter’s aromatic profile.
- Lavishly coat each corn cob with the seasoned butter mixture, ensuring every curve and kernel gets a luxurious massage.
- For oven enthusiasts: Arrange corn on a baking sheet and roast for 20-25 minutes, rotating midway to guarantee uniform caramelization.
- Grill lovers can char the corn over medium heat for 10-15 minutes, rotating frequently to achieve those coveted smoky grill marks.
- In the final cooking moments, cascade shredded cheese over the corn, allowing it to melt tantalizingly.
- For extra golden edges, broil for 2-3 minutes until the cheese transforms into a bubbling, slightly crisp topping.
- Extract the corn from heat, drizzle with any remaining garlic butter, and crown with an optional sprinkle of fresh parsley.
- Serve immediately while the cheese is molten and the corn radiates irresistible warmth.
Notes
- Select fresh corn with bright, plump kernels for the most delicious and juicy result.
- Try different cheese varieties like sharp cheddar, smoked gouda, or pepper jack for unique flavor profiles.
- Adjust spice levels by increasing or decreasing chili powder and paprika to suit personal taste preferences.
- For a lighter version, use olive oil instead of butter and opt for low-fat cheese alternatives.
- Prep Time: 10 minutes
- Cook Time: 25 minutes
- Category: Snacks, Appetizer, Dinner
- Method: Baking
- Cuisine: American
Nutrition
- Serving Size: 4
- Calories: 367 kcal
- Sugar: 3 g
- Sodium: 250 mg
- Fat: 29 g
- Saturated Fat: 17 g
- Unsaturated Fat: 10 g
- Trans Fat: 0.5 g
- Carbohydrates: 16 g
- Fiber: 2 g
- Protein: 11 g
- Cholesterol: 65 mg
Maya Thompson
Culinary Content Creator & Nutrition Enthusiast
Expertise
Healthy single-serving recipes, Meal prepping for individuals, Integrating nutrition into everyday cooking, Vegetarian and plant-based cuisine
Education
The Chef’s Academy at Harrison College
Associate of Applied Science in Culinary Arts
Focus: Nutrition, meal planning, and culinary techniques for healthy living.
Maya found her passion in the kitchen by mixing good food with good energy. After earning her culinary degree at The Chef’s Academy at Harrison College, she made it her mission to keep cooking simple, wholesome, and packed with flavor.
At Steelhead Diner, Maya shares easy, healthy recipes built for real life. For Maya, great food seems like a celebration of everyday moments, made better one fresh bite at a time.