Homemade Cookie Dough Snickers & Reese’s Ice Cream Recipe
Craving a decadent cookie dough Snikers & Reese’s ice cream that combines childhood nostalgia with indulgent flavors?
Sweet memories collide with creamy dreams in this irresistible dessert.
Chocolate chunks and peanut butter swirls create a magical landscape of deliciousness.
Comfort meets creativity in every single spoonful of this frozen treat.
Layers of rich ingredients promise a spectacular sensory adventure for dessert enthusiasts.
Nutty, sweet, and incredibly smooth textures dance together in perfect harmony.
You’ll want to savor each magnificent bite and share this delightful creation with everyone around.
Prepare to be amazed by the ultimate dessert experience that transforms ordinary moments into extraordinary memories.
Why Cookie Dough Snickers Ice Cream Shines
Ingredients for Cookie Dough Snickers Ice Cream
For the Base:For the Mix-Ins:For the Preparation:How to Make Cookie Dough Snickers Ice Cream
Step 1: Whip The Cream
Use an electric mixer to whip heavy cream until it forms stiff, tall peaks that hold their shape when the beater is lifted. The cream should look thick and glossy with strong structure.
Step 2: Blend Condensed Milk
In a separate large mixing bowl, combine sweetened condensed milk with vanilla extract. Stir until the mixture is smooth and fully integrated with a consistent light color.
Step 3: Fold Whipped Cream
Carefully incorporate the whipped cream into the condensed milk mixture using a gentle folding technique. Use a spatula and sweep from bottom to top, turning the bowl to ensure complete blending without deflating the cream’s volume.
Step 4: Add Delicious Mix-Ins
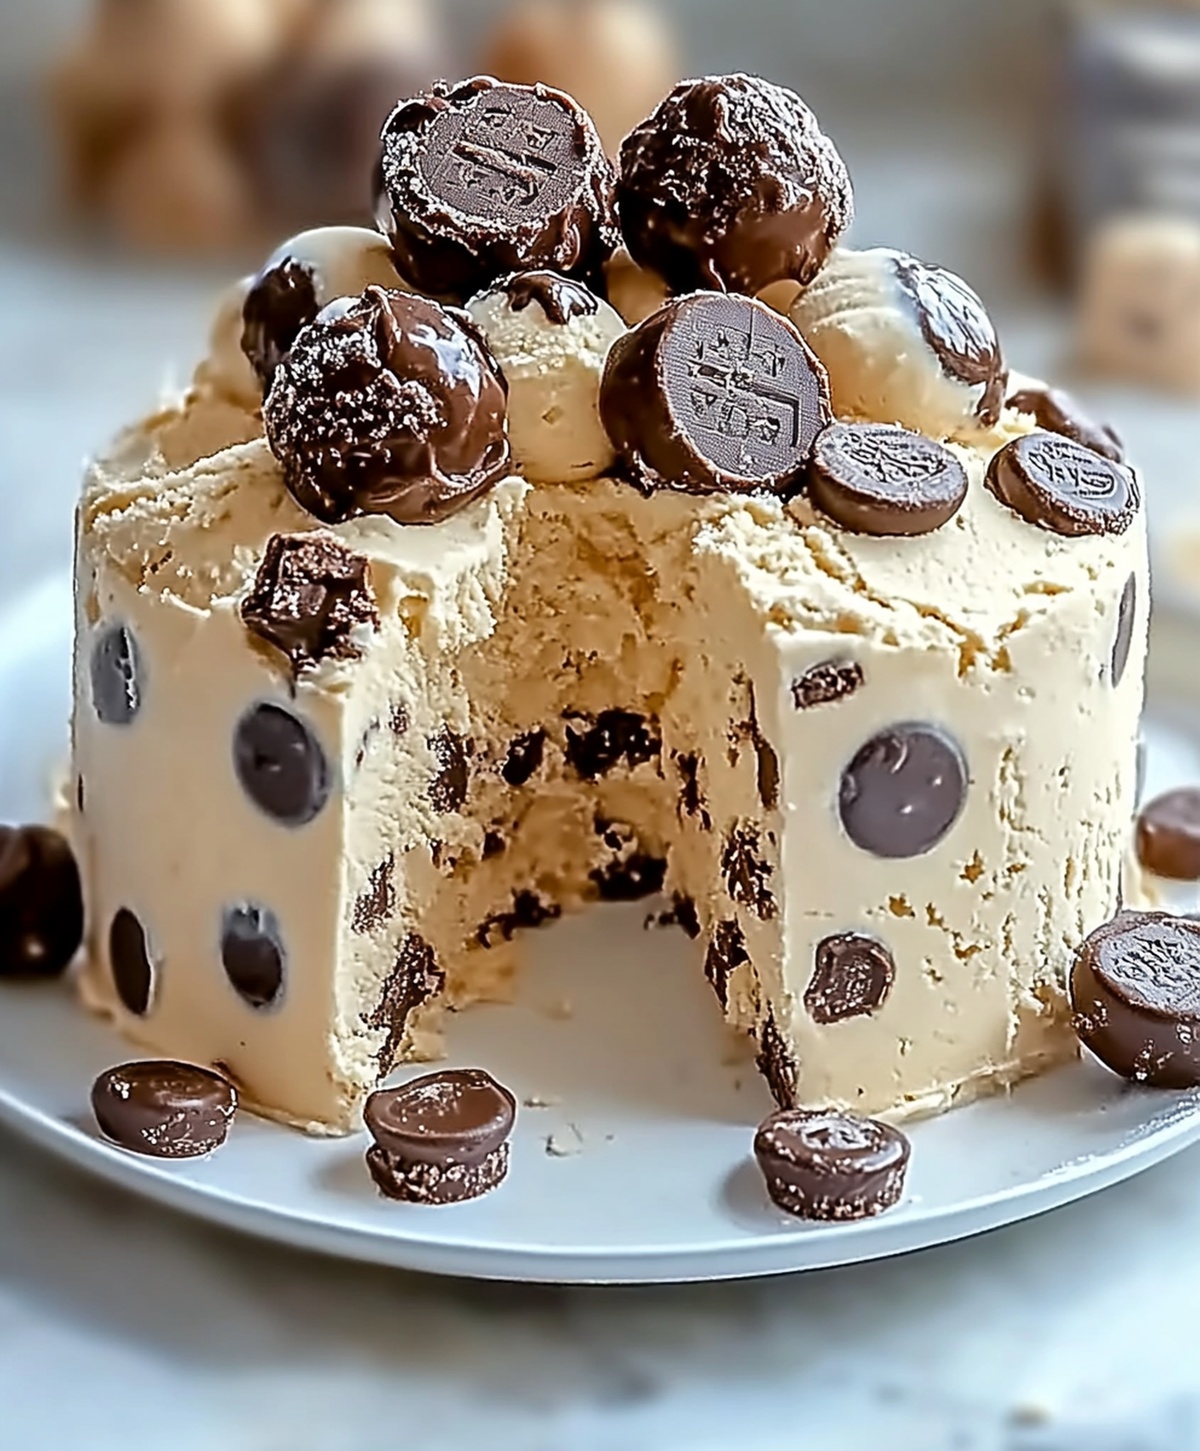
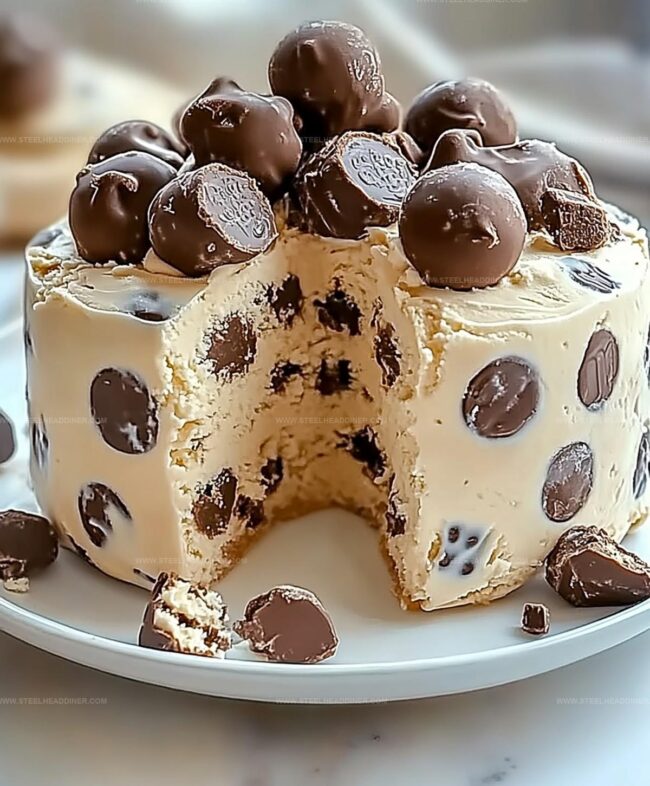
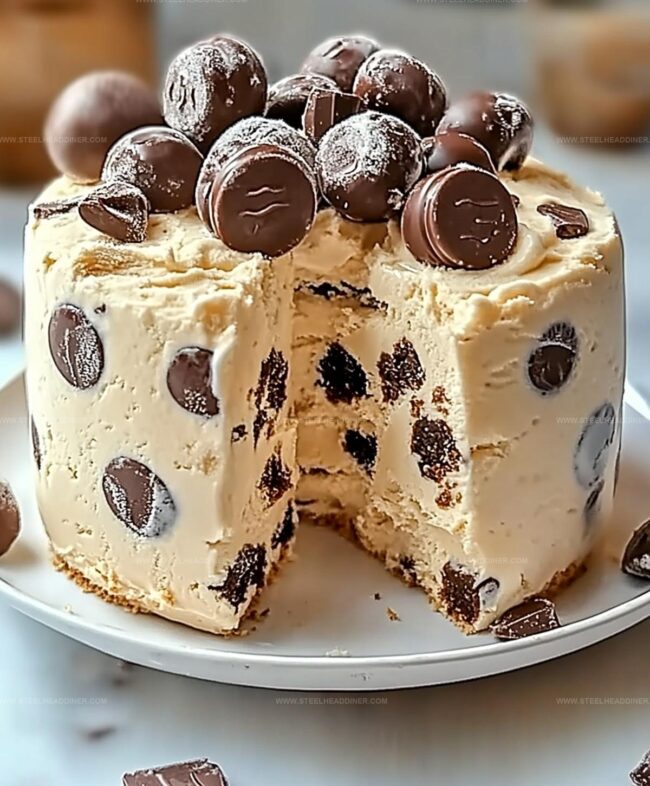
Gently fold in the following candy and chocolate pieces:Distribute ingredients evenly throughout the ice cream base.
Step 5: Prepare For Freezing
Transfer the mixed ice cream into a freezer-safe loaf pan or container.
Smooth the top with a spatula to create an even surface.
Step 6: Freeze And Set
Cover the container with plastic wrap or a tight-fitting lid.
Place in the freezer for a minimum of 6 hours, preferably overnight, until the ice cream becomes completely firm.
Step 7: Serve And Enjoy
Remove from freezer, scoop into bowls, and savor your homemade no-churn ice cream loaded with candy surprises.
Helpful Notes for Cookie Dough Snickers Ice Cream

Flavor Twists for Cookie Dough Snickers Ice Cream

Best Ways to Serve Cookie Dough Snickers Ice Cream
How to Store Cookie Dough Snickers Ice Cream
FAQs
Absolutely! Feel free to swap Snickers and Reese’s with your favorite candy bars like Kit Kat, Twix, or Mars bars to customize the ice cream.
No ice cream maker required! This is a no-churn recipe that uses whipped cream and condensed milk to create a creamy, smooth texture without special equipment.
The ice cream will stay fresh for up to 2 weeks when stored in an airtight container in the freezer. Just make sure to cover it well to prevent freezer burn.
Print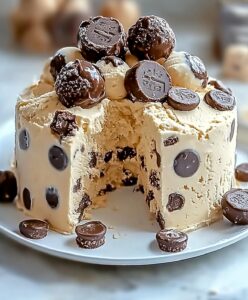
Cookie Dough Snikers & Reese’s Ice Cream Recipe
- Total Time: 15 minutes
- Yield: 8 1x
Description
Homemade cookie dough Snickers & Reese’s ice cream blends rich chocolate, creamy peanut butter, and nostalgic candy bar flavors. Dessert enthusiasts will savor this indulgent frozen treat that combines classic comfort with gourmet creativity.
Ingredients
- 2 cups (474 ml) heavy whipping cream
- 1 (14 oz / 397 g) can sweetened condensed milk
- 1 teaspoon vanilla extract
- 1/2 cup (85 g) mini chocolate chips
- 1/2 cup (75 g) chopped Snickers bars
- 1/2 cup (75 g) chopped Reese’s Peanut Butter Cups
Instructions
- Whip heavy cream in a spacious mixing bowl until it forms robust, standing peaks with a smooth, glossy texture.
- In a separate vessel, blend sweetened condensed milk with pure vanilla extract until thoroughly incorporated.
- Carefully integrate the whipped cream into the condensed milk mixture using a gentle folding technique to maintain the cream’s airy structure.
- Delicately incorporate chocolate chips, roughly chopped Snickers bars, Reese’s candies, and crumbled cookie dough pieces throughout the creamy base.
- Transfer the luxurious mixture into a freezer-safe container, ensuring an even distribution of mix-ins.
- Seal the container securely with a tight-fitting lid or plastic wrap to prevent ice crystals from forming.
- Freeze for a minimum of 6-8 hours, preferably overnight, allowing the ice cream to set completely and develop a rich, creamy consistency.
- When ready to serve, allow the ice cream to soften at room temperature for 2-3 minutes to achieve the perfect scoopable texture.
- Serve in chilled bowls, garnishing with additional candy pieces if desired, and savor the decadent frozen treat.
Notes
- Customize the texture by adjusting the cream whipping time, ensuring stiff peaks for a lighter, fluffier ice cream base.
- Break chocolate bars and candies into smaller chunks for more even distribution throughout the dessert, creating delightful surprise bites.
- Consider using low-fat condensed milk or a dairy-free alternative like coconut milk for those with dietary restrictions or seeking a lighter version.
- Prevent ice crystallization by pressing plastic wrap directly onto the surface before freezing, which helps maintain a smooth, creamy consistency.
- Prep Time: 15 minutes
- Cook Time: 0 minutes
- Category: Desserts
- Method: Freezing
- Cuisine: American
Nutrition
- Serving Size: 8
- Calories: 540
- Sugar: 58 g
- Sodium: 120 mg
- Fat: 32 g
- Saturated Fat: 18 g
- Unsaturated Fat: 12 g
- Trans Fat: 0.5 g
- Carbohydrates: 57 g
- Fiber: 2 g
- Protein: 6 g
- Cholesterol: 95 mg
Maya Thompson
Culinary Content Creator & Nutrition Enthusiast
Expertise
Healthy single-serving recipes, Meal prepping for individuals, Integrating nutrition into everyday cooking, Vegetarian and plant-based cuisine
Education
The Chef’s Academy at Harrison College
Associate of Applied Science in Culinary Arts
Focus: Nutrition, meal planning, and culinary techniques for healthy living.
Maya found her passion in the kitchen by mixing good food with good energy. After earning her culinary degree at The Chef’s Academy at Harrison College, she made it her mission to keep cooking simple, wholesome, and packed with flavor.
At Steelhead Diner, Maya shares easy, healthy recipes built for real life. For Maya, great food seems like a celebration of everyday moments, made better one fresh bite at a time.