
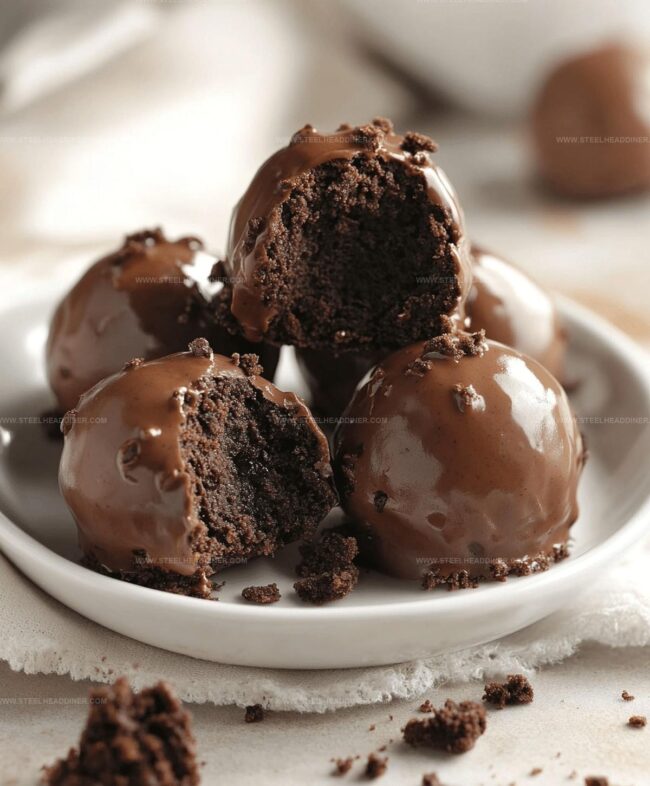
The Easiest Brownie Truffles Recipe That Melts in Your Mouth
Decadent chocolate lovers stumble upon these magical brownie truffles that promise pure indulgence.
Bite-sized delights packed with rich flavor combine classic dessert elements into one irresistible treat.
Smooth chocolate coating meets dense, fudgy interior for a mouthwatering experience.
Simple ingredients come together effortlessly in this quick recipe.
Minimal kitchen skills work perfectly for creating these delectable morsels.
Chocolate enthusiasts will adore these compact, intensely satisfying confections.
Prepare to impress everyone with these elegant, easy-to-make sweet bites that scream gourmet without complicated techniques.
Why Brownie Truffles Are So Decadent
Ingredients for Brownie Truffles
For the Base:For the Coating and Binding:For the Optional Extras:For the Preparation:How to Make Brownie Truffles
Step 1: Whip Up Delectable Brownies
Follow the package instructions to bake brownies. Allow them to cool completely at room temperature.
Step 2: Crumble Brownie Goodness
Crush the cooled brownies into fine crumbs using your hands or a food processor. Break down any large chunks to create a smooth, consistent texture.
Step 3: Shape Delightful Brownie Balls
Grab small portions of the crumbled brownies and gently roll them into perfect bite-sized spheres. Place each truffle on a parchment-lined baking sheet.
Step 4: Melt Chocolate Coating
Use a microwave-safe bowl to melt chocolate chips. Heat in short 30-second bursts, stirring between each interval until the chocolate becomes silky smooth.
Step 5: Dunk and Coat Truffles
Carefully dip each brownie ball into the melted chocolate, ensuring complete and even coverage. Use a fork or dipping tool to help coat and remove excess chocolate.
Step 6: Decorate and Embellish
Return the chocolate-covered truffles to the parchment paper. Sprinkle with optional toppings like:Step 7: Let Truffles Set
Allow truffles to solidify at room temperature or speed up the process by placing them in the refrigerator.
Step 8: Store and Serve
Keep truffles in an airtight container. They’ll stay fresh for up to a week, ready to delight whenever a sweet craving hits.
Tips for Perfect Brownie Truffles
Flavor Variations for Brownie Truffles
Serving Ideas for Brownie Truffles
Storage Recommendations for Brownie Truffles
FAQs
Yes, homemade brownies work perfectly. Just ensure they are cooled and crumbled finely.
Milk, dark, or semi-sweet chocolate chips all work great. Choose your favorite flavor.
Make sure brownies are completely cool and packed tightly when forming balls. Chill them for 15 minutes before dipping to help them hold shape.
Absolutely! They’re bite-sized, delicious, and look impressive. Package them in cute boxes or bags for a wonderful homemade gift.
Print
Easy Brownie Truffles Recipe
- Total Time: 50 minutes
- Yield: 24 1x
Description
Chocolate-packed easy brownie truffles deliver rich, fudgy delight with minimal effort. Quick dessert bites combine classic brownie flavor and smooth chocolate coating for an irresistible sweet treat you’ll savor.
Ingredients
- 1 box brownie mix (prepared and cooled)
- 1 cup (240 ml) chocolate chips (melted, for coating)
- Optional toppings: crushed nuts
- Optional toppings: sprinkles
- Optional toppings: cocoa powder (for rolling)
Instructions
- Prepare brownies following package directions, allowing them to cool completely to room temperature.
- Pulverize the cooled brownies in a mixing bowl until achieving a fine, uniform crumb texture.
- Carefully form the crumbled brownies into compact, bite-sized spheres approximately 1 inch in diameter.
- Arrange the brownie balls on a parchment-lined baking sheet, ensuring they are evenly spaced.
- Melt chocolate chips in a microwave-safe bowl, heating in short 30-second bursts and stirring between intervals until completely smooth and glossy.
- Submerge each brownie ball into the melted chocolate, using a fork to ensure thorough and even coating.
- Gently tap the fork to remove excess chocolate, then return the coated truffles to the parchment-lined sheet.
- Optionally sprinkle decorative toppings like crushed nuts, sprinkles, or cocoa powder over the wet chocolate coating.
- Allow truffles to set at room temperature for approximately 30 minutes, or expedite the process by refrigerating for 15 minutes.
- Transfer the completed truffles to an airtight container, where they can be stored for up to one week in a cool environment.
Notes
- Ensure brownies are completely cooled to prevent chocolate coating from melting and maintain truffle structure.
- Use a cookie scoop for uniform-sized truffles, creating consistent and professional-looking results.
- For gluten-free version, select gluten-free brownie mix or use almond flour-based brownie recipe.
- Try different chocolate coatings like white chocolate, dark chocolate, or milk chocolate for varied flavor profiles.
- Prep Time: 20 minutes
- Cook Time: 30 minutes
- Category: Desserts, Snacks
- Method: Baking
- Cuisine: American
Nutrition
- Serving Size: 24
- Calories: 120 kcal
- Sugar: 12 g
- Sodium: 70 mg
- Fat: 6 g
- Saturated Fat: 3.5 g
- Unsaturated Fat: 2 g
- Trans Fat: 0 g
- Carbohydrates: 17 g
- Fiber: 1 g
- Protein: 1.5 g
- Cholesterol: 15 mg
Maya Thompson
Culinary Content Creator & Nutrition Enthusiast
Expertise
Healthy single-serving recipes, Meal prepping for individuals, Integrating nutrition into everyday cooking, Vegetarian and plant-based cuisine
Education
The Chef’s Academy at Harrison College
Associate of Applied Science in Culinary Arts
Focus: Nutrition, meal planning, and culinary techniques for healthy living.
Maya found her passion in the kitchen by mixing good food with good energy. After earning her culinary degree at The Chef’s Academy at Harrison College, she made it her mission to keep cooking simple, wholesome, and packed with flavor.
At Steelhead Diner, Maya shares easy, healthy recipes built for real life. For Maya, great food seems like a celebration of everyday moments, made better one fresh bite at a time.