
Fluffy Homemade Marshmallow Easter Eggs Recipe for Spring Joy
Sweet anticipation builds as these delightful marshmallow Easter eggs capture the essence of springtime indulgence.
Crafting homemade marshmallow Easter eggs brings pure joy to any kitchen celebration.
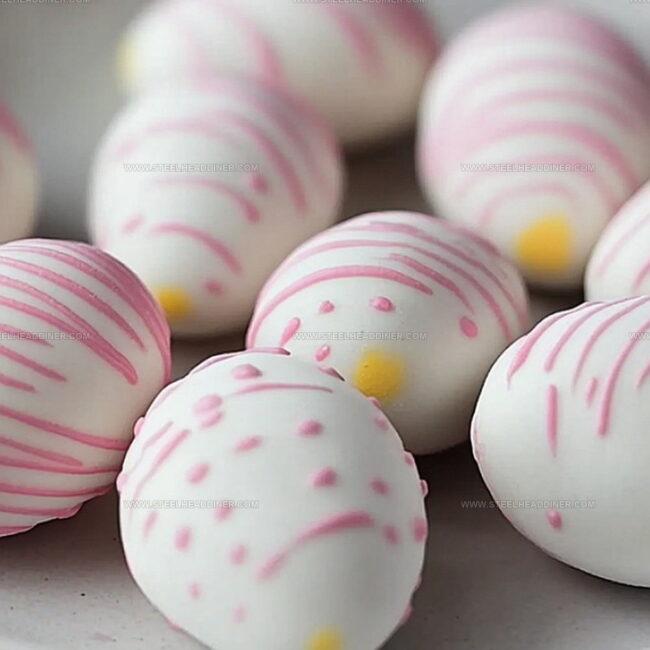
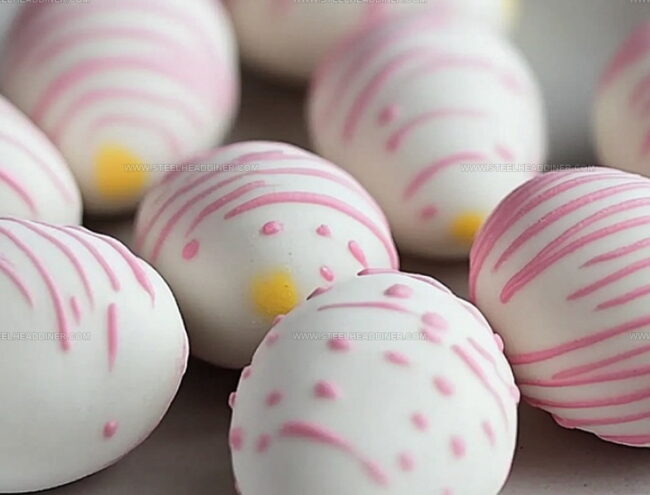
Soft, pillowy marshmallow centers nestled in rich chocolate create a delectable treat that delights both children and adults.
Each bite promises a burst of creamy sweetness wrapped in smooth chocolate coating.
The recipe transforms simple ingredients into an irresistible confection that sparkles with seasonal charm.
No store-bought candy compares to the love baked into these handcrafted Easter delights.
Gather your ingredients and let the magic of homemade marshmallow eggs begin.
Sweet Appeal of Marshmallow Easter Eggs
Ingredients Required for Marshmallow Easter Eggs
Main Ingredients:Liquid Ingredients:Coating and Decoration:Optional Decorations:Additional Ingredients:Instructions for Making Marshmallow Easter Eggs
Step 1: Create Sugary Egg Impressions
Line a baking sheet with parchment paper. Generously dust the surface with powdered sugar.
Use the back of a spoon to gently press shallow egg-shaped indentations into the sugar, creating perfect molds for your marshmallow treats.
Step 2: Prepare Marshmallow Base
Ingredients:Sprinkle gelatin over cold water and let it bloom for 5 minutes.
In a saucepan, combine sugar, corn syrup, water, and salt. Heat the mixture over medium flame, stirring occasionally.
Watch for the syrup to reach 240°F on a candy thermometer. Remove from heat and slowly pour the hot syrup into the gelatin mixture.
Beat with an electric mixer, starting low and increasing to high speed. Continue whipping for 8-10 minutes until the mixture becomes thick and fluffy.
Fold in vanilla extract for a delightful flavor.
Step 3: Mold Marshmallow Eggs
Carefully spoon the fluffy marshmallow mixture into the sugar-dusted egg-shaped impressions.
Allow the eggs to rest at room temperature for 4-6 hours, letting them firm up naturally.
Step 4: Chocolate Dipping Extravaganza
Ingredients:Melt chocolate in a microwave-safe bowl, using 30-second intervals and stirring between each.
Add a touch of coconut oil if you want a smoother chocolate coating. Gently remove the marshmallow eggs from the sugar mold, brushing off any excess sugar.
Using a fork, dip each egg into the melted chocolate, allowing excess to drip away. Place the chocolate-covered eggs on a parchment-lined tray.
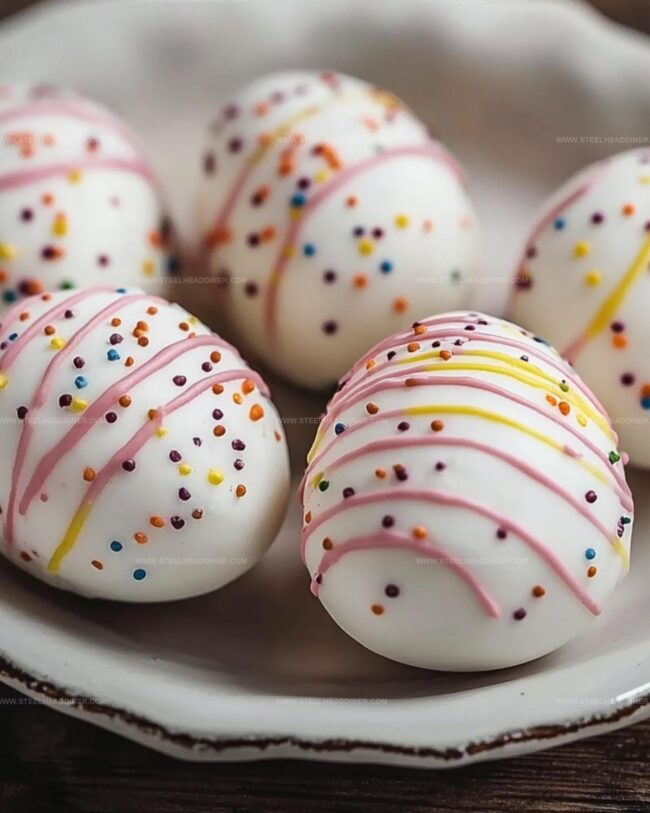
Get creative with decorations – sprinkle with colorful toppings, crushed nuts, or drizzle with white chocolate.
Step 5: Final Set and Indulge
Let the chocolate-covered marshmallow eggs sit at room temperature or pop them in the refrigerator for 15-20 minutes.
Once the chocolate hardens, your homemade Easter treats are ready to delight and impress!
Tips for Making Marshmallow Easter Eggs
Creative Twists for Marshmallow Easter Eggs
Perfect Pairings with Marshmallow Easter Eggs
Storage Guidelines for Marshmallow Easter Eggs
FAQs
Dust your spoon and spatula with powdered sugar before handling the marshmallow mixture to prevent sticking.
Yes, you can substitute vanilla with almond, peppermint, or other flavor extracts to customize the taste of your marshmallow eggs.
Melt chocolate slowly in short intervals and add a small amount of coconut oil to create a smoother, more even chocolate coating.
The mixture is ready when it becomes thick, fluffy, and holds its shape, which typically takes 8-10 minutes of high-speed beating.
Print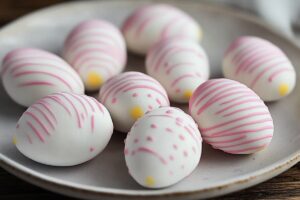
Marshmallow Easter Eggs Recipe
- Total Time: 30 minutes
- Yield: 24 1x
Description
Sweet chocolate-coated marshmallow Easter eggs bring springtime magic to dessert tables. Homemade confections deliver delightful nostalgia, inviting families to craft memorable treats together during holiday celebrations.
Ingredients
Main Ingredients:
- 2.5 tablespoons (3 packets) unflavored gelatin
- 1 cup granulated sugar
- 1/2 cup light corn syrup
Liquid Ingredients:
- 1/2 cup cold water
- 1/4 cup water
Flavor and Seasoning:
- 1/8 teaspoon salt
- 1 teaspoon vanilla extract (or almond extract)
Instructions
- Prepare a parchment-lined baking sheet and generously dust with powdered sugar, creating delicate egg-shaped impressions using the back of a spoon to guide the marshmallow formation.
- Sprinkle gelatin over cold water and allow to bloom for 5 minutes, creating a smooth base for the marshmallow mixture.
- In a saucepan, combine sugar, corn syrup, water, and salt, heating to a rolling boil over medium heat until the temperature reaches precisely 240F on a candy thermometer.
- Remove syrup from heat and gradually stream into the gelatin mixture, using an electric mixer on low speed to incorporate, then increase to high and whip for 8-10 minutes until the mixture transforms into a voluminous, glossy marshmallow cream.
- Fold in vanilla extract, ensuring even distribution throughout the fluffy mixture.
- Carefully spoon the marshmallow mixture into the powdered sugar egg-shaped indentations, allowing the confection to rest and set at room temperature for 4-6 hours until firm and stable.
- Melt chocolate in 30-second microwave intervals, stirring between each to prevent burning, and add coconut oil if needed for a silky consistency.
- Gently extract marshmallow eggs from the sugar mold, brushing away excess powdery coating.
- Using a fork, delicately dip each marshmallow egg into melted chocolate, allowing excess to drip off, then place on a parchment-lined tray.
- Embellish with sprinkles, crushed nuts, or a drizzle of white chocolate for a festive touch.
- Allow chocolate coating to set at room temperature or expedite the process by refrigerating for 15-20 minutes until chocolate hardens completely.
Notes
- Choose powdered sugar with a fine texture to create smoother egg-shaped indentations and prevent sticking.
- Ensure gelatin blooms completely in cold water before adding hot syrup for optimal marshmallow structure.
- Use a candy thermometer for precise temperature control when heating sugar syrup to prevent burning or undercooking.
- Work quickly when shaping marshmallow eggs, as the mixture sets fast and becomes difficult to mold.
- Opt for high-quality chocolate with at least 60% cocoa content for richer flavor and better coating.
- Create dairy-free version by using coconut oil instead of butter and vegan chocolate alternatives.
- Add natural food coloring to marshmallow mixture for pastel-colored Easter eggs.
- Prep Time: 20 minutes
- Cook Time: 10 minutes
- Category: Desserts, Snacks
- Method: Boiling
- Cuisine: American
Nutrition
- Serving Size: 24
- Calories: 61 kcal
- Sugar: 15 g
- Sodium: 5 mg
- Fat: 0 g
- Saturated Fat: 0 g
- Unsaturated Fat: 0 g
- Trans Fat: 0 g
- Carbohydrates: 15.2 g
- Fiber: 0 g
- Protein: 1.3 g
- Cholesterol: 0 mg
Maya Thompson
Culinary Content Creator & Nutrition Enthusiast
Expertise
Healthy single-serving recipes, Meal prepping for individuals, Integrating nutrition into everyday cooking, Vegetarian and plant-based cuisine
Education
The Chef’s Academy at Harrison College
Associate of Applied Science in Culinary Arts
Focus: Nutrition, meal planning, and culinary techniques for healthy living.
Maya found her passion in the kitchen by mixing good food with good energy. After earning her culinary degree at The Chef’s Academy at Harrison College, she made it her mission to keep cooking simple, wholesome, and packed with flavor.
At Steelhead Diner, Maya shares easy, healthy recipes built for real life. For Maya, great food seems like a celebration of everyday moments, made better one fresh bite at a time.