
Easy No-bake Peanut Butter Buckeye Bars Recipe for Sweet Lovers
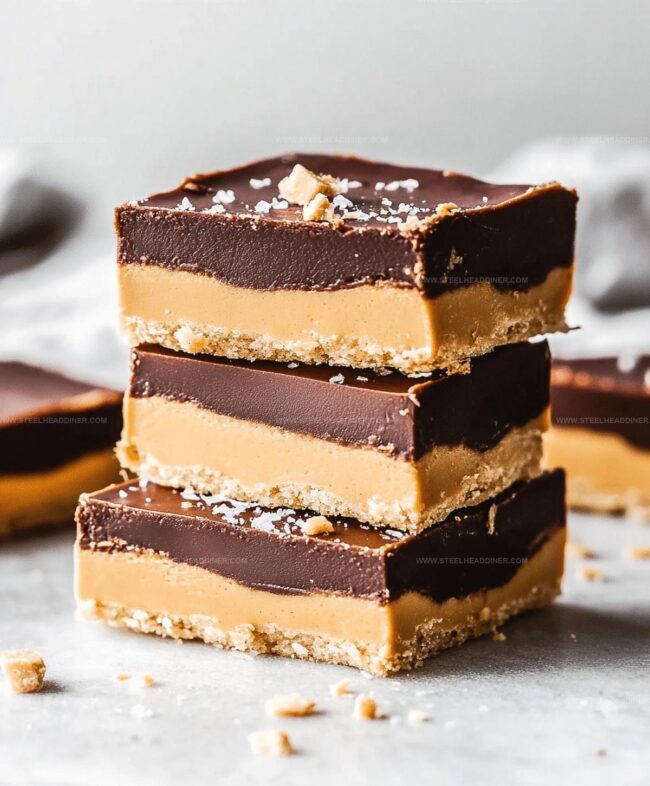
Creamy peanut butter buckeye bars offer a decadent twist on classic chocolate-peanut treats that melt in your mouth.
Sweet memories flood back with each rich bite of this no-fuss dessert.
Chocolate and peanut butter create an irresistible combination that appeals to everyone’s inner child.
Dense layers of smooth peanut butter filling coated in rich chocolate make these bars impossible to resist.
Minimal kitchen skills are required to craft this indulgent confection that looks like you spent hours preparing.
Ohio natives might recognize these bars as a nod to their beloved state’s signature candy.
Ready to wow guests with minimal effort and maximum flavor?
You’ll be the star of any gathering when you serve these addictive no-bake delights.
Why No-Bake Peanut Butter Buckeye Bars Impress
Essential Ingredients for Peanut Butter Buckeye Bars
For the Base and Structure:For the Sweeteners:For the Chocolate Topping:How to Make Peanut Butter Buckeye Bars

Step 1: Create Delectable Peanut Butter Base
Grab a large mixing bowl and combine creamy peanut butter, melted butter, powdered sugar, and crushed graham crackers. Stir all ingredients until they form a smooth, uniform mixture that’s easy to spread and holds together perfectly.
Step 2: Build the Foundation
Transfer the peanut butter mixture into a parchment-lined 9×9-inch baking pan. Use your hands or a spatula to press and distribute the mixture evenly across the bottom, creating a solid and compact layer.
Step 3: Craft Chocolate Drizzle
Place chocolate chips and coconut oil in a microwave-safe bowl. Heat in short 15-20 second bursts, stirring between each interval until the chocolate transforms into a silky, glossy liquid with no lumps.
Step 4: Pour Chocolate Blanket
Gently pour the melted chocolate over the peanut butter base. Use a spatula to spread the chocolate in an even, consistent layer that completely covers the peanut butter foundation.
Step 5: Chill and Solidify
Place the pan in the refrigerator for 1-2 hours. The bars will become firm and develop a satisfying snap when you break or cut them.
Step 6: Slice and Indulge
Remove the pan from the refrigerator. Lift the parchment paper to release the entire dessert.
Cut into perfect square pieces and savor the rich, decadent flavors of your homemade buckeye bars.
Expert Tips for Perfect Buckeye Bars

Creative Twists on Peanut Butter Buckeye Bars
Delicious Ways to Serve Buckeye Bars
Best Methods to Store Buckeye Bars
FAQs
Yes, they share the same classic peanut butter and chocolate combination, but Buckeye Bars are easier to make and serve as a slice-able dessert instead of individual candies.
Natural peanut butter works, but it might make the mixture slightly less stable. Creamy, processed peanut butter provides the best texture and consistency for these bars.
When stored in an airtight container in the refrigerator, these bars will stay fresh for up to 7-10 days. Just make sure to keep them chilled to maintain their texture.
Print
No-bake Peanut Butter Buckeye Bars Recipe
- Total Time: 2 hours 15 minutes
- Yield: 12 1x
Description
Scrumptious no-bake peanut butter buckeye bars deliver classic Midwestern dessert magic with chocolate and creamy peanut butter layers. Sweet chocolate and rich peanut butter combine into an irresistible treat you cannot resist.
Ingredients
- 1 1/2 cups (360 ml) chocolate chips
- 1 cup (240 ml) creamy peanut butter
- 1/2 cup (120 ml) unsalted butter, melted
- 2 cups (480 ml) powdered sugar
- 1 1/2 cups (360 ml) graham cracker crumbs
- 1 tablespoon (15 ml) coconut oil or vegetable oil (optional, for melting chocolate)
Instructions
- Prepare a 9×9-inch pan by lining it with parchment paper, ensuring complete coverage for easy removal.
- In a large mixing bowl, thoroughly blend peanut butter, melted butter, powdered sugar, and graham cracker crumbs until achieving a uniform, silky consistency.
- Transfer the mixture into the prepared pan, using a spatula or clean hands to create an even, compact layer across the bottom.
- Create the chocolate topping by microwaving chocolate chips with coconut oil in short 15-second intervals, stirring between each interval until completely smooth and glossy.
- Carefully pour the melted chocolate over the peanut butter base, using a spatula to distribute evenly and create a uniform chocolate layer.
- Place the pan in the refrigerator for 1-2 hours, allowing the bars to firm up completely and develop a crisp texture.
- Once fully chilled and set, lift the parchment paper to remove the entire slab from the pan.
- Using a sharp knife, slice into precise squares, wiping the blade clean between cuts for neat edges.
- Serve chilled and store any remaining bars in an airtight container in the refrigerator for up to one week.
Notes
- Use fine graham cracker crumbs for a smoother, more uniform peanut butter layer that holds together perfectly.
- Stir chocolate gently and avoid overheating to prevent seizing, which can make the chocolate grainy and unappetizing.
- Swap traditional ingredients with gluten-free graham crackers and dairy-free chocolate chips to accommodate various dietary needs.
- Keep bars refrigerated in an airtight container for up to a week, allowing the flavors to meld and texture to remain ideal.
- Prep Time: 15 minutes
- Cook Time: 2 hours
- Category: Desserts, Snacks
- Method: Blending
- Cuisine: American
Nutrition
- Serving Size: 12
- Calories: 320
- Sugar: 20 g
- Sodium: 110 mg
- Fat: 24 g
- Saturated Fat: 8 g
- Unsaturated Fat: 14 g
- Trans Fat: 0.2 g
- Carbohydrates: 25 g
- Fiber: 2 g
- Protein: 7 g
- Cholesterol: 15 mg
Maya Thompson
Culinary Content Creator & Nutrition Enthusiast
Expertise
Healthy single-serving recipes, Meal prepping for individuals, Integrating nutrition into everyday cooking, Vegetarian and plant-based cuisine
Education
The Chef’s Academy at Harrison College
Associate of Applied Science in Culinary Arts
Focus: Nutrition, meal planning, and culinary techniques for healthy living.
Maya found her passion in the kitchen by mixing good food with good energy. After earning her culinary degree at The Chef’s Academy at Harrison College, she made it her mission to keep cooking simple, wholesome, and packed with flavor.
At Steelhead Diner, Maya shares easy, healthy recipes built for real life. For Maya, great food seems like a celebration of everyday moments, made better one fresh bite at a time.