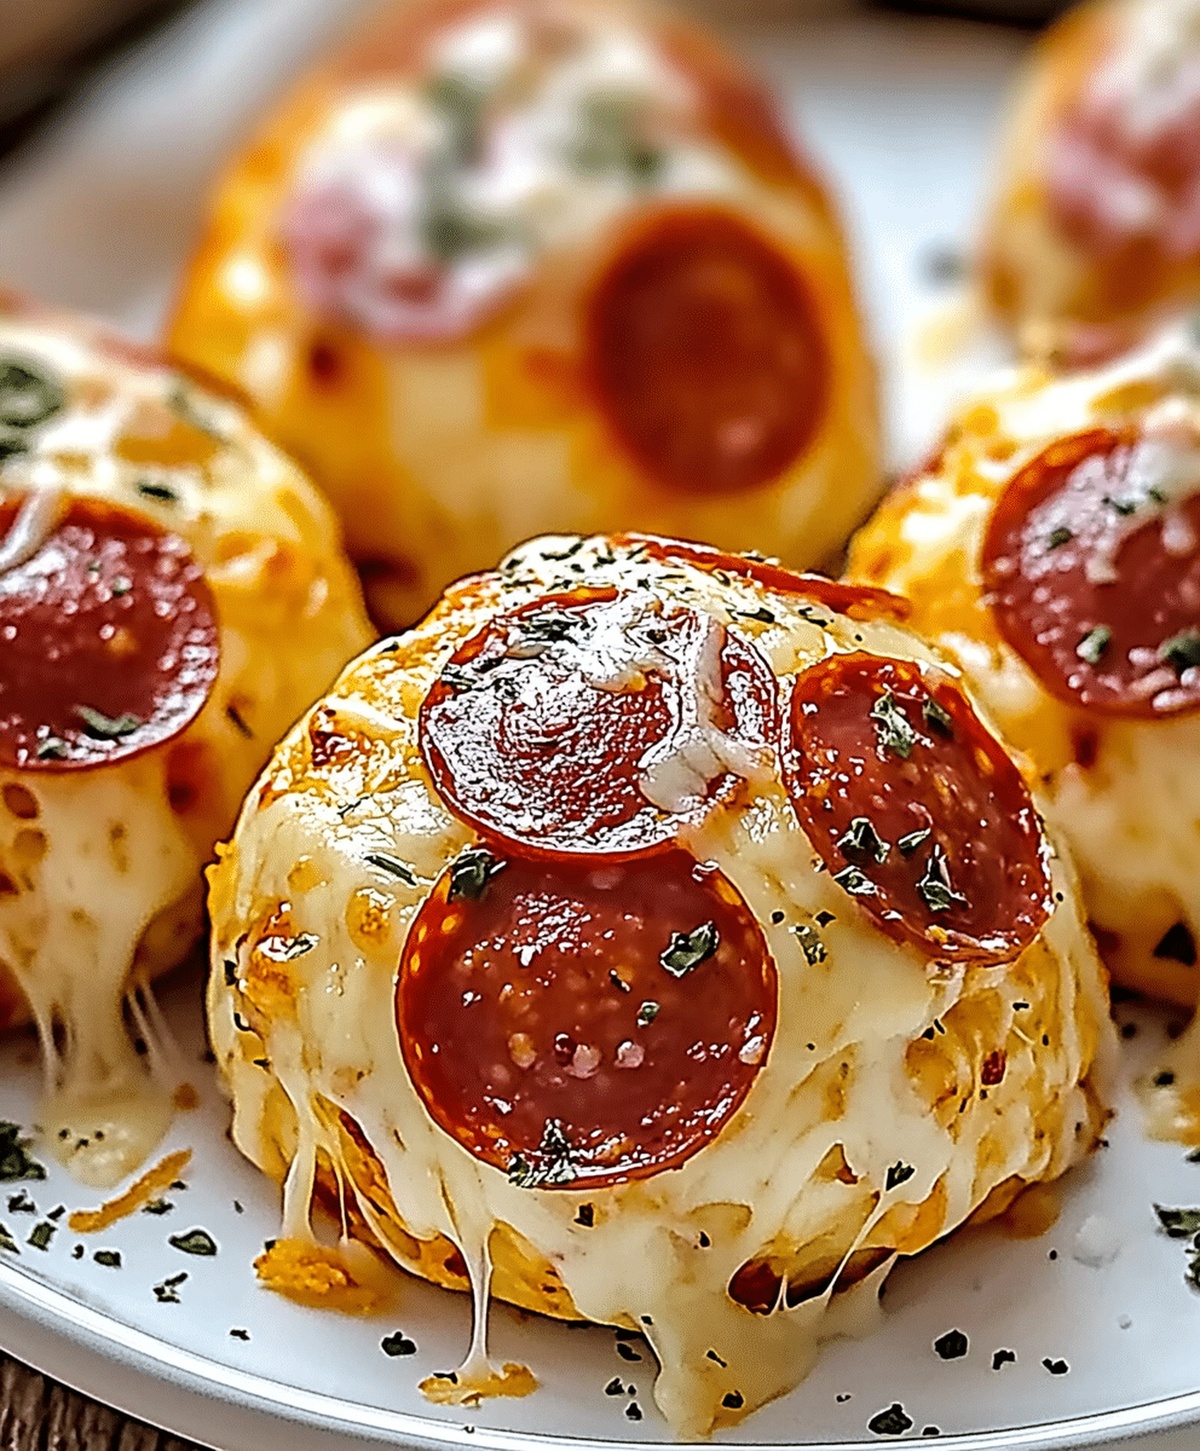
The Best Pepperoni Pizza Bombs Recipe: Cheesy Pockets of Joy
Crispy, golden pepperoni pizza bombs burst with cheesy excitement that’ll make your taste buds dance.
Melted mozzarella hides inside these irresistible bite-sized treats.
Small pockets of savory goodness await you at every turn.
Pillowy dough wraps around spicy pepperoni chunks like a warm embrace.
Simple ingredients come together in minutes for a seriously addictive snack.
Comfort food meets party appetizer in this crowd-pleasing recipe.
You’ll want to double the batch because these vanish faster than you can say “delicious”!
What Makes Pepperoni Pizza Bombs Special

What Goes in Pepperoni Pizza Bombs
For the Dough:For the Protein and Cheese:For the Seasoning and Topping:For the Serving:How to Make Pizza Bombs Easily

Step 1: Warm Up The Oven
Crank the oven to 375F (190C) and line a baking sheet with parchment paper to create the perfect cooking surface.
Step 2: Prepare The Dough Pockets
Take each biscuit and gently press it flat.
Place your tasty fillings in the center:Step 3: Create Pizza Bombs
Carefully fold the dough over the delicious filling, pinching the edges tightly to seal. Roll the dough into a perfect round ball, ensuring no filling escapes.
Step 4: Position On Baking Sheet
Arrange the pizza bombs with the sealed side facing down on the prepared baking sheet, giving each bomb enough space to expand.
Step 5: Craft Flavor-Packed Topping
Combine melted butter with:Generously brush this magical mixture over each pizza bomb to create a mouthwatering golden exterior.
Step 6: Add Cheesy Finish
Sprinkle Parmesan cheese over the top of each bomb, creating a crispy, cheesy crust.
Step 7: Bake To Perfection
Slide the baking sheet into the oven and bake for 12-15 minutes.
Watch for a beautiful golden-brown color that signals they’re ready.
Step 8: Serve And Enjoy
Pull out the pizza bombs and let them cool slightly.
Serve with a side of marinara sauce for dipping, creating an irresistible appetizer or snack that will disappear in minutes.
Helpful Notes for Pizza Bombs
Creative Spins for Pepperoni Pizza Bombs
Great Ways to Present Pizza Bombs
How to Keep Pizza Bombs Fresh
FAQs
Yes, you can substitute homemade biscuit dough, but ensure it’s rolled thin and has similar consistency to canned biscuit dough for best results.
You can prepare the pizza bombs and refrigerate them uncooked for up to 4 hours before baking. Just brush with seasoned butter and sprinkle Parmesan right before baking.
Use thin-sliced pepperoni that’s not too thick, which helps it melt and distribute evenly inside the pizza bombs. Stick with classic or mild pepperoni for the most traditional flavor.
Print
Pepperoni Pizza Bombs Recipe
- Total Time: 30 minutes
- Yield: 10 1x
Description
Homemade pepperoni pizza bombs combine cheesy goodness with crispy exterior in a handheld Italian-inspired snack. Simple ingredients and quick preparation make these appetizers perfect for gatherings and casual meals you can easily enjoy.
Ingredients
- 1 cup shredded mozzarella cheese
- 20 pepperoni slices
- 1 can refrigerated biscuit dough
- 1/4 cup grated Parmesan cheese
- 2 tablespoons butter, melted
- 1/2 teaspoon garlic powder
- 1/2 teaspoon Italian seasoning
Instructions
- Prepare a baking sheet with parchment paper and heat the oven to 375°F (190°C).
- Gently press each biscuit into a flat circular shape, creating a wider surface area.
- Position two pepperoni slices in the center of each flattened biscuit, then add a dollop of fresh mozzarella on top.
- Carefully encase the filling by pulling the edges of the dough over the pepperoni and cheese, ensuring a tight seal.
- Smoothly roll each filled pocket into a compact spherical shape, concealing the ingredients completely.
- Arrange the pizza bombs with the sealed side facing downward on the prepared baking sheet.
- Create a savory coating by blending melted butter with aromatic garlic powder and Italian seasoning.
- Generously brush the herbed butter mixture over each pizza bomb, ensuring complete coverage.
- Sprinkle a layer of grated Parmesan cheese across the surface of each bomb.
- Bake for 12-15 minutes until the exterior transforms into a gorgeous golden-brown color.
- Remove from the oven and let cool briefly before serving alongside warm marinara sauce for dipping.
Notes
- Seal edges tightly to prevent cheese from leaking during baking, ensuring a perfect golden-brown exterior with gooey cheese inside.
- Use room temperature ingredients like cheese and biscuit dough for easier handling and more even cooking.
- For a lighter version, swap regular biscuits with low-fat or whole wheat options and use part-skim mozzarella to reduce calories.
- Try different fillings like ham and Swiss, or vegetarian options with bell peppers and spinach to create exciting variations of these pizza bombs.
- Prep Time: 15 minutes
- Cook Time: 15 minutes
- Category: Lunch, Dinner, Appetizer, Snacks
- Method: Baking
- Cuisine: Italian
Nutrition
- Serving Size: 10
- Calories: 224 kcal
- Sugar: 1 g
- Sodium: 420 mg
- Fat: 14 g
- Saturated Fat: 7 g
- Unsaturated Fat: 6 g
- Trans Fat: 0.3 g
- Carbohydrates: 15 g
- Fiber: 1 g
- Protein: 10 g
- Cholesterol: 35 mg
Maya Thompson
Culinary Content Creator & Nutrition Enthusiast
Expertise
Healthy single-serving recipes, Meal prepping for individuals, Integrating nutrition into everyday cooking, Vegetarian and plant-based cuisine
Education
The Chef’s Academy at Harrison College
Associate of Applied Science in Culinary Arts
Focus: Nutrition, meal planning, and culinary techniques for healthy living.
Maya found her passion in the kitchen by mixing good food with good energy. After earning her culinary degree at The Chef’s Academy at Harrison College, she made it her mission to keep cooking simple, wholesome, and packed with flavor.
At Steelhead Diner, Maya shares easy, healthy recipes built for real life. For Maya, great food seems like a celebration of everyday moments, made better one fresh bite at a time.